Plumber Las Vegas News

Your trusted source for plumbing updates, DIY fixes, and industry insights in Las Vegas. Stay informed with practical tips, local trends, and expert advice for homeowners and professionals alike.

Pipe Insulation Strategies: Saving Money and Preventing Damage Year-Round

Introduction: Why Pipe Insulation Is a Must for Every Homeowner

When most homeowners think of plumbing, their minds jump to leaky faucets, clogged drains, or the occasional burst pipe during deep winter freezes. Yet, one of the most overlooked—and cost-effective—ways to protect your home’s plumbing system is by investing in quality pipe insulation. Far from being a seasonal fix, proper insulation delivers year-round benefits: it reduces energy costs, prevents frozen pipes, controls condensation, and even extends the lifespan of your plumbing. Whether you’re a DIY enthusiast or simply want to make informed decisions when hiring a pro, understanding the essentials of pipe insulation can save you significant money and headaches down the line. This guide will walk you through the science behind pipe insulation, material options, step-by-step installation for various pipe types, maintenance tips, and advanced strategies tailored to your home’s unique needs. By the end, you’ll know exactly how to implement or upgrade insulation—whether you’re prepping for harsh winters, hot summers, or just want to maximize efficiency all year long.

The Science Behind Pipe Insulation: How It Works

Thermal Transfer and Heat Loss Explained

Pipes carry water at temperatures that often differ from the surrounding air. Without insulation, heat moves from hot water pipes to cold ambient air (or vice versa), causing energy loss and increased utility bills. In cold climates, this can lead to freezing, while in humid areas, condensation can cause corrosion and rot. Insulation acts as a barrier, reducing the flow of heat or cold between the pipe and its environment.

Condensation and Moisture Control

When warm, humid air contacts cold pipes, condensation forms. Over time, this moisture can drip onto wooden joists, drywall, or insulation materials, leading to mold, mildew, and structural damage. Pipe insulation not only keeps water inside pipes at the desired temperature but also prevents the formation of damaging condensation.

Types of Pipe Insulation: Materials, Pros, and Cons

  • Foam Tubing (Polyethylene or Rubber): Affordable, easy to install, and widely available. Best for indoor pipes. Look for pre-slit versions for quick DIY jobs.
  • Fiberglass Wrap: Superior for high-temperature pipes (e.g., near boilers or water heaters). Often comes with a vapor barrier to prevent moisture ingress.
  • Foil-Backed Insulation: Offers both thermal resistance and a moisture barrier. Ideal for pipes in unconditioned spaces like attics or crawl spaces.
  • Spray Foam: Used for hard-to-reach spots, elbows, or junctions. Provides custom coverage but is more expensive and requires careful application.
  • Rubber Insulation (EPDM): Flexible, durable, and resistant to UV and ozone. Excellent for outdoor or exposed piping.

Choosing the Right Material for Your Application

The best insulation depends on pipe material (copper, PVC, PEX), location (indoor/outdoor), temperature range, and exposure to moisture or sunlight. For example, foam tubing is perfect for basement hot water lines, while EPDM rubber is better for outdoor applications.

Where Pipe Insulation Matters Most: Prioritizing Your Efforts

  • Exterior Walls: Pipes running through poorly insulated exterior walls are at high risk of freezing and should be insulated first.
  • Unheated Basements and Crawl Spaces: These are common trouble spots, especially in older homes.
  • Attics and Garages: Even brief cold snaps can freeze pipes in these unconditioned spaces.
  • Near the Water Heater or Boiler: Insulating hot water pipes reduces heat loss and can deliver hot water faster, saving energy and money.
  • Outdoor Pipes and Spigots: Protection here is crucial to prevent bursts and leaks.

Step-by-Step Pipe Insulation Installation

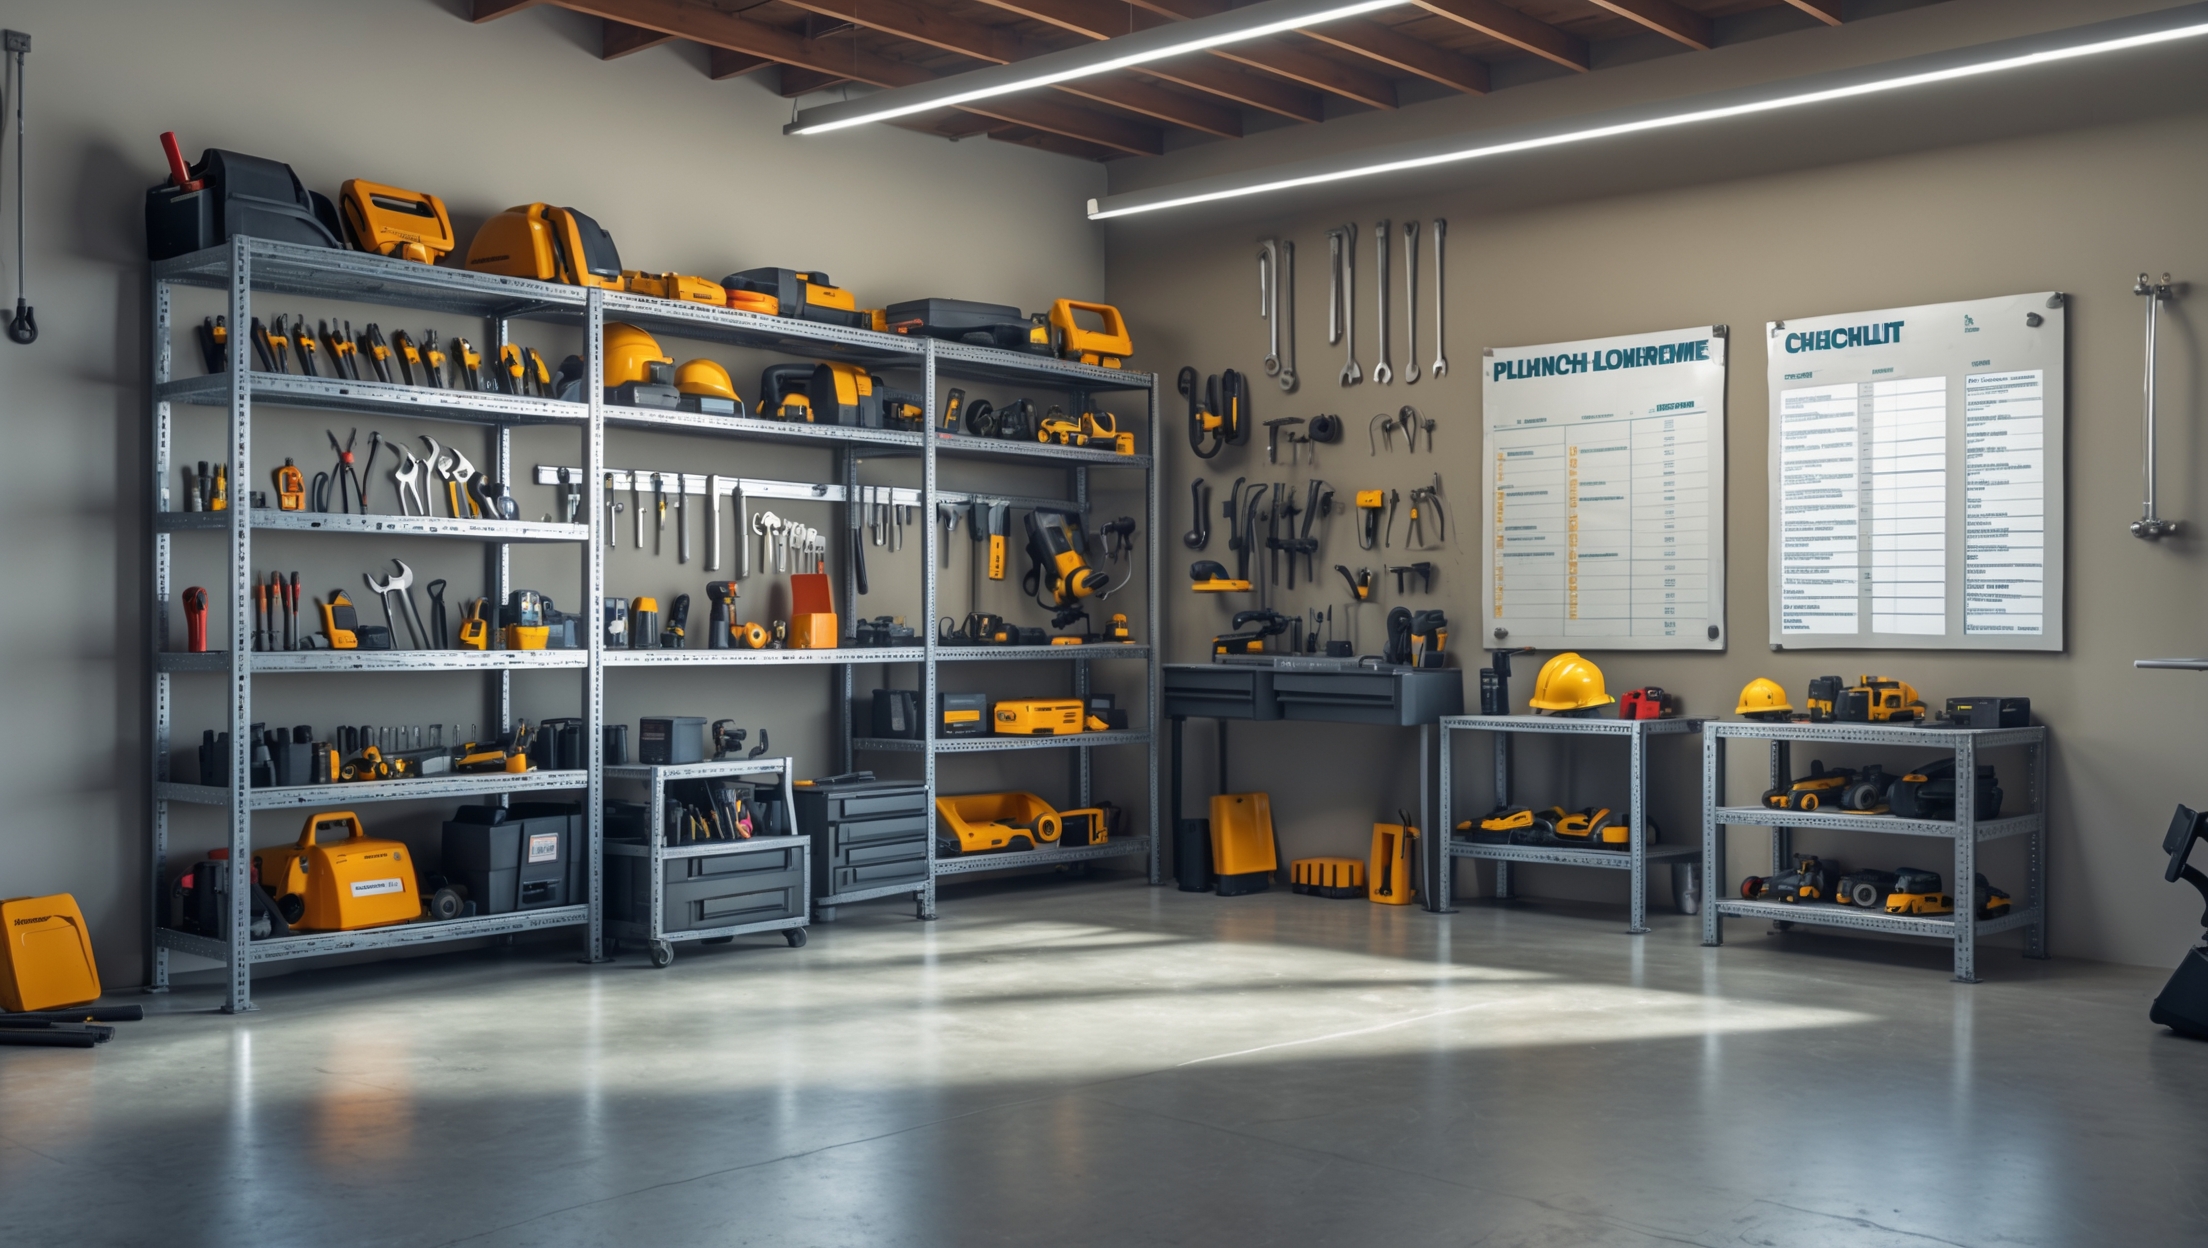
Tools and Materials Checklist

  • Pre-slit foam or rubber pipe insulation (sized to your pipes)
  • Utility knife or scissors
  • Measuring tape
  • Duct tape or specialized insulation tape
  • Cable ties (optional, for extra security)
  • Gloves and dust mask (for fiberglass insulation)

Preparation: Measuring and Cleaning

Start by measuring the length and diameter of every pipe you plan to insulate. Clean the pipes to remove dust, oil, or debris, which can interfere with adhesion and fit.

Cutting and Fitting Insulation

Cut insulation to length with a utility knife. For elbows and T-joints, use angled cuts to ensure full coverage. Slide pre-slit tubes over the pipe, ensuring a snug fit. For wrap or tape-style insulation, spiral it tightly around the pipe, overlapping each layer by at least half an inch.

Sealing Joints and Gaps

Secure seams with insulation tape or duct tape. Pay special attention to corners, valves, and connections. Any exposed pipe can become a weak point in your system.

Special Cases: Outdoor and Underground Pipes

  • For exterior pipes, use weather-resistant insulation and waterproof tape. Consider adding a plastic or metal covering for extra protection from the elements.
  • Underground pipes should be insulated with closed-cell foam and covered with a moisture barrier before burial.

Advanced Insulation Strategies for Maximum Protection

Double-Layering in Extreme Climates

In regions with severe winters, double up on insulation or combine materials (e.g., foam tubing plus fiberglass wrap). This layered approach can dramatically reduce the risk of freezing.

Heat Tape and Cable Integration

For pipes that are especially vulnerable, apply UL-rated heat tape or cable directly to the pipe before insulating. This ensures continuous warmth during sub-zero temperatures, but always follow manufacturer instructions for safe use.

Vapor Barriers and Moisture Control

Especially in humid climates or near cold-water lines, use insulation with built-in vapor barriers to prevent condensation from dripping onto other surfaces.

Common Mistakes to Avoid

  • Gaps at Joints or Valves: Even small exposed spots can allow freezing or condensation. Seal every seam meticulously.
  • Incorrect Sizing: Insulation that’s too loose won’t be effective; too tight, and it may compress or split over time.
  • Using the Wrong Material: Don’t use indoor-only insulation outdoors, where UV and rain will quickly degrade it.
  • Neglecting Regular Checks: Insulation can shift, compress, or degrade; always re-inspect at least once a year.

Maintenance: Keeping Your Insulation Effective Year After Year

Seasonal Inspection Checklist

  • Check for signs of wear, moisture, or damage in late summer and early winter.
  • Look for displaced insulation, especially after plumbing repairs or renovations.
  • Inspect outdoor insulation for cracking or UV damage each spring.
  • Replace or repair any compromised sections immediately.

Cleaning and Rodent Prevention

Dust and debris can settle on exposed insulation, especially in basements or crawl spaces. Gently wipe with a dry cloth or vacuum with a soft brush attachment. In areas prone to rodents, consider wrapping insulation with metal mesh to prevent chewing.

Pipe Insulation and Energy Savings: What the Numbers Say

Energy Efficiency Benefits

The U.S. Department of Energy estimates that insulating hot water pipes can reduce heat loss by up to 80%, resulting in water temperatures that are 2–4°F higher compared to uninsulated pipes. This means you can lower your water heater setting and still enjoy hot showers—reducing your energy bills by 3–5% annually.

Preventing Costly Repairs

The average burst pipe repair costs between $500 and $2,000—not including water damage restoration. A weekend spent insulating pipes is a tiny investment compared to the expense of emergency plumbing calls and home repairs.

Frequently Asked Questions About Pipe Insulation

  • Do I need to insulate both hot and cold water pipes?
    Yes. Hot water pipes benefit from reduced heat loss, while cold water pipes are protected from condensation and freezing.
  • Can I insulate pipes myself, or should I hire a professional?
    Most homeowners can handle basic installations. For complex systems or hard-to-reach pipes, a professional can ensure optimal coverage.
  • How long does pipe insulation last?
    Quality insulation can last 10–20 years indoors. Outdoor insulation may need replacement sooner, especially if exposed to direct sunlight or harsh weather.

Conclusion: Investing in Pipe Insulation Pays Off

Pipe insulation doesn’t just prevent winter disasters—it’s a smart, year-round investment that pays dividends in comfort, efficiency, and peace of mind. By understanding the science behind insulation, choosing the right materials, and following expert installation and maintenance practices, homeowners can safeguard their plumbing systems against freezing, condensation, and energy loss. The upfront cost of materials and a few hours of DIY labor pale in comparison to the expenses—and stress—of emergency plumbing repairs or water damage. More importantly, well-insulated pipes make your home more energy-efficient, environmentally friendly, and comfortable for everyone inside.

Start by inspecting your home’s vulnerable spots: exterior walls, basements, attics, and any outdoor piping. Gather the right materials, take your time with installation, and schedule regular maintenance checks to catch problems early. Don’t hesitate to consult a professional for tricky areas or if you’re unsure about local code requirements. Remember, every foot of insulated pipe is an investment in your home’s resilience—and your wallet’s bottom line. Take action today, and you’ll enjoy the rewards of safer, more efficient plumbing for years to come.
126 comments
Patricia Sanchez

You talk about condensation causing mold and damage if pipes aren’t insulated. What are early warning signs that moisture is already becoming a problem around pipes, and what immediate steps should I take if I spot them?

    Mario The Plumber

    Early warning signs of moisture problems around pipes include visible water droplets, damp or discolored spots on nearby walls or ceilings, a musty smell, or peeling paint. If you notice these, dry the area thoroughly, improve ventilation, and inspect for leaks. Address any leaks promptly and consider applying pipe insulation to prevent further issues. If mold is present, clean small patches with a mold cleaner, but consult a professional for larger areas.

William Thompson

You mentioned different material options for pipe insulation in the article. Could you elaborate on how to choose between foam, fiberglass, or rubber insulation, especially if I’m dealing with both hot and cold water pipes in various parts of my house?

    Mario The Plumber

    Choosing between foam, fiberglass, or rubber pipe insulation depends on your specific needs. Foam is easy to install and works well for both hot and cold pipes, making it great for most indoor applications. Fiberglass handles higher temperatures and is often used on hot water pipes or near boilers; just make sure to use a vapor barrier for cold pipes to prevent condensation. Rubber insulation is flexible, resists heat loss, and does well in areas exposed to sunlight or varying temperatures. Consider the pipe temperature, location, and exposure to moisture when deciding which material to use.

Brian Jackson

What’s the best way to check if my existing pipe insulation is still effective? Is there a general rule for how often it should be replaced, or any tell-tale signs that it’s no longer protecting against heat loss or condensation?

    Mario The Plumber

    To check if your pipe insulation is still effective, look for signs of wear like cracks, gaps, dampness, or areas where the insulation has come loose. If you notice higher energy bills or pipes sweating with condensation, these are red flags. Generally, insulation should be inspected annually and replaced every 5–10 years, but immediate replacement is needed if you spot any damage or water intrusion.

Helen Sanchez

I’m getting ready to insulate some older copper pipes in my basement, but some areas are tough to access. Do you have any techniques or recommended products that make it easier to insulate pipes in cramped or awkward spaces without compromising effectiveness?

    Mario The Plumber

    For hard-to-reach copper pipes, consider using self-sealing foam pipe sleeves or split foam tubes, which can be wrapped around pipes without needing much clearance. For very tight spots, flexible pipe wrap insulation tape is helpful and can be spiraled around bends and fittings. Make sure to overlap the tape and seal any gaps for full coverage. These products are designed to maintain insulation effectiveness even in cramped areas.

Nancy Jackson

If a homeowner is mainly concerned with controlling condensation in a humid climate, is basic foam tubing enough, or should we consider vapor-barrier wraps too? Any tips to avoid moisture problems from the start?

    Mario The Plumber

    In humid climates, basic foam tubing can help, but it may not be enough on its own to control condensation. It’s best to use foam insulation that includes a built-in vapor barrier or to add a vapor-barrier wrap over the foam. Make sure all seams and joints are tightly sealed with tape to prevent moist air from reaching the pipe surface. Also, check for gaps or damage regularly to stop moisture problems before they start.

Betty Hernandez

How long does a typical DIY pipe insulation project take for an average-sized home, and are there specific maintenance checks you recommend throughout the year to make sure the insulation stays effective?

    Mario The Plumber

    For an average-sized home, a DIY pipe insulation project usually takes between 4 to 8 hours, depending on how many pipes you need to cover and your experience level. To keep the insulation effective, check it twice a year—once before winter and again in spring. Look for any gaps, moisture, or signs of wear, and replace damaged sections promptly to maintain good protection.

Linda Gonzalez

The article mentions that condensation on pipes can cause mold and structural damage. If I already see some condensation on my basement pipes, should I just insulate the pipes as they are, or do I need to address any existing moisture or mold first?

    Mario The Plumber

    It’s important to address any existing moisture or mold before adding insulation. Wipe down the pipes to remove condensation, and if you notice any mold, clean it using an appropriate cleaner or consult a professional if the problem seems extensive. Insulating over damp or moldy pipes can trap moisture and worsen the issue over time.

Jessica Jones

For a homeowner not comfortable with DIY projects, what should they look for when hiring a pro to upgrade their pipe insulation, and are there any red flags that might indicate a lack of experience or poor-quality work?

    Mario The Plumber

    When hiring a professional to upgrade your pipe insulation, ask about their experience with similar projects and request references or photos of past work. Make sure they use materials suited to your climate and plumbing. Red flags include reluctance to show credentials or insurance, vague estimates, or a lack of knowledge about local building codes and insulation types. Always get a written estimate before work begins.

Rachel Martinez

If some of my plumbing is hard to reach, like in tight crawl spaces, are there any advanced strategies or tools recommended for installing insulation in those tricky spots?

    Mario The Plumber

    For tight crawl spaces and hard-to-reach plumbing, consider using flexible foam pipe insulation that can be bent or squeezed into place. Pre-slit insulation tubes with adhesive strips can make installation easier. Specialty tools like telescoping grabbers or insulation push rods help you position and secure the material from a distance. In especially tricky spots, spray foam insulation can fill gaps around pipes, but use it cautiously to avoid over-application.

Betty Moore

You talked about step-by-step installation for different pipe types, but I live in an older house with oddly shaped and hard-to-reach plumbing. What’s the best strategy for insulating pipes in tight spaces or awkward corners?

    Mario The Plumber

    For tight spaces or awkward corners, use flexible insulation materials like foam tape or fiberglass wrap instead of rigid pipe sleeves. These can be cut to size and wrapped around oddly shaped pipes. For really hard-to-reach spots, consider using spray foam insulation, which expands to fill gaps. Always make sure pipes are dry before insulating to prevent trapping moisture.

Karen Rodriguez

I’m interested in saving on energy costs year-round like you described, but is insulating just the hot water pipes enough, or should I do the cold ones too? I don’t want to overspend if it won’t make much difference.

    Mario The Plumber

    Insulating hot water pipes does offer the most noticeable energy savings by reducing heat loss, but insulating cold water pipes has its own benefits as well. Cold pipe insulation helps prevent condensation and reduces the risk of freezing in colder months, which can avoid costly damage. If energy savings are your main goal, focus on hot water pipes. For added protection and to prevent moisture issues, consider insulating cold pipes in areas prone to condensation or freezing.

Jason Hernandez

How often should pipe insulation be checked or replaced, especially in homes that experience both really cold winters and hot, humid summers? I’d like to avoid any surprises or unexpected repairs down the line.

    Mario The Plumber

    It’s a good idea to inspect your pipe insulation at least once a year, ideally before the extreme seasons set in. In areas with harsh winters and hot, humid summers, check for cracks, moisture, or loosened insulation. Replace any sections that appear damaged or degraded. Regular yearly checks help catch problems early and prevent costly repairs.

Kevin Garcia

I noticed you mentioned extending the lifespan of plumbing through insulation. Is there a point where it no longer makes sense to insulate older pipes because of wear, or can insulation always help—even if the pipes are already showing signs of corrosion?

    Mario The Plumber

    Insulating older pipes can still offer some benefits, like reducing heat loss or protecting against freezing, but if pipes are already corroded or showing significant wear, insulation is not a fix for existing damage. In fact, insulating corroded pipes can sometimes trap moisture and make corrosion worse. If you see signs of serious wear, it’s best to have a plumber assess whether repair or replacement should come before any new insulation.

James Smith

I’m interested in the cost-saving aspect you brought up. About how much can a typical homeowner expect to save on utility bills per year by properly insulating their pipes?

    Mario The Plumber

    Properly insulating your pipes can typically help a homeowner save around 3% to 4% on their annual energy bills. For an average household, this often amounts to about $30 to $50 each year, though savings can be higher in colder climates or older homes with uninsulated plumbing. These savings also come with the added benefit of reducing potential repair costs from frozen or burst pipes.

Lisa Smith

For a homeowner on a tight budget, what are the most cost-effective pipe insulation strategies that still prevent freezing and reduce energy loss without requiring a professional?

    Mario The Plumber

    For homeowners on a budget, using pre-slit foam pipe insulation is both affordable and effective. Measure your exposed pipes and cut the foam sleeves to fit, then simply slip them on and seal any gaps with tape. Focus on pipes in unheated areas like basements, crawl spaces, and attics. Also, insulating hot water pipes helps reduce energy loss. No special tools or professional help are needed for these steps.

Nathan Robinson

How often should I check or replace pipe insulation to ensure it’s still effective, especially in areas that might be exposed to occasional leaks or condensation?

    Mario The Plumber

    You should inspect your pipe insulation at least once a year, ideally before winter sets in. In areas prone to leaks or condensation, check more frequently—every six months is a good rule of thumb. Look for signs of moisture, mold, or damage. Replace insulation immediately if you notice it’s wet, crumbling, or no longer fitting snugly around the pipe.

Brian Miller

Is there a certain type of pipe insulation material that works better for both winter freezes and summer heat, or do you need different products for different seasons?

    Mario The Plumber

    Closed-cell foam pipe insulation is a versatile option that performs well in both winter and summer. It helps prevent pipes from freezing during cold months and also minimizes heat gain or loss in warmer weather. Generally, you don’t need separate products for each season if you use high-quality foam insulation, though for extreme cold, you might want to choose thicker insulation for extra protection.

James Martin

I’ve always insulated my pipes before winter to prevent freezing, but I hadn’t thought about doing it for summer efficiency as well. For someone on a budget, is there a strategic way to prioritize which pipes to insulate first for the biggest year-round impact?

    Mario The Plumber

    Absolutely, prioritizing can help you get the most value for your effort and budget. Start by insulating pipes in unconditioned spaces like basements, crawl spaces, attics, and garages, since these are most vulnerable to both winter freezing and summer heat gain. Focus first on hot water pipes to reduce energy loss year-round, then cold water pipes to prevent condensation and potential moisture issues. This approach gives you the best protection and efficiency with minimal investment.

Helen White

If I want to insulate pipes myself, how do I know which areas of my home’s plumbing system should be prioritized to get the most savings and protection?

    Mario The Plumber

    Focus first on insulating pipes in unheated areas like basements, crawl spaces, attics, garages, and exterior walls. These spots are most vulnerable to both heat loss and freezing, which can lead to costly damage. Also, pay close attention to hot water pipes throughout your home, as insulating them reduces energy loss and can lower your bills. Prioritizing these locations will give you the best protection and savings.

Joshua Williams

The article talks about advanced strategies tailored to unique home needs. Could you give examples of what kinds of homes might need those, or what situations might mean I should go beyond just basic insulation?

    Mario The Plumber

    Advanced pipe insulation strategies are often needed in homes with features like exposed pipes in unheated spaces, older homes with unusual layouts, or properties in regions with extreme temperatures. If your home has areas that are hard to access, pipes running through exterior walls, or a history of frozen pipes, you may benefit from extra protection like heat tape, insulated pipe sleeves, or even smart temperature monitoring systems.

Aaron Lewis

If I want to start insulating the pipes myself, is there a step-by-step guide or checklist you’d recommend for beginners like me? I’m especially interested in learning how to handle tight spaces and corners, since that seems tricky.

    Mario The Plumber

    Absolutely, starting with pipe insulation is manageable for beginners with the right approach. First, measure all exposed pipes to estimate materials needed. Clean pipes before applying insulation. Use foam pipe sleeves or fiberglass wrap, cutting sleeves to length as needed. For tight spaces and corners, use pre-slit foam that can be bent, or cut small pieces and tape them securely. Don’t forget to seal all joints and seams with insulation tape. Take your time around bends and valves—wrapping these areas carefully ensures full coverage and better protection.

Thomas Lee

If I start insulating pipes now, how long does a typical installation take for an average-sized home, and are there any sections of the plumbing system that homeowners tend to overlook during this process?

    Mario The Plumber

    For an average-sized home, installing pipe insulation usually takes about one to two days, depending on accessibility and the amount of piping. Homeowners often overlook insulating pipes in crawl spaces, attics, and behind walls, as well as short sections near water heaters or under sinks. Be sure to check these areas to ensure complete coverage and maximum protection.

Lisa Lopez

For homeowners on a budget, which pipe insulation material offers the best balance between cost and effectiveness for reducing energy bills year-round?

    Mario The Plumber

    For homeowners on a budget, foam pipe insulation is often the best choice. It’s affordable, easy to install yourself, and provides good year-round thermal protection that helps reduce energy bills. While it might not last as long as more expensive materials like rubber or fiberglass, it’s effective for most household needs and readily available at hardware stores.

Linda Thomas

If my main concern is condensation and preventing mold under my house in the summer, is there a specific type of insulation or technique that works better for moisture control compared to basic freeze protection?

    Mario The Plumber

    For controlling condensation and preventing mold in summer, focus on closed-cell foam insulation, which acts as a vapor barrier and resists moisture better than basic fiberglass or foam sleeves meant for freeze protection. Make sure the insulation is properly sealed at all seams and joints to keep humid air from reaching cold pipes. This will significantly reduce the risk of condensation and mold growth under your house.

Kevin Wilson

When choosing between different insulation materials, how significant is the cost savings over time for energy bills? Are there any budget-friendly options that still provide strong protection against both freezing and condensation?

    Mario The Plumber

    The cost savings from choosing effective pipe insulation materials can be quite significant over time, especially in regions with extreme temperatures. While higher-end materials like fiberglass or elastomeric foam offer top performance, budget-friendly options like polyethylene foam still provide good protection against freezing and condensation. Choosing the right thickness and ensuring a proper installation are key to maximizing savings and protection, even with less expensive materials.

Julie Jackson

How often does pipe insulation need to be checked or replaced to keep it effective year-round? Does the maintenance schedule vary depending on the climate or the type of insulation you choose?

    Mario The Plumber

    Pipe insulation should generally be checked at least once a year, ideally before winter or peak usage seasons. In harsher climates or areas with temperature swings, more frequent inspections are helpful. The maintenance schedule can also vary by insulation type—foam and fiberglass may deteriorate faster outdoors and need more regular replacement, while rubber or closed-cell types often last longer. Look for cracks, moisture, or gaps as signs it’s time to repair or replace insulation.

Robert Perez

If you’re on a tight budget, are there any affordable pipe insulation materials that still provide decent energy savings and protection, or is it really worth investing in the higher-end stuff?

    Mario The Plumber

    You can absolutely find affordable pipe insulation materials that offer good protection and energy savings. Foam pipe sleeves and fiberglass wraps are both budget-friendly options and can be easily installed yourself. While higher-end products may add durability or extra features, basic insulation is usually enough to prevent most heat loss and pipe damage, especially in milder climates. Just make sure the material fits your pipe size and is rated for your environment.

Linda Johnson

When you mention extending the lifespan of plumbing with insulation, are there specific pipe materials (like copper versus PVC) that benefit more, or does insulation help all kinds equally?

    Mario The Plumber

    Insulation is beneficial for all common pipe materials, including copper, PVC, and PEX. However, metal pipes like copper are more prone to heat loss and freezing, so they often gain the most from insulation. That said, insulating any pipe helps prevent condensation, temperature swings, and potential freezing, so all types of plumbing benefit, though metal pipes typically see the greatest improvement.

Elizabeth Martin

If someone is on a tight budget, what would be the most important pipes to insulate first to get the biggest impact on energy savings or damage prevention?

    Mario The Plumber

    If budget is a concern, start by insulating pipes that are most at risk for freezing, such as those in unheated spaces like basements, crawl spaces, attics, or exterior walls. Next, focus on hot water pipes near the water heater to reduce heat loss and save on energy. This targeted approach gives you the best protection and efficiency for your investment.

Ashley Hernandez

For homeowners on a tight budget, are there low-cost insulation materials that still offer decent protection, or is it always better to invest in higher-end options for long-term benefits?

    Mario The Plumber

    There are affordable insulation materials that can still protect your pipes well, especially for indoor or less extreme conditions. Foam pipe sleeves and fiberglass wraps are both budget-friendly and provide decent insulation. While higher-end options may last longer or offer better protection in very cold climates, using these lower-cost materials correctly can still prevent most common problems like freezing and energy loss.

Joseph Wilson

If you’re planning to insulate pipes yourself, how critical is it to cover every single exposed run, including hard-to-reach spots in crawl spaces? Would missing a few sections significantly impact energy savings or increase the risk of frozen pipes?

    Mario The Plumber

    Insulating every exposed section of pipe, even those in hard-to-reach places like crawl spaces, is very important. Gaps in insulation can create cold spots, which not only reduce energy savings but also increase the risk of pipes freezing in winter. Missing even a few sections can undermine the overall effectiveness of your insulation, so it’s best to be thorough for the best protection and efficiency.

Emily Lopez

I’m curious about the different insulation materials you mentioned. Are there certain types that are better suited for older homes with mixed plumbing (like copper and PVC), or is one kind generally the best for all pipe types?

    Mario The Plumber

    Different insulation materials have their own strengths. Foam pipe insulation is versatile and works well with both copper and PVC, making it a popular choice for homes with mixed plumbing. Fiberglass insulation is also effective and especially useful in higher temperature settings, but it needs to be sealed properly if used on cold-water pipes to prevent moisture issues. For older homes with a mix of pipe materials, foam or rubber pipe insulation is generally a safe and effective option.

Betty Thomas

If I’m planning to insulate pipes for the first time, how much of a difference can I expect to see on my energy bill, and does it pay off quickly enough for a smaller house?

    Mario The Plumber

    Insulating your pipes can lower energy bills by reducing heat loss, especially for hot water pipes. In a smaller house, you might see a 3–5% reduction in water heating costs, which means the savings could cover the cost of materials within a year or two. Besides saving money, you’ll also help prevent pipe damage and heat loss, making it a worthwhile project even for smaller homes.

Michelle Brown

How often should pipe insulation be checked or replaced to make sure it’s still effective, especially if you live in a region with extreme temperature changes between summer and winter?

    Mario The Plumber

    For regions with extreme temperature swings, it’s wise to check your pipe insulation at least once a year—ideally before winter. Look for cracks, moisture, or areas where the insulation has shifted or compressed. Replacement is usually needed every 5–10 years, but damage from weather or pests may require earlier action. Regular checks will help keep your insulation effective and your pipes protected.

Donna Davis

You mentioned DIY installation, but I’m not sure how to tell if my home’s pipes are the right type for a do-it-yourself insulation project versus when I should hire a professional. Are there specific types of pipes or layouts that are riskier for DIY insulation?

    Mario The Plumber

    When considering DIY pipe insulation, accessible, straight runs of copper or PVC pipes are usually the easiest and safest to handle yourself. Pipes that are hard to reach, have tight bends, are near electrical wiring, or show signs of corrosion are best left to professionals. Also, if your home has very old or complex plumbing layouts, especially with asbestos insulation, it’s safest to call an expert. Always turn off water supply and wear protective gear if you proceed on your own.

Anthony Miller

Do you have any rough idea how much it usually costs to insulate plumbing in an average-sized home if I buy the materials myself versus hiring a professional? I want to make sure I budget enough before I start.

    Mario The Plumber

    If you buy materials yourself, insulating plumbing in an average-sized home typically costs between $100 and $300, depending on the type and amount of insulation. Hiring a professional usually brings the total to around $500 to $1,200, including labor. Costs can vary with pipe length and accessibility, so checking prices locally is a good idea for a more precise estimate.

Jennifer Smith

I’m really interested in the step-by-step installation tips you referenced. Are there specific considerations or common mistakes to watch out for when insulating older pipes or pipes located in crawl spaces and basements?

    Mario The Plumber

    When insulating older pipes or those in crawl spaces and basements, it’s important to first check for existing leaks or corrosion—address these before adding insulation. Clean the pipes so insulation adheres properly. In crawl spaces, use insulation with a vapor barrier to prevent moisture issues. Make sure to tightly seal seams and joints, and avoid compressing the insulation, as this can reduce effectiveness. Watch for sharp bends or tight spaces where gaps might occur.

Julie Jones

Could you add more about the actual installation process? I’m concerned about accidentally skipping a step and causing damage or leaving gaps. Is there a common mistake first-time DIYers should watch out for when applying the insulation?

    Mario The Plumber

    When installing pipe insulation, start by measuring the pipes and cutting insulation to fit. Carefully wrap or slip the insulation over clean, dry pipes, ensuring all joints and bends are covered. Seal seams and joints with the recommended adhesive or tape. A common mistake is leaving small gaps or not sealing the seams, which can reduce the insulation’s effectiveness and let moisture in. Double-check all areas, especially around valve connections, to make sure everything is snug and secure.

James Lee

I’m considering doing the pipe insulation myself for my shop, but I’m a bit worried about making mistakes. Are there common installation errors you see with DIY jobs, and how can I make sure I’m getting the benefits you described in your article?

    Mario The Plumber

    DIY pipe insulation can be very effective if done carefully. Common mistakes include leaving gaps or seams unsealed, using the wrong insulation material for the type of pipe, and not insulating elbows or valves. To maximize the benefits, make sure all pipes are fully covered, seal joints with tape, and choose insulation with the right thickness and rating for your climate. Take your time measuring and cutting, and double-check every joint to avoid heat loss or condensation issues.

Joseph Ramirez

When installing insulation on pipes that run through both heated and unheated areas of a home, is it necessary to use the same type and thickness of insulation throughout, or should the strategy differ based on the location?

    Mario The Plumber

    It’s best to adjust your insulation strategy based on where the pipes are located. Pipes in unheated areas need thicker and possibly higher-rated insulation to prevent freezing, while pipes in heated spaces may only need minimal insulation to reduce minor heat loss. Matching the insulation type and thickness to each area’s conditions helps maximize protection and efficiency.

Michael Clark

Does insulating cold water pipes in warmer climates make much of a difference, or is it really just a concern for places with harsh winters? Would it still help with condensation issues during the summer?

    Mario The Plumber

    Insulating cold water pipes in warmer climates can still be beneficial, especially for reducing condensation during hot, humid summers. Condensation can cause water damage, mold, and mildew even if freezing isn’t a risk. So while winter protection isn’t needed, insulation can still help maintain a drier, safer home environment year-round.

Donna Johnson

You mention energy savings from reducing heat loss in pipes. Is there a way to estimate how much a retail business like mine could save annually by adding or improving pipe insulation?

    Mario The Plumber

    You can estimate your annual savings by first calculating the length and size of the pipes you plan to insulate, along with the temperature difference between your hot water and the surrounding area. Online pipe insulation calculators can give you a good estimate based on these details. For a retail business, savings often range from 5% to 10% of your current pipe-related energy costs, but the exact amount depends on your usage and insulation quality.

Linda White

When talking about saving on energy bills, do you have any data or estimates on how much a typical homeowner might save annually by upgrading their pipe insulation?

    Mario The Plumber

    Upgrading pipe insulation can typically save homeowners about 3–5% on their annual energy bills, depending on climate and existing insulation. For an average household, this might translate to savings of around $30–$60 per year. The exact amount can vary, but properly insulated pipes help reduce heat loss, especially in colder climates, and can also prevent costly damage from frozen pipes.

Kevin Jones

How much of a difference in energy bills have you seen after upgrading pipe insulation in your own experience? I’m trying to figure out if the investment pays off quickly or if it’s more of a long-term saving.

    Mario The Plumber

    From my own experience and feedback from readers, the reduction in energy bills after upgrading pipe insulation can range from 5% to 10%, depending on your home’s layout and climate. The investment usually pays off within a couple of years, especially if you have exposed pipes or live in a colder area. While the savings add up over time, some people start noticing lower bills within the first few months.

Betty Sanchez

If I’m only able to insulate part of my plumbing system due to budget, which pipes should I prioritize to get the most benefit — the ones running through unheated spaces, or should I focus on the ones carrying hot water?

    Mario The Plumber

    To get the most benefit on a limited budget, prioritize insulating pipes running through unheated spaces like basements, crawl spaces, and attics. These areas are most vulnerable to freezing and heat loss, which can lead to pipe damage or wasted energy. If you have any budget left after that, focus on hot water pipes to help retain heat and improve energy efficiency.

Michelle Wilson

Sometimes our pipes still sweat even though they’re insulated, particularly in the basement. Are there specific troubleshooting steps or advanced strategies you recommend in these situations to fully prevent condensation and water damage?

    Mario The Plumber

    If your basement pipes are still sweating despite insulation, it could be due to gaps, improperly sealed seams, or the type of insulation used. Ensure all joints and seams are tightly sealed with vapor barrier tape. Consider upgrading to closed-cell foam insulation, which resists moisture better than fiberglass. You might also reduce humidity in the basement with a dehumidifier or by improving ventilation, as high ambient humidity can overwhelm pipe insulation.

Jennifer Perez

I noticed you mentioned step-by-step installation for different pipe types. For someone new to DIY, are there any tricky parts of installation I should look out for, especially in older homes with tight spaces?

    Mario The Plumber

    When insulating pipes in older homes, tight spaces and unusual pipe layouts can be challenging. Fitting insulation around bends, valves, and joints often requires careful cutting and patience. Watch out for pipes close to walls or ceilings—using flexible foam insulation and a utility knife helps. Be cautious of any damaged or rusty pipes, as they may need repair before adding insulation.

Rachel Brown

If I’m doing this as a weekend project, how long does it typically take to insulate the pipes for an average-sized home? Are there any common mistakes first-timers like me should watch out for during installation?

    Mario The Plumber

    For an average-sized home, insulating exposed pipes usually takes between 4 to 8 hours, depending on accessibility and the number of pipes. First-timers often forget to seal all seams and joints tightly, which can reduce insulation effectiveness. Also, make sure to measure pipes accurately and cut insulation to fit snugly—gaps or compressed sections can lead to heat loss or condensation issues.

Daniel Wilson

The section about condensation issues in humid areas caught my attention. Are there any extra steps or tips for preventing mold if my basement tends to stay damp even after insulating the pipes?

    Mario The Plumber

    If your basement stays damp, it’s a good idea to pair pipe insulation with a dehumidifier to keep humidity levels low. Make sure the pipe insulation has a vapor barrier to prevent moist air from reaching cold pipe surfaces. Also, check for gaps in insulation and seal them well, and regularly inspect pipes and nearby surfaces for any signs of mold growth so you can address issues early.

Brian Jackson

When insulating pipes to reduce energy costs, is there a significant difference in performance between insulating hot water versus cold water pipes? I’d like to know which should be prioritized if I’m on a limited budget.

    Mario The Plumber

    If you need to prioritize due to budget, insulating hot water pipes generally provides more immediate energy savings by reducing heat loss and keeping your water hotter for longer. Insulating cold water pipes is important too, mainly to prevent condensation and freezing, but for energy cost reduction, start with hot water pipes first. Once your budget allows, consider insulating the cold water pipes as well for added protection.

William Taylor

Once you install pipe insulation yourself, how often do you need to check or replace it to make sure it’s still effective? Is there a sign I should look for before insulation starts failing or causing moisture issues?

    Mario The Plumber

    It’s a good idea to check your pipe insulation at least once a year, especially before winter. Look for signs like cracking, peeling, or gaps in the insulation, as well as any dampness or mold. If the insulation looks damaged or feels wet, it’s time to replace or repair it to keep your pipes protected and avoid moisture problems.

Ashley Thomas

The article talks about both DIY and professional installation methods. For someone on a tight budget, which insulation materials would be most cost-effective, but still provide solid protection against both heat loss and condensation?

    Mario The Plumber

    For a tight budget, foam pipe insulation sleeves or self-sealing foam tubes are great choices. They’re affordable, easy to install yourself, and offer good protection against both heat loss and condensation. Make sure they fit snugly around your pipes and seal any joints with tape to maximize effectiveness. Fiberglass wrap is another low-cost option, but it usually requires a vapor barrier to prevent condensation.

Christopher Harris

When insulating pipes to prevent condensation, are there any mistakes to watch out for, especially when working in areas like basements or crawl spaces where moisture problems are already common?

    Mario The Plumber

    When insulating pipes in basements or crawl spaces, it’s important to avoid leaving gaps or seams in the insulation, as exposed pipe surfaces can still attract condensation. Be careful not to compress the insulation, since this reduces its effectiveness. Always use vapor-barrier insulation for cold pipes to prevent moisture from getting trapped between the pipe and the insulation, which can lead to mold or corrosion. Also, make sure the area is as dry as possible before installing insulation.

William Hernandez

I noticed you explained the science of heat loss from pipes. How much of a difference does insulating hot water pipes make on energy bills in a typical home, and is it worth the investment for mild climates?

    Mario The Plumber

    Insulating hot water pipes can reduce heat loss by 25 to 45 percent, which translates to savings of about $8 to $12 per year for a typical home, depending on water usage and energy rates. In mild climates, the savings are smaller, but pipe insulation can still help deliver hotter water faster and prevent condensation. The investment is usually low, so it’s often worthwhile, especially for pipes in unheated areas.

Linda Wilson

If my house is in an area with mild winters but hot, humid summers, should I focus on insulating cold water pipes, hot water pipes, or both? I want to maximize efficiency without overspending on unnecessary materials.

    Mario The Plumber

    In your climate, insulating cold water pipes is especially important to prevent condensation and potential moisture damage during hot, humid summers. This helps avoid mold and protects your home. For hot water pipes, insulating can improve energy efficiency by reducing heat loss, but it’s less critical if winter temperatures rarely drop low. If you’re prioritizing, start with cold water pipes, then consider insulating the accessible sections of hot water pipes for added efficiency.

Karen Martinez

If I want to insulate our pipes myself rather than hiring a pro, what are the most common mistakes small business owners make during installation that I should watch out for? Do you have tips for tackling hard-to-reach areas?

    Mario The Plumber

    Some frequent mistakes include leaving gaps or seams uncovered, using the wrong insulation type or thickness, and not sealing joints with tape or mastic. In hard-to-reach spots, try using pre-slit foam tubes for flexibility or wrap-style insulation that can be cut to size. Use gloves and a flashlight to help maneuver in tight areas, and double-check for any missed sections before finishing up.

Thomas Thomas

Can you clarify how often pipe insulation should be checked or replaced to ensure it keeps working effectively, especially when dealing with high humidity and potential condensation issues?

    Mario The Plumber

    Pipe insulation should be checked at least once a year, ideally before extreme weather seasons. In areas with high humidity and condensation, it’s wise to inspect it more often—every six months is a good rule of thumb. Look for signs like wet spots, mold, or damage. Replace insulation if it appears worn, waterlogged, or no longer fits snugly around the pipe, as compromised insulation won’t protect effectively.

Andrew Brown

You talk about how condensation can lead to mold and damage if pipes aren’t insulated. If I live in a pretty humid state but my winters aren’t that harsh, should I still insulate all my pipes or just the cold water ones?

    Mario The Plumber

    Even in milder winters, if you live in a humid state, it’s a good idea to insulate your cold water pipes. This helps prevent condensation, which can lead to mold and water damage. Hot water pipes can also be insulated for energy savings, but the main concern for condensation is usually on cold water lines. Prioritizing those will give you the most protection against moisture issues.

Thomas Martin

If I want to insulate only the most at-risk pipes in my house first due to budget limits, which locations or types of pipes should I prioritize for the best year-round benefits?

    Mario The Plumber

    Focus on insulating pipes that are exposed to the cold, such as those in unheated basements, crawl spaces, attics, garages, and exterior walls. Pay special attention to water supply pipes (both hot and cold) in these areas. These spots are most vulnerable to freezing in winter and heat gain in summer, so insulating them first will help prevent damage and reduce energy costs year-round.

Donna Brown

As a small business owner, I’m interested in preventing condensation problems in my basement supply lines. The article mentions moisture control to avoid mold and structural damage, but are there certain insulation materials that work better in humid basement environments?

    Mario The Plumber

    In humid basement environments, closed-cell foam insulation is often the best choice for supply lines. This type of insulation has a built-in vapor barrier that helps prevent moisture from reaching the pipes and causing condensation. Look for pre-slit polyethylene or rubber foam tubes designed for plumbing, as these resist water absorption and mold growth better than fiberglass or open-cell materials.

Jessica Hernandez

I’m a DIYer interested in step-by-step installation. What’s the best way to insulate pipes that already run close together or are tucked behind finished walls? Is it worth opening up the walls or are there strategies for tight spaces?

    Mario The Plumber

    For pipes that are close together or behind finished walls, using flexible foam pipe insulation with a slit can help you fit it around tight spots. If pipes are accessible without major demolition, carefully slide the insulation in place and secure it with tape. Opening up walls is usually not worth the effort unless you’re renovating for another reason or there’s a risk of freezing. Focus on insulating any exposed pipe sections and use spray foam in gaps to reduce heat loss in hard-to-reach areas.

Sean Taylor

I’m planning to insulate my pipes mainly to cut down on energy bills, but I’m not sure how much of a difference it actually makes. Can you give an idea of how much money you might realistically save on utilities by insulating hot water pipes?

    Mario The Plumber

    Insulating your hot water pipes can reduce heat loss by up to 2–4°F, so you’ll waste less energy heating water. This usually translates to about 3–4% savings on your water heating bill, depending on pipe length and your usage patterns. For many homes, that’s around $8–$12 per year, but savings can be higher if you use a lot of hot water or have longer pipe runs.

Linda Ramirez

You mention that insulation can help with both winter freezing and summer efficiency. If my main concern is lowering my utility bills during a hot summer, is there a specific insulation strategy I should use for cold versus hot water pipes?

    Mario The Plumber

    For hot summer months, focus on insulating your cold water pipes to prevent them from absorbing heat and sweating, which can increase humidity and cooling costs. Use closed-cell foam insulation sleeves for best results. While insulating hot water pipes is more about energy savings for heating, doing both can help, but prioritizing cold lines during summer will have the biggest impact on lowering your utility bills.