Plumber Las Vegas News

Your trusted source for plumbing updates, DIY fixes, and industry insights in Las Vegas. Stay informed with practical tips, local trends, and expert advice for homeowners and professionals alike.

Beginner Plumbing Mistakes to Avoid: Real Examples and Pro Fixes

Introduction: Why Plumbing Mistakes Happen—and How to Avoid Them

Tackling plumbing projects yourself can save money and offer a tremendous sense of accomplishment. Yet, even the most well-intentioned DIYers often underestimate the complexity of plumbing systems. A single overlooked detail or improperly tightened joint can result in costly water damage, hidden leaks, or even hazardous conditions. Understanding the most common beginner mistakes is the first and most crucial step toward DIY plumbing success. In this comprehensive guide, we’ll highlight real-world examples of plumbing errors, explain why they happen, and provide professional solutions for avoiding and correcting them. Whether you’re fixing a leaky faucet, installing a new toilet, or tackling your first drain replacement, this post will empower you to work confidently and safely, prevent expensive mishaps, and ensure your efforts stand the test of time.

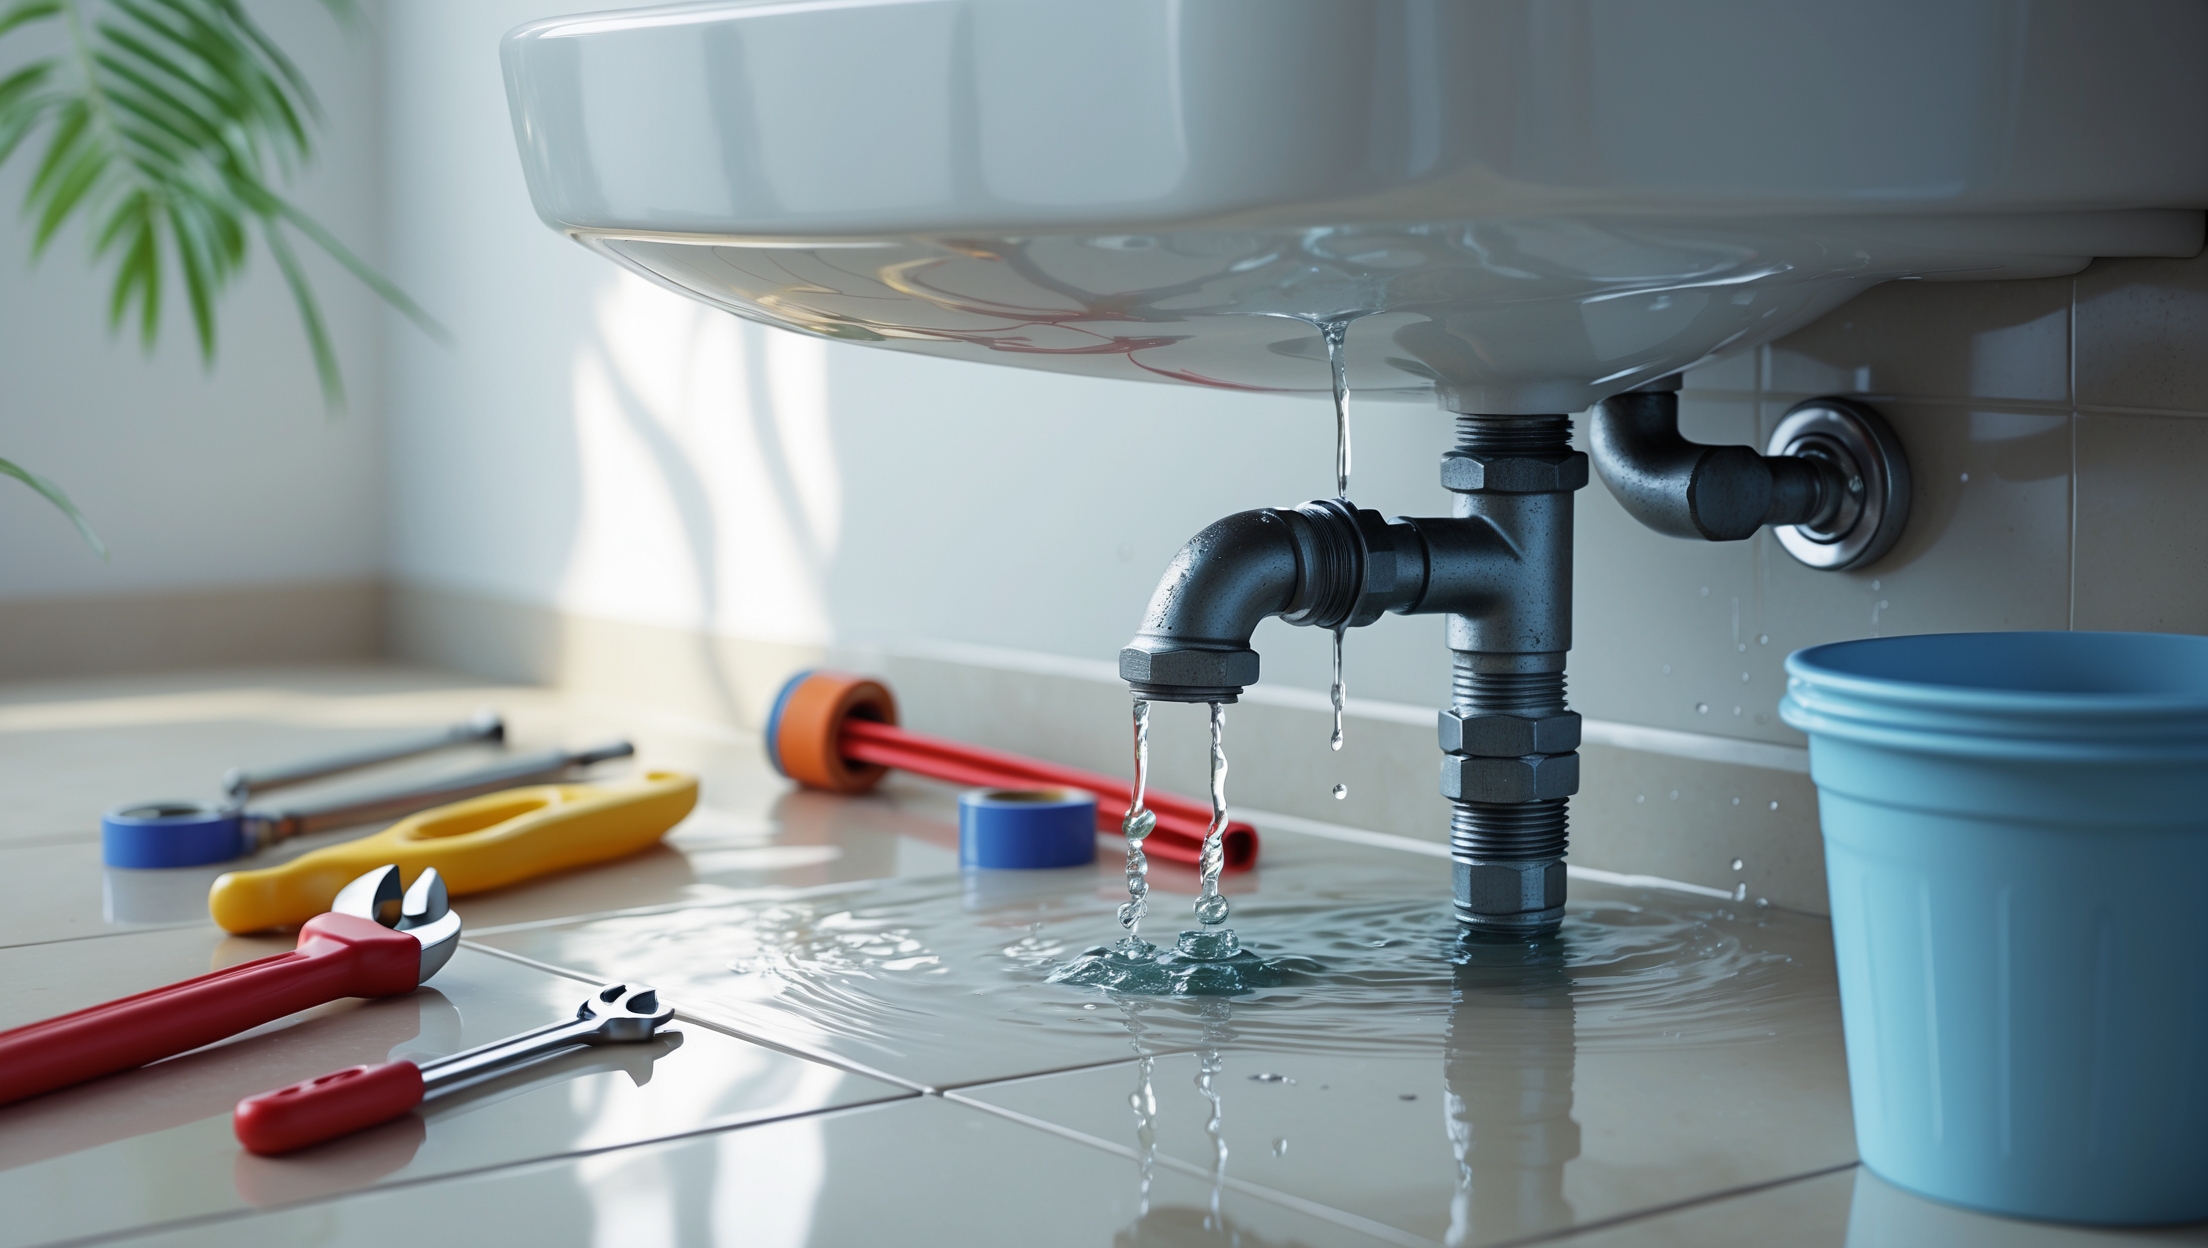
1. Overtightening Fittings: The Hidden Cost of “Extra Tight”

Why It Happens

Many beginners believe that the tighter the fitting, the better the seal. While snug connections are essential, overtightening can crack plumbing fixtures, deform threads, or strip nuts—leading to slow leaks or catastrophic failures.

Real Example

A homeowner replaced a leaking sink trap and, fearing future drips, used a wrench to crank the plastic slip nuts as tight as possible. Within days, hairline cracks formed, and water began seeping into the cabinet below, causing hidden mold growth.

How to Avoid & Fix

  • Hand-tighten plastic fittings, then add a quarter turn with pliers.
  • For metal fittings, use a wrench and stop once resistance is felt—never force further.
  • If you suspect overtightening, disassemble and inspect for cracked components; replace as needed.

2. Skipping Plumber’s Tape (Thread Seal Tape): Small Omission, Big Leaks

Why It Happens

Thread seal tape, also known as Teflon tape, is essential for sealing threaded joints in metal pipes. Beginners often skip this step, assuming the threads alone provide a watertight seal.

Real Example

During a DIY showerhead installation, a homeowner simply screwed the new fixture onto the supply pipe. Days later, a persistent drip developed, staining the tile and leading to water waste.

How to Avoid & Fix

  • Wrap thread seal tape clockwise (the same direction as the fitting will turn) three to four times around male threads before assembly.
  • For gas fittings, use yellow gas-rated tape; for water, use white or pink tape.
  • If you forgot the tape, unscrew the fixture, dry the threads, apply tape, and reinstall.

3. Using the Wrong Tools: When Improvisation Backfires

Why It Happens

It’s tempting to substitute household tools for plumbing-specific ones. Channel-lock pliers instead of a pipe wrench, or a regular screwdriver for a basin wrench—these choices can damage fixtures or fail to provide enough torque.

Real Example

A DIYer used adjustable pliers to loosen a rusted galvanized pipe. The jaws slipped repeatedly, rounding off the pipe and making future removal impossible without cutting.

How to Avoid & Fix

  • Invest in a basic plumbing toolkit: pipe wrench, basin wrench, adjustable pliers, and tubing cutter.
  • If you’ve rounded a fitting, use a pipe extractor or, as a last resort, carefully cut and replace the section.

4. Not Turning Off the Water Supply: A Flood in the Making

Why It Happens

Enthusiasm can lead beginners to start work before shutting off the water. This mistake is especially common with faucet or valve repairs, where supply lines are assumed to be “low pressure.”

Real Example

During a quick faucet cartridge replacement, a DIYer loosened the nut, only to be sprayed with water—flooding the vanity and damaging the bathroom floor.

How to Avoid & Fix

  • Always locate and close the nearest shutoff valve before beginning any repair.
  • If a valve is stuck or missing, turn off the main water supply to the house.
  • After turning off water, open the faucet to relieve pressure before disassembly.

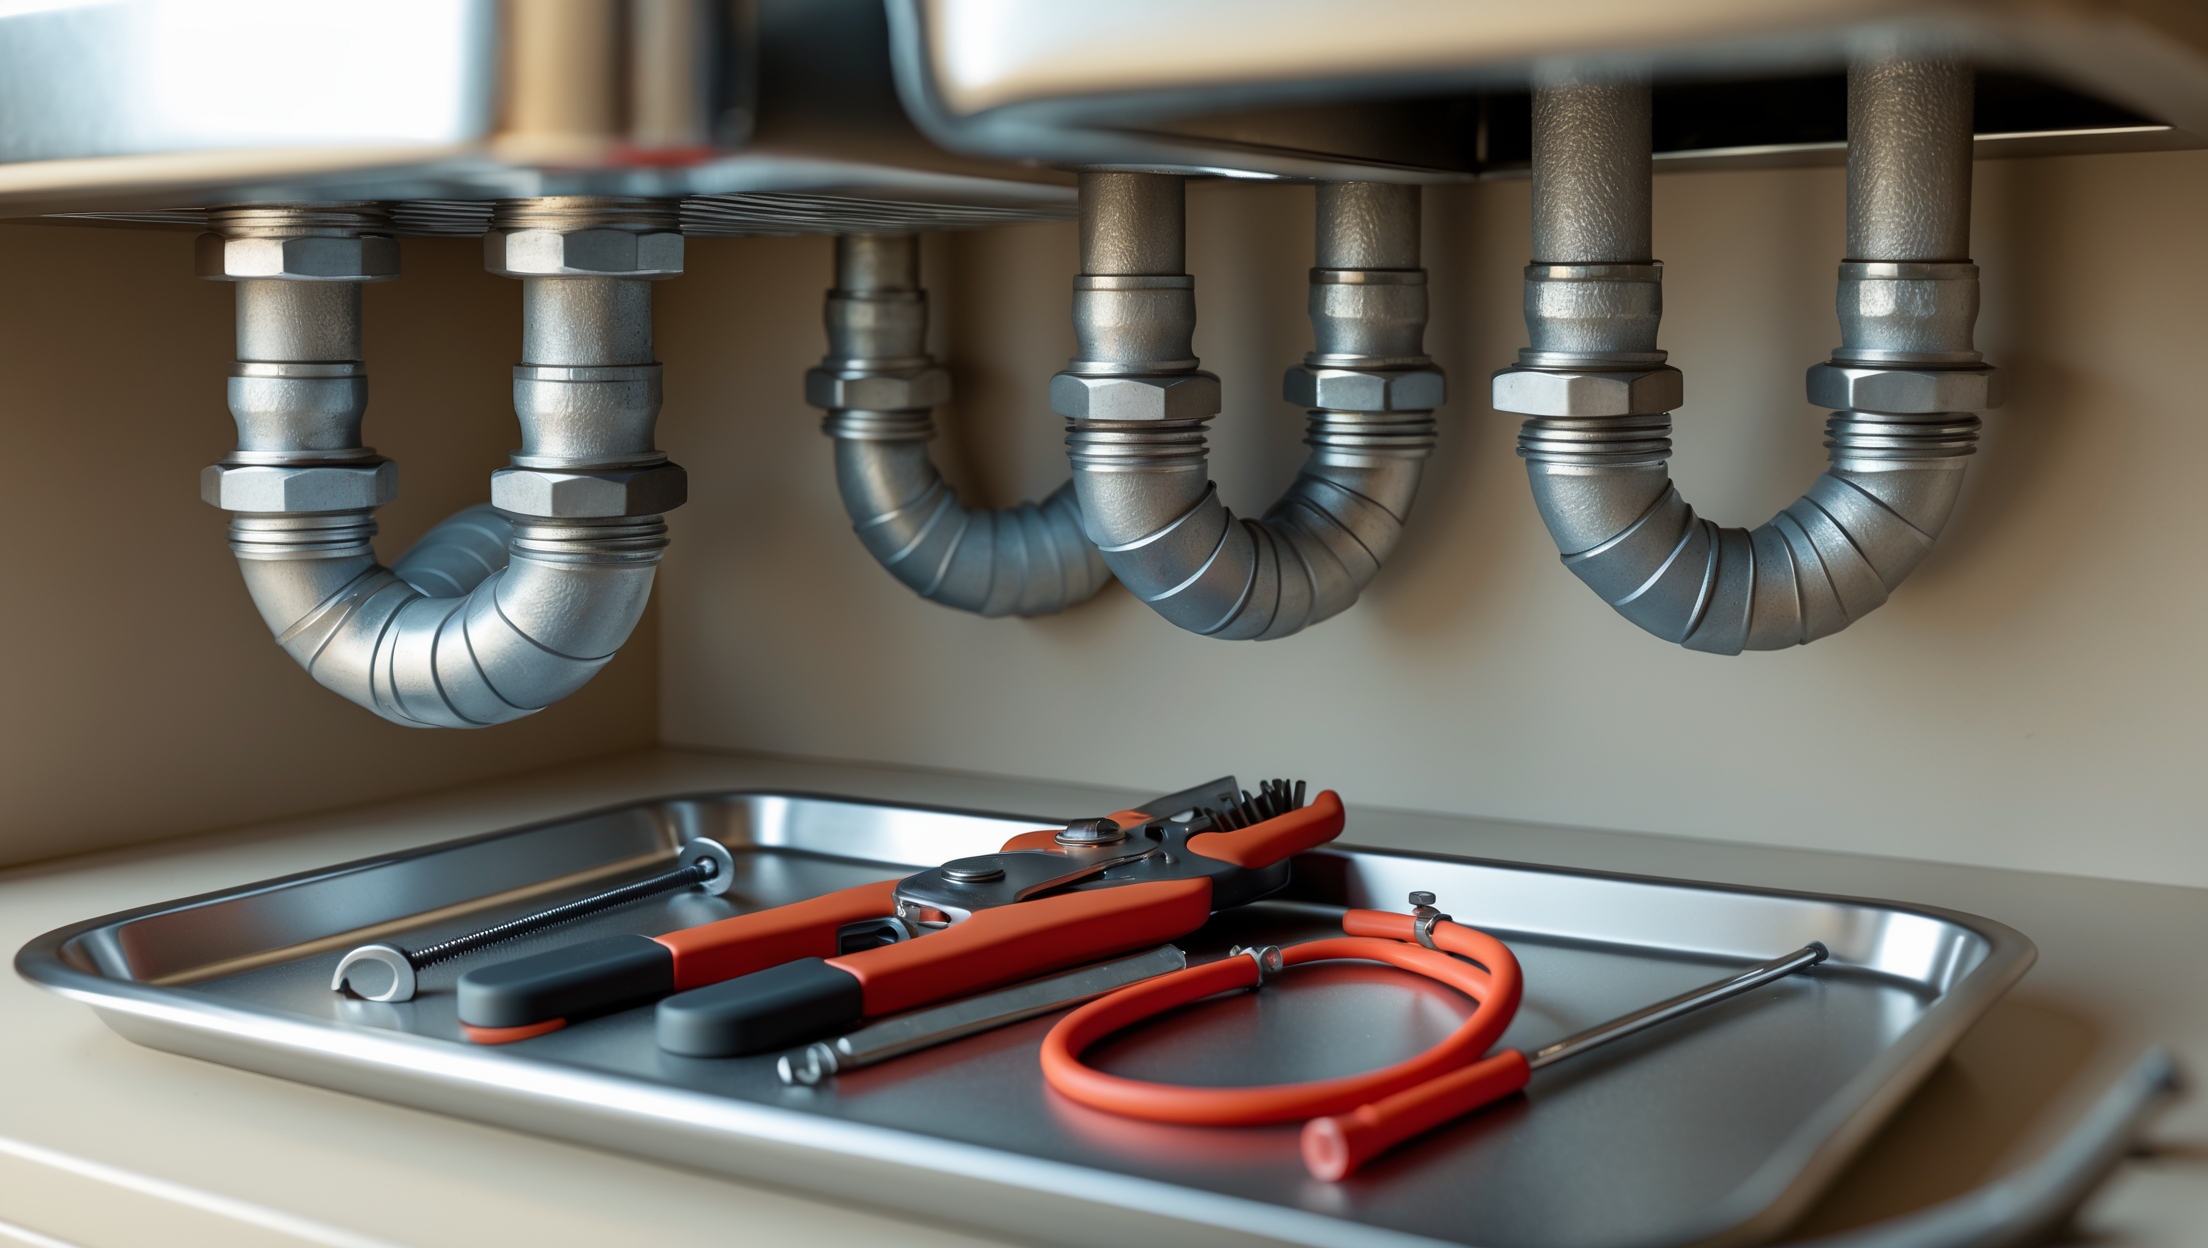
5. Incorrect Pipe Slope: The Cause of Recurring Drain Clogs

Why It Happens

Proper drain function depends on gravity. Pipes without adequate slope allow waste to settle, while excessive slope causes water to outrun solids, leading to blockages.

Real Example

After replacing a section of kitchen drain, a homeowner installed the pipe horizontally to fit the cabinetry. Within weeks, sluggish drainage and foul odors developed, requiring professional intervention.

How to Avoid & Fix

  • Maintain a slope of 1/4 inch per foot on horizontal drain lines (check local codes for specifics).
  • Use a level and tape measure during installation; adjust hangers or supports as needed.
  • If you suspect improper slope, rework the affected section to correct the angle.

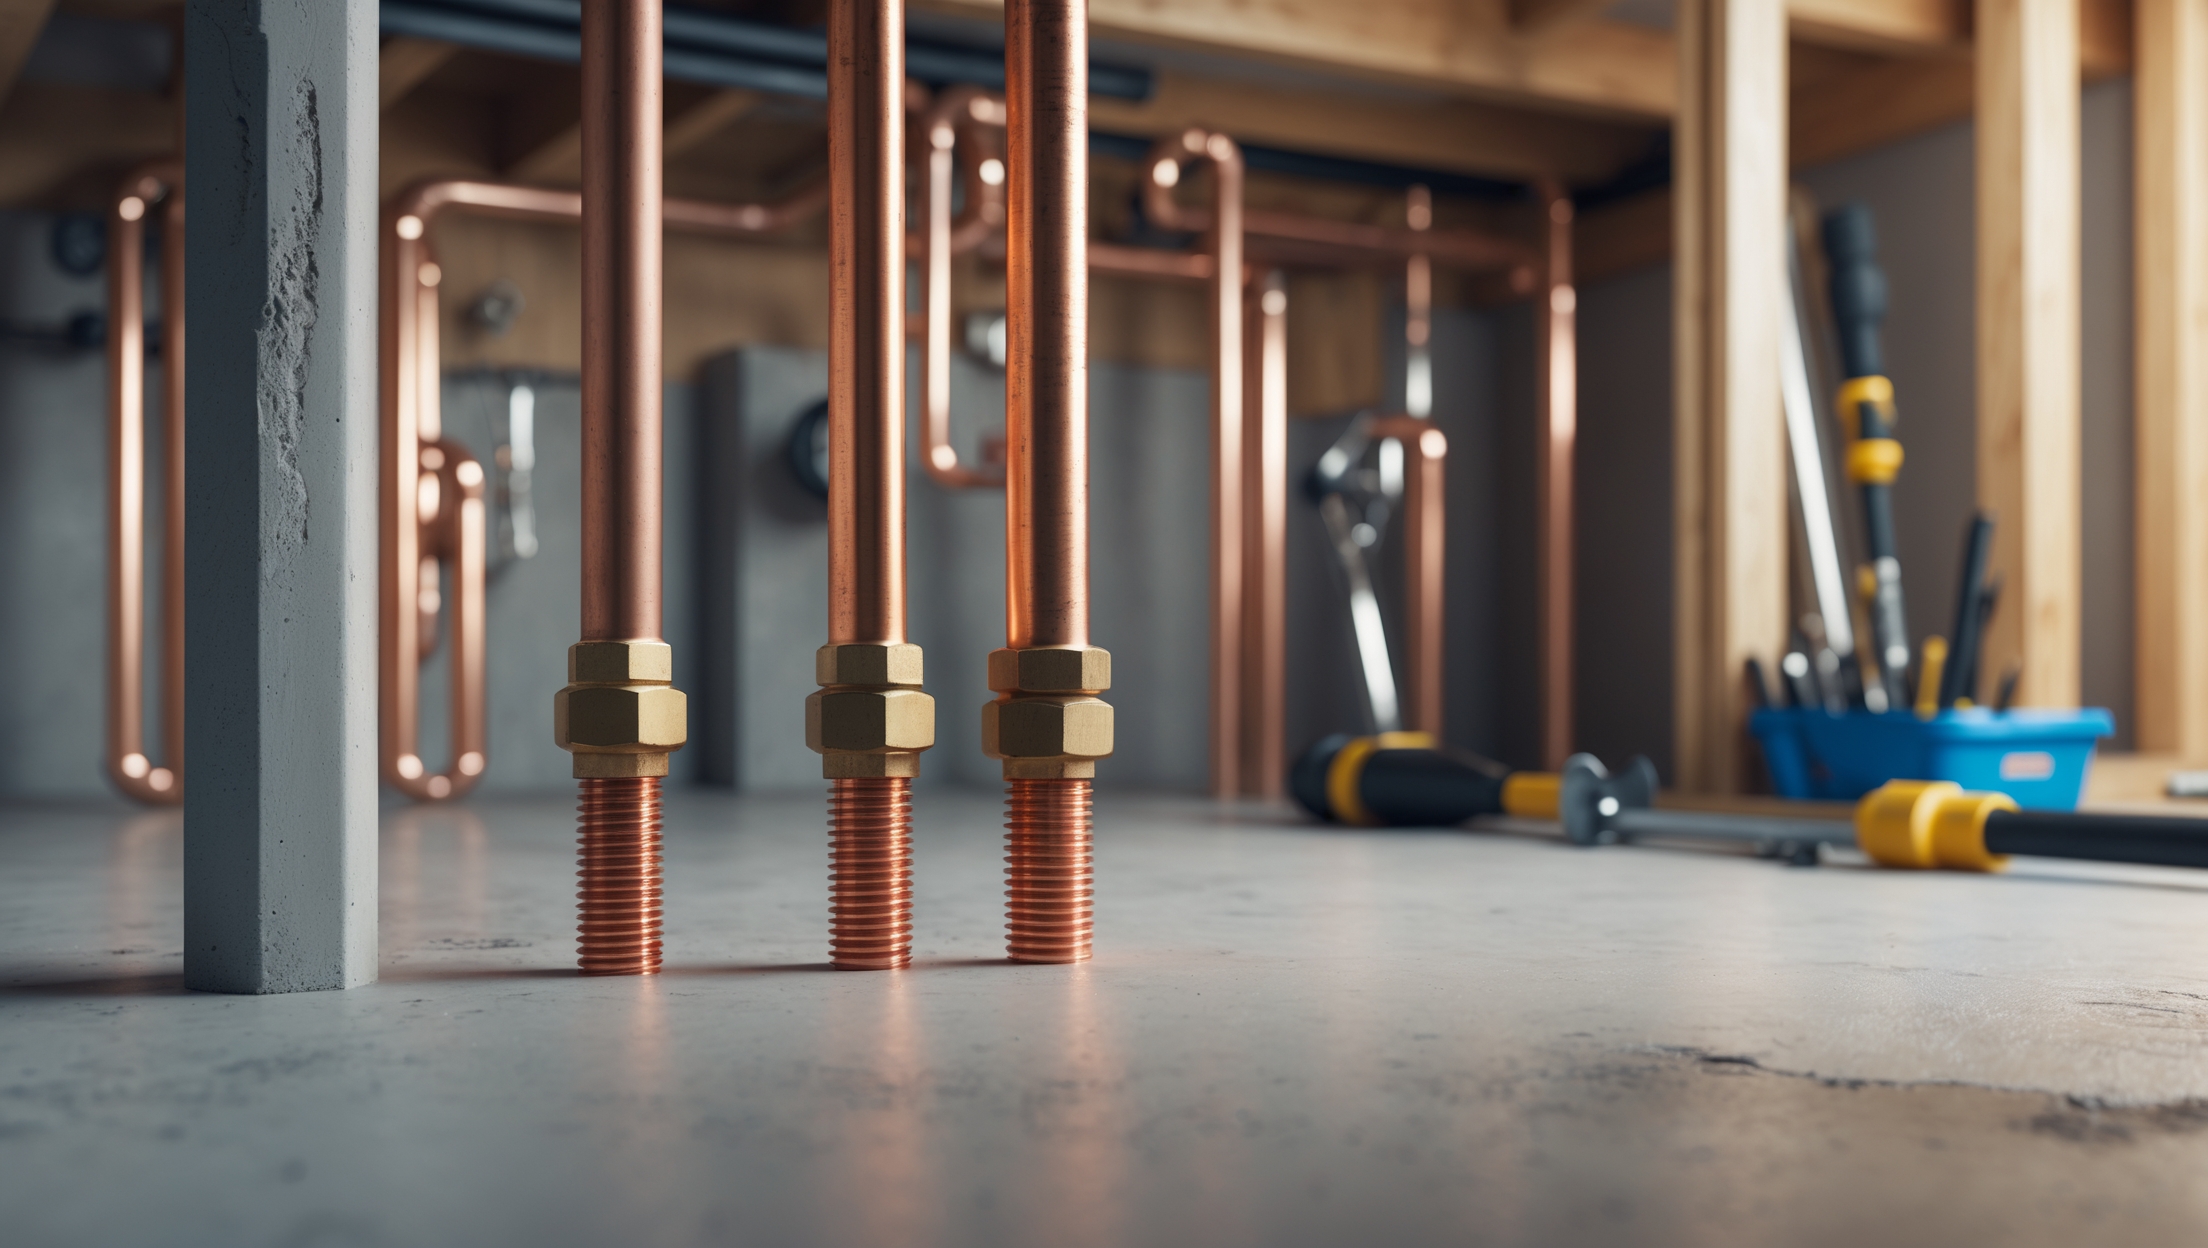
6. Mixing Incompatible Materials: When Pipes Don’t Play Nice

Why It Happens

Modern homes often contain a mix of copper, galvanized steel, PVC, and PEX. Joining these without the correct transition fittings can lead to leaks, corrosion, or even toxic reactions.

Real Example

A DIYer used a standard brass fitting to connect new copper pipe to old galvanized steel. Months later, a pinhole leak developed at the joint due to galvanic corrosion.

How to Avoid & Fix

  • Use dielectric unions when joining copper and steel to prevent corrosion.
  • Consult manufacturer instructions and local code for approved transition fittings.
  • If you notice corrosion or leaks, replace the joint with the correct connector.

7. Forgetting Air Chambers or Vents: The Shock of Water Hammer

Why It Happens

Plumbing systems need air chambers or mechanical arrestors to absorb shock when valves close quickly. Beginners removing or not reinstalling these can experience loud banging pipes, called water hammer.

Real Example

While renovating a laundry room, a DIYer capped off an old vent pipe, thinking it was unused. The washing machine then caused loud knocking noises after each cycle.

How to Avoid & Fix

  • Never remove vent pipes or air chambers without understanding their function.
  • If you hear water hammer, install a water hammer arrestor at the affected fixture.
  • Restore capped vents or consult a plumber if unsure about their function.

8. Poor Soldering Technique: The Leaky Copper Joint

Why It Happens

Soldering copper pipes requires clean, properly prepped surfaces and the right amount of heat. Beginners often underheat joints, use too little flux, or move the pipe before the solder sets.

Real Example

Attempting to install a new hose bib, a homeowner heated the joint until the solder melted, but didn’t clean the pipe ends. The result was a slow drip that led to water stains on the siding.

How to Avoid & Fix

  • Clean pipe and fitting with emery cloth or a wire brush until shiny.
  • Apply flux evenly, heat joint until solder flows completely around the seam.
  • Allow joint to cool naturally before handling.
  • For a failed joint, cut out the section, clean, and resolder with fresh materials.

9. Overusing Drain Cleaner: Quick Fixes, Long-Term Damage

Why It Happens

Chemical drain cleaners promise fast results, but repeated use can corrode pipes, damage seals, and push clogs deeper into the system. Beginners often turn to these products before trying mechanical removal.

Real Example

After a slow kitchen drain, a DIYer poured commercial cleaner down the pipe weekly. Months later, the pipe began leaking at a joint eaten away by caustic chemicals.

How to Avoid & Fix

  • Use a plunger or drain snake as your first line of defense.
  • Reserve chemical cleaners for emergencies, and use sparingly.
  • If pipes leak after cleaner use, replace the damaged section and switch to mechanical cleaning methods.

10. Neglecting Permits and Inspections: Shortcuts That Backfire

Why It Happens

DIYers sometimes underestimate the importance of local permits and inspections, especially for “minor” repairs or upgrades. Skipping this step can void insurance, cause compliance issues, or lead to costly rework when selling your home.

Real Example

After finishing a basement bathroom without a permit, a homeowner was forced to rip out finished walls when the uninspected plumbing failed during a home sale inspection.

How to Avoid & Fix

  • Check with your local building department before beginning any major plumbing work.
  • Schedule required inspections after completing rough-in and before closing walls.
  • If you skipped permits, consult a professional to evaluate work and bring it up to code.

11. Failing to Test for Leaks: Don’t Trust Your Eyes Alone

Why It Happens

It’s easy to assemble new plumbing and assume all joints are tight. But even a barely visible drip can cause major damage over time. Beginners often forget to test every connection under pressure.

Real Example

After installing a new dishwasher, a homeowner ran one quick cycle and saw no leaks. Weeks later, a slow drip had warped the kitchen floorboards.

How to Avoid & Fix

  • After completing work, pressurize the system and run water for several minutes.
  • Check every joint with a dry paper towel or tissue—look for the slightest moisture.
  • If you spot a leak, turn off water, tighten or reseal the joint, and retest.

12. Ignoring Manufacturer Instructions: Shortcutting Custom Components

Why It Happens

DIYers may skip reading instructions, assuming all components install the same way. But modern fixtures and fittings often have unique requirements for washers, seals, or torque values.

Real Example

Installing a tankless water heater, a novice skipped steps in the manual and used the wrong venting material. The result: a failed inspection and expensive replacement parts.

How to Avoid & Fix

  • Read all included instructions before starting any installation or repair.
  • Double-check required tools, materials, and safety notes.
  • If something seems unclear, search for manufacturer videos or ask a pro.
  • Correct improper installations promptly to prevent long-term issues.

Conclusion: Mastering DIY Plumbing—One Mistake at a Time

DIY plumbing offers a rewarding pathway to home improvement, but it’s a journey that requires knowledge, patience, and a willingness to learn from mistakes—yours and others’. By understanding the most common errors made by beginners, you can proactively avoid costly missteps that could lead to water damage, code violations, or even personal injury. Always remember to plan thoroughly, invest in the right tools, and never skip critical steps such as turning off the water, using the appropriate sealants, and testing for leaks. Take the time to study manufacturer instructions and consult your local building department for permitting requirements. Even seasoned professionals encounter unexpected challenges; what sets them apart is their systematic approach to troubleshooting and their commitment to best practices. If you run into a problem you can’t solve, don’t hesitate to call in a qualified plumber—knowing your limits is as important as knowing your pipes. With careful preparation and attention to detail, you can tackle most DIY plumbing projects confidently, safely, and with results you’ll be proud to call your own.

110 comments
Mark Ramirez

In your point about overtightening fittings, you mention using a wrench only until resistance is felt. Is there a recommended torque value or specific guideline for how tight metal fittings should be, or does it really just come down to feel?

    Mario The Plumber

    For most home plumbing, there isn’t a universal torque value, since fittings and materials vary. The general guideline is to hand-tighten the fitting, then use a wrench for an additional quarter to half turn until you feel firm resistance. Avoid forcing it further, as overtightening can crack or damage threads. If you have access to manufacturer instructions, always follow their specific recommendations.

Kevin Lopez

You mentioned mold growth from a cracked slip nut. What’s the recommended way to clean up and repair the area under the sink if I catch this kind of leak late? Should I be worried about health risks from hidden mold?

    Mario The Plumber

    If you discover a late leak and see mold, first wear gloves and a mask to protect yourself. Remove any items and thoroughly clean all surfaces with soap and water, then disinfect with a solution like diluted bleach. For porous or badly damaged materials, it’s safest to replace them. Mold can cause health issues, especially if you have allergies or respiratory problems, so if you notice a musty smell or visible spread, consider bringing in a professional for a thorough check.

Margaret Lewis

You mention overtightening plastic fittings can cause cracks and leaks. Is it safer to stick with metal fittings for beginners, or do plastic ones have advantages I should consider when replacing a sink trap?

    Mario The Plumber

    Plastic fittings can actually be a good choice for beginners because they’re lightweight, easier to cut and adjust, and don’t corrode. The main thing is to hand-tighten them and avoid using tools that could overtighten and crack the plastic. Metal fittings are stronger but can be harder to work with and sometimes corrode over time. If you follow the installation instructions, plastic sink traps are safe and reliable.

Barbara Lee

When working on a plumbing project with both metal and plastic fittings, how should a beginner balance the differences in tightening methods for each type? Is there a rule of thumb to use when switching between materials within the same job?

    Mario The Plumber

    When working with metal and plastic fittings, it’s important to adjust your approach. Metal fittings can handle more tightening and usually need to be snugged up firmly, but plastic fittings are prone to cracking if overtightened and only need to be hand-tight plus a small extra turn. A good rule of thumb: tighten metal until snug, then a quarter turn more; for plastic, hand-tight, then an eighth turn. Always check manufacturer instructions for each fitting type.

Patricia Brown

the explanation about overtightening fittings, especially on plastic traps. If I’ve already overtightened a fitting and can’t see any obvious cracks, should I proactively replace the component or just keep an eye out for leaks over time?

    Mario The Plumber

    If you’ve overtightened a plastic trap fitting but don’t see any visible cracks or leaks, it’s usually fine to monitor it rather than replace it immediately. Keep an eye on the area for any signs of dripping or stress fractures over the next several weeks. If you notice any leaks or damage, then it’s best to replace the fitting. Otherwise, just ensure you avoid overtightening in the future.

Jessica White

Is hand-tightening followed by a quarter turn with pliers usually reliable for all plastic fittings, or are there exceptions depending on the brand or type of trap you’re installing?

    Mario The Plumber

    Hand-tightening plus a quarter turn with pliers is a common guideline, but not all plastic fittings are the same. Some brands or types, especially thinner or lower-quality plastics, can crack if overtightened. Always check the manufacturer’s instructions for your specific trap, and if you feel resistance or hear creaking, stop tightening to avoid damaging the fitting.

John Miller

If someone realizes too late that they skipped using plumber’s tape on a threaded joint, what’s the best way to fix that without having to redo the entire installation?

    Mario The Plumber

    If you missed plumber’s tape on a threaded joint and it’s leaking, the best fix is to turn off the water supply, unscrew the joint, and apply plumber’s tape properly before reassembling. Unfortunately, there’s no reliable way to seal it from the outside—taking apart just that joint is the safest, most effective solution. You won’t need to redo the whole installation, just that specific connection.

Susan Jones

If I overtighten a connection by accident, is it usually enough to just replace the cracked nut, or could overtightening damage the surrounding pipes or fixtures too?

    Mario The Plumber

    Oftentimes, replacing a cracked nut is all you need if overtightening hasn’t caused further issues. However, overtightening can also stress or damage the threads on the pipe or fixture itself, especially if they’re plastic or older metal. It’s a good idea to inspect the surrounding threads and fittings for cracks or signs of distortion before simply replacing the nut, to ensure a safe, leak-free repair.

Linda Jones

In the real-world example with mold growth from a slow leak, what would be the recommended steps to address any potential hidden mold if the leak went unnoticed for a while?

    Mario The Plumber

    If mold may have developed from a hidden leak, start by stopping the leak and thoroughly drying the area. Remove any wet or damaged materials, like drywall or insulation, since mold can hide behind walls. It’s best to wear protective gear and use a mold-killing cleaning solution for small areas. For extensive or hidden mold, contact a professional remediation service to ensure all mold is safely removed and the area is properly restored.

Jessica Taylor

You mentioned hidden leaks from overtightening and skipping thread seal tape. If I find a slow drip under my sink but can’t see any obvious cracks, what steps should I take to troubleshoot whether overtightening or missing tape is the problem?

    Mario The Plumber

    Start by turning off the water supply and carefully loosening the fitting to inspect the threads. Look for signs of damaged or flattened threads, which can be caused by overtightening. Check if thread seal tape (Teflon tape) is present—if it’s missing or looks worn, clean the threads and wrap them with fresh tape before reassembling. Tighten the fitting snugly, but avoid using excessive force. Turn the water back on and check for leaks.

Jason Moore

If I accidentally overtighten a metal fitting and it starts to drip days later, is replacing the washer enough, or do I need to replace the whole joint? What’s the most cost-effective way to repair damage from overtightening?

    Mario The Plumber

    If overtightening caused a drip, replacing just the washer might not solve the issue. Overtightening can distort or crack the threads or fitting itself. First, disassemble the joint and check both the washer and the fitting for visible damage. If the washer looks worn, replace it. If the fitting shows cracks or misshaping, it’s best to replace the damaged part. Only replace the whole joint if you see definite damage; otherwise, a new washer and careful reassembly may be enough.

George Robinson

You mention that even a minor leak can lead to hidden mold growth. What’s the best way to check behind cabinets or walls for water damage after a suspected plumbing mistake, especially before calling in a professional?

    Mario The Plumber

    To check for hidden water damage before calling a professional, look and feel for soft spots, discoloration, or warping on walls and inside cabinets. A musty smell can be a sign of mold. You can also use a moisture meter, which is affordable and available at hardware stores, to detect moisture behind surfaces. If you see or smell anything unusual, it’s wise to call a pro right away.

Kevin Johnson

I have kids who sometimes use the bathroom sink to wash paintbrushes and other messy stuff. Would the overtightening risk be the same for traps in utility sinks or should I use different materials there?

    Mario The Plumber

    The overtightening risk is similar for traps in both bathroom and utility sinks, as too much force can damage plastic or metal parts and cause leaks. In a utility sink where you expect more debris and mess, consider using a sturdier material like a metal (brass or chrome) trap, which can handle heavier use. Just remember to tighten connections snugly but not excessively, regardless of the material.

Joseph Lee

In your example, a simple mistake with overtightening led to hidden mold growth. Are there any tips for DIYers on how to check for potential mold or water damage early if they’ve made a similar error and are worried about what’s behind a cabinet?

    Mario The Plumber

    If you’re concerned about possible mold or water damage behind a cabinet due to overtightening or leaks, look for musty smells, discoloration, or soft spots on wood and walls. Open the cabinet and check around joints and along the floor for dampness or swelling. You can also use a moisture meter to detect hidden dampness. If you suspect something’s off but can’t see it, carefully remove the cabinet’s back panel for a closer inspection.

Michael Robinson

I’m about to replace the drain trap under my bathroom sink and I’m worried about cracking the plastic nuts like you mentioned. If I only have basic hand tools, is there a special kind of wrench or grip I should use to avoid overtightening?

    Mario The Plumber

    Using basic hand tools is perfectly fine for replacing a drain trap. To avoid overtightening and cracking the plastic nuts, hand-tighten them first, then use a pair of slip-joint pliers or a large adjustable wrench to give just a small additional turn—usually about a quarter turn. Be gentle, as plastic nuts only need to be snug, not super tight. This will help prevent leaks without risking damage.

Thomas Jackson

I noticed you mentioned hand-tightening plastic fittings plus a quarter turn. Does this rule apply to all types of plastic plumbing parts, or are there exceptions, especially for things like drain traps versus toilet supply lines?

    Mario The Plumber

    The hand-tight plus a quarter turn guideline generally works for most threaded plastic fittings, but there are some exceptions. For example, drain traps usually just need to be hand-tightened—extra force could crack the plastic. Toilet supply lines can sometimes handle a gentle quarter turn with a wrench after hand-tightening, but be careful not to overtighten. Always check the manufacturer’s instructions, as some parts may have specific torque recommendations.

Andrew Williams

In your real example about cracks forming in plastic slip nuts, how soon would I start noticing water damage if I made the same mistake? Would it show up right away or could it take weeks to become obvious?

    Mario The Plumber

    Water damage from cracked plastic slip nuts can sometimes be noticed right away, especially if the leak is significant. However, smaller cracks might result in slow drips that could take several days or even weeks before any visible water damage appears. Always check under sinks regularly for moisture or discoloration after making plumbing changes.

Anthony Martinez

When hand-tightening plastic fittings and then adding a quarter turn with pliers as suggested, how can I tell if I’ve tightened enough without risking hairline cracks like the example mentioned?

    Mario The Plumber

    When tightening plastic fittings, after hand-tightening, use pliers to add only a small quarter turn—stop if you feel any resistance beyond gentle snugness. If the fitting starts to creak or you see slight deformation, that’s a sign to stop. It’s always better to err on the side of slightly loose than risk cracking, since overtightening is a main cause of hairline fractures.

Megan Miller

When you mention hand-tightening plastic fittings and then adding just a quarter turn with pliers, is this rule of thumb the same for both PVC and ABS pipes, or do they require different tightening approaches?

    Mario The Plumber

    The quarter-turn rule after hand-tightening is a good general guide for both PVC and ABS plastic fittings. However, be careful not to overtighten either type, as this can cause cracks or leaks. Always check the manufacturer’s recommendations if you’re unsure, but in most cases, the approach is the same for both materials.

Betty Lee

The example about skipping plumber’s tape got me thinking—are there any situations where using thread seal tape would actually make a connection worse instead of better, especially in a commercial workspace?

    Mario The Plumber

    Yes, there are situations where using thread seal tape can cause problems. For example, on compression fittings or flare fittings, tape is unnecessary and can even lead to leaks if it prevents proper metal-to-metal contact. In commercial settings, some gas lines require special thread sealants instead of tape to meet code and safety standards. Always check the manufacturer’s recommendations and local codes before using tape on any connection.

Ashley White

I’m curious about preventive maintenance after a small leak from overtightening goes unnoticed for a while. Are there particular steps to ensure mold or water damage doesn’t progress inside cabinetry or walls after making the plumbing repair?

    Mario The Plumber

    After repairing the leak, it’s important to thoroughly dry the affected area. Remove any items from the cabinet and use fans or a dehumidifier to speed up drying. Check for moisture inside walls with a moisture meter if the leak reached that far. Watch for lingering odors or discoloration, which can signal mold. If you notice any, consider cutting an inspection hole to check behind the wall or contacting a professional for assessment.

George Clark

For someone on a tight budget, are there affordable tools or gadgets that can help avoid overtightening, like torque wrenches for plumbing, or is it mainly about developing a feel for it?

    Mario The Plumber

    For most home plumbing tasks, you don’t need expensive torque wrenches to avoid overtightening. There are some budget-friendly torque wrenches available, but they’re not always necessary. Many plumbers rely on developing a feel for snug but not overly tight connections—hand-tightening plus a small extra turn is often enough. If you’re worried, try using slip-joint pliers with cushioned handles, or practice on spare parts to build your confidence.

Joshua Anderson

I’m about to replace my bathroom sink trap for the first time. The article says to hand-tighten plastic fittings and just a quarter turn more with pliers. How do I know when it’s too much? Is there any way to tell before it cracks?

    Mario The Plumber

    When tightening plastic fittings, you should feel resistance after hand-tightening. At that point, use pliers for just a slight extra turn—typically about a quarter turn. If you feel the fitting starting to deform, or if it gets harder to turn suddenly, stop right away. Cracks often happen from overtightening, so gentle resistance is your best guide. If in doubt, test for leaks after assembly and tighten slightly only if needed.

Aaron Davis

When you say to hand-tighten plastic fittings and then give them a quarter turn with pliers, how do I know if I’ve gone too far, especially if there’s still a tiny drip? Should I loosen and try again if I think I overtightened?

    Mario The Plumber

    With plastic fittings, overtightening can cause cracks and leaks, so it’s best to stop once the fitting feels snug after a light quarter turn with pliers. If you still notice a drip, avoid tightening further. Instead, unscrew the fitting, check for debris, ensure the threads are clean, and try again. If the drip continues, consider using plumber’s tape or checking for defects. Loosening and reseating the fitting is often safer than forcing it tighter.

Michael Sanchez

Does using plumber’s tape apply to all connections, like drains and traps made of plastic, or should it only go on certain types of threaded metal pipe fittings?

    Mario The Plumber

    Plumber’s tape, also called Teflon tape, is mainly meant for threaded metal pipe fittings to help prevent leaks. It’s not usually needed on plastic drain and trap connections, which often use compression or slip-joint washers to create a seal instead. You should avoid using plumber’s tape on non-threaded or plastic connections unless the manufacturer specifically recommends it.

Joshua Hernandez

How does using plumber’s tape affect overtightening? Like, does the tape make it safer to tighten fittings more, or should I still be careful regardless?

    Mario The Plumber

    Plumber’s tape helps seal threaded connections and prevent leaks, but it doesn’t mean you can overtighten fittings. The tape acts as a lubricant, which can actually make it easier to overtighten by reducing friction. Overtightening can crack fittings or strip threads, so you should always tighten just until snug and not force it, even when using plumber’s tape.

David Thompson

When you mention overtightening fittings, would that same advice apply to connecting hoses on washing machines or just to things like sink traps? I’m not always sure which connections need to be super careful versus just tight enough.

    Mario The Plumber

    Overtightening fittings is a common mistake with many plumbing connections, including washing machine hoses. For both hose connections and sink traps, you want them snug but not overly tight. Too much force can damage threads or crush washers, leading to leaks. Hand-tighten until secure, then use a wrench for an extra quarter turn if needed, but don’t force it. This cautious approach works well for most household plumbing connections.

Tyler Wilson

When it comes to using plumber’s tape on threaded joints, does it matter what type or thickness of tape is used for different pipe materials, or is standard white Teflon tape fine for everything mentioned in your examples?

    Mario The Plumber

    Standard white Teflon tape works well for most residential plumbing with water pipes, especially on threaded connections made of metal or plastic. However, if you’re dealing with gas lines or larger pipe sizes, you should use yellow gas-rated tape or thicker tape made specifically for those applications. Always check the tape packaging to match it with your pipe material and use case for a proper seal.

Barbara White

I noticed you mentioned using Teflon tape for metal pipes. For beginners, how do we know when to use plumber’s tape versus pipe dope, or are there situations when both are needed for a better seal?

    Mario The Plumber

    Plumber’s tape (Teflon tape) is best for threaded connections on metal or plastic pipes, like shower arms or water supply lines. Pipe dope, or thread sealant, works well on threaded metal pipes, especially for gas lines or larger threads. In some cases, like high-pressure or gas lines, plumbers use both: apply pipe dope over the Teflon tape for extra sealing. For most home water lines, just Teflon tape is usually enough.

Rachel Moore

When hand-tightening plastic fittings and then giving a quarter turn with pliers as you suggested, how can I tell if I’ve gone too far before I risk causing hairline cracks in the material?

    Mario The Plumber

    You’ll know you’re getting close to overtightening if you start to feel strong resistance or the fitting begins to creak or deform slightly. Stop immediately at the first sign of this. The fitting should feel snug but not strained—if the threads become hard to turn or you see any slight whitening or stress marks, that’s a warning to back off.

Brian Lee

What should I do if I already overtightened a connection and noticed a slow leak later on? Can I just loosen it or do I have to replace parts?

    Mario The Plumber

    If you’ve overtightened a plumbing connection and notice a slow leak, first shut off the water supply. Carefully loosen the fitting and inspect the washer, gasket, or threads for damage. If the rubber or plastic parts look crushed or misshapen, replace them before reconnecting. Simply loosening might not fix the problem if any parts are compromised, so checking and replacing damaged components is the safest approach.

Matthew Sanchez

In your real example, it sounded like the homeowner only realized there was a problem days later. Is there a way to pressure test or check new fittings right after installation to avoid these hidden leaks?

    Mario The Plumber

    Absolutely, you can check for leaks immediately after installing new fittings by performing a pressure test. For most home plumbing, this means turning the water supply back on and carefully inspecting all new joints for any signs of moisture. You can also use a dry tissue or paper towel to wipe around the fittings—if it gets wet, you’ve found a leak. For extra confidence, some people use test plugs and a pressure gauge to check for drops in pressure over a few minutes, which can reveal even slow leaks.

Christopher Gonzalez

For a small business like mine that relies on functioning sinks, is it worth training staff on these DIY plumbing basics, or should I just call a pro for every repair to avoid costly mistakes like overtightening?

    Mario The Plumber

    For a small business, it’s smart to train staff in basic plumbing, like clearing minor clogs or spotting leaks. This can save time and prevent simple issues from becoming bigger problems. However, for repairs that involve connections, water pressure, or anything more complex, it’s safer to call a professional. That way, you avoid costly errors like overtightening or damaging pipes.

Jessica Robinson

Do you have any advice for business owners on when a plumbing job is too risky to DIY, especially when dealing with hidden leaks mentioned in your real-world examples?

    Mario The Plumber

    If you’re a business owner and suspect hidden leaks, it’s usually best to call a licensed plumber rather than attempt a DIY fix. Hidden leaks can cause major structural and mold issues that affect your business operations and liability. If you notice water stains, persistent dampness, or unexplained increases in water bills, these are signs the problem may be behind walls or under floors, and professional tools and skills are needed to address them safely.

Patricia Williams

Regarding overtightening fittings, are there certain brands or materials for slip nuts and traps that hold up better to minor overtightening, or are all plastic components generally at higher risk for cracks?

    Mario The Plumber

    Plastic slip nuts and traps, regardless of brand, are generally more prone to cracking if overtightened compared to metal components. Some higher-quality plastics may offer a bit more durability, but in general, all plastic fittings should be tightened by hand and not with tools. If you need extra durability and resistance to overtightening, consider using metal (usually brass) slip nuts and traps, as they can handle more force without cracking.

Jennifer Clark

For a beginner who wants to avoid water damage but also wants to keep costs down, how do you decide when it’s worth calling a plumber versus following these DIY fixes described in the article?

    Mario The Plumber

    If you’re dealing with a simple issue like a dripping faucet or a clogged drain, and you feel confident after reading the DIY steps, it’s usually safe to try the fix yourself. However, if you encounter leaks behind walls, persistent low water pressure, or anything involving your main water line, calling a plumber is wise. These situations can quickly cause costly water damage if not handled properly.

Karen Brown

If I accidentally overtightened a plastic fitting but everything looks fine right now, is it a good idea to leave it alone, or should I go ahead and take it apart to check for hairline cracks like the example you gave?

    Mario The Plumber

    If you overtightened a plastic fitting, there’s a risk of hidden hairline cracks that might not show right away but could cause leaks later. If it’s an easy spot to access, it’s a good idea to take it apart now and check for cracks, just to be safe. It’s better to catch any damage early rather than deal with a surprise leak down the road.

Joseph Martin

If I skipped plumber’s tape on a metal fitting and only realized it after installation, is it best to redo that connection right away, or can I wait to see if there are leaks in the next few weeks?

    Mario The Plumber

    It’s best to redo the connection right away. Plumber’s tape helps create a watertight seal on threaded metal fittings, and skipping it increases the risk of leaks over time, even if you don’t see any immediately. Taking the fitting apart and applying the tape now is safer and prevents potential water damage later.

Aaron Perez

Could you give an estimate of how much it usually costs to fix damage caused by overtightening or skipping thread seal tape versus catching it early? I’m trying to decide how much to invest in prevention versus repairs.

    Mario The Plumber

    Catching overtightening or missed thread seal tape early can often be fixed with minimal cost, usually under $50 for new fittings or tape. If damage goes unnoticed and causes leaks, you could face repairs ranging from $200 to over $1,000, especially if there’s water damage to walls or flooring. Preventive steps are much less expensive than dealing with the aftermath of a major leak.

Richard Clark

The article talks about overtightening and also skipping plumber’s tape. If I accidentally did both—overtightened and forgot the tape—what would be the first thing to fail, and what’s the safest way to troubleshoot or redo the connection?

    Mario The Plumber

    If you both overtighten and skip plumber’s tape, the most likely first issue is a leak at the threads, since the tape helps seal connections. Overtightening can also crack fittings or damage threads over time. To troubleshoot, turn off the water, unscrew the connection, inspect for damage, apply plumber’s tape properly, then reconnect and tighten just until snug—avoid over-tightening. Check for leaks after turning the water back on.

Susan Lopez

How long after finishing a plumbing repair should I keep checking for hidden leaks or mold, like you mentioned happened with the cracked sink trap? Is there a typical timeframe when most problems show up if there’s an issue?

    Mario The Plumber

    After completing a plumbing repair, it’s wise to monitor the area closely for at least a week. Most leaks or mold issues will become noticeable within the first few days, but sometimes moisture problems can take longer to appear. Check daily for dampness, musty smells, or water stains during that first week, especially under sinks or around traps. If everything stays dry after seven days, you can be more confident that the repair was successful.

Sarah Lee

For a busy parent like me, how much extra time should I budget for double-checking things like overtightening or missing tape during a basic plumbing repair to avoid expensive surprises later on?

    Mario The Plumber

    For a basic plumbing repair, setting aside an extra 10 to 15 minutes to carefully double-check for overtightened fittings or missing plumber’s tape can save you from bigger issues down the road. Take a quick look at all connections and seals before finishing up—this small step can help you avoid leaks or costly repairs later.

Joseph Brown

The article mentions hidden mold growth from leaks under the cabinet. If I catch a minor leak later, do I need to replace that entire cabinet bottom, or can I clean and dry it out as long as it’s not too bad?

    Mario The Plumber

    If you catch a minor leak early and the cabinet bottom is just damp or has slight staining, you can usually dry it thoroughly and clean it with a mold-killing cleaner. However, if the wood is soft, warped, or has visible mold that doesn’t come off, it’s safer to replace the affected section to prevent ongoing issues.

Sarah Thompson

Is there a specific type of wrench or tool you recommend for beginners to avoid accidentally overtightening metal fittings, or are all adjustable wrenches about the same for home use?

    Mario The Plumber

    For beginners, a standard adjustable wrench works well, but it’s important to select one with a comfortable, non-slip grip and smooth adjustment. To avoid overtightening, consider using a torque wrench, which allows you to set a specific tightness level. Pipe wrenches are also helpful for plumbing, but always tighten fittings just enough—snug but not forced—to prevent damage.

Richard Wilson

The article explains that skipping plumber’s tape can cause big leaks. Are there any types of fittings or situations where plumber’s tape is not recommended, or is it universal for all threaded joints?

    Mario The Plumber

    Plumber’s tape, also called Teflon tape, is ideal for most threaded metal and plastic pipe fittings used for water or air. However, it’s not recommended for compression fittings or flare fittings, which rely on metal-to-metal or metal-to-plastic seals rather than threads to prevent leaks. Using plumber’s tape in those cases can actually interfere with the seal. Always check the manufacturer’s instructions for the specific fitting you’re working with.

Elizabeth Moore

You mention using thread seal tape on metal pipes but not on plastic fittings. Is there a risk in putting plumber’s tape on plastic threads, or does it just not help as much?

    Mario The Plumber

    Using thread seal tape on plastic threads can actually lead to overtightening, which increases the risk of cracking or damaging the fitting. Unlike metal, plastic is softer and can deform more easily. Many plastic fittings are designed to seal by compression rather than by filling gaps with tape, so adding tape often isn’t necessary and can sometimes cause leaks instead of preventing them.

Rachel Lopez

I saw you mention skipping plumber’s tape as a common beginner error. Are there certain types of connections or specific plumbing projects where plumber’s tape should definitely not be used, or is it always best to use it on threaded joints?

    Mario The Plumber

    Plumber’s tape, also called Teflon tape, is great for sealing threaded pipe joints to prevent leaks, especially with metal or plastic water lines. However, you shouldn’t use it on compression fittings or flare fittings, as those rely on the metal-to-metal or rubber-to-metal contact for a proper seal. Reserve plumber’s tape only for threaded connections, not for any type of push-fit, soldered, or glued joints.

Mark Sanchez

I had to replace a leaking sink trap recently and got worried about making it too loose, so I tightened it quite a bit with a wrench. If I already overtightened the plastic slip nuts, will reusing the same trap after loosening them be safe, or should I replace those parts to prevent issues like the hidden mold mentioned?

    Mario The Plumber

    If the plastic slip nuts were overtightened, they could now be cracked or slightly deformed, which might lead to future leaks and potential mold. Carefully inspect the slip nuts and washers for any visible damage. If you see any cracks, warping, or if they no longer fit snugly, it’s best to replace them. This will help ensure a reliable seal and prevent hidden leaks or moisture issues.

Aaron Lee

When it comes to tightening metal versus plastic fixtures, is there a specific type of wrench or tool you recommend for beginners to avoid accidentally overtightening and damaging the parts?

    Mario The Plumber

    For metal fixtures, a standard adjustable wrench or a basin wrench is usually fine, but be careful not to overtighten—just snug is enough. For plastic fixtures, use a plastic or strap wrench if possible, as these apply pressure gently and help avoid cracking. Always go slowly and stop as soon as you feel firm resistance to prevent damage.

Megan Robinson

You mention that a pro fix sometimes involves replacing cracked parts. If I’m doing a plumbing repair on a tight budget, is it ever safe to patch a cracked fitting temporarily, or should I always replace it right away?

    Mario The Plumber

    It’s understandable to want to save money, but patching a cracked fitting is only a very short-term solution and can easily lead to leaks or further damage. For your safety and to avoid bigger repair costs later, it’s best to replace any cracked parts as soon as possible. Temporary patches should only be used in an emergency until you can do a proper replacement.

Barbara Lopez

When you mention skipping plumber’s tape on threaded joints, does this apply to both water and gas lines, or are there different rules I should follow as a business owner dealing with various pipe materials?

    Mario The Plumber

    Skipping plumber’s tape (also known as Teflon tape) is a mistake for many threaded joints, but the rules do vary. For water lines, plumber’s tape is commonly used on threaded connections to help prevent leaks. For gas lines, you need a tape that is specifically rated for gas—usually yellow Teflon tape labeled for gas use. Always check local codes and manufacturer guidelines for each pipe material, as some connections, like flare fittings, shouldn’t use tape at all.

Linda Sanchez

Do you have any budget-friendly advice for detecting hidden leaks or early water damage if a beginner makes one of these mistakes? I want to catch issues before they turn into a bigger headache but don’t want to invest in expensive tools right away.

    Mario The Plumber

    Absolutely, there are some easy and affordable ways to catch hidden leaks early. Check under sinks and around toilets for any dampness or musty smells regularly. Place dry paper towels under pipes and fittings—if they get wet after a day or two, you may have a leak. Also, keep an eye on your water bill for unexplained increases. These simple checks can help you spot problems before they get serious.

Betty Robinson

You mention stopping once you feel resistance when using a wrench on metal fittings. Are there any tools or gadgets that can help measure the right amount of torque so I don’t overtighten by accident?

    Mario The Plumber

    Yes, there are torque wrenches specifically designed to help you apply the right amount of force to fittings. These tools can be set to the manufacturer’s recommended torque value, and they will either click or signal when you’ve reached it. For plumbing, look for a torque wrench compatible with your pipe sizes and fittings. This is a great way to avoid overtightening and damaging the threads.

Megan White

After overtightening and then suspecting a leak later, do you recommend taking everything apart to inspect even if there are no visible signs of dripping, or is it okay to just keep an eye on things for a while? How quickly do cracks usually become a problem in your experience?

    Mario The Plumber

    If you’ve overtightened a fitting, it’s wise to monitor it closely for any signs of leakage, such as moisture or corrosion. If there are no visible signs of trouble, you don’t necessarily need to take everything apart immediately. However, cracks from overtightening can sometimes take days or weeks to show up, so check the area regularly for a while, especially after running water through the system.

Megan Ramirez

If a slow leak is discovered under the sink due to skipped plumber’s tape, is it usually enough to just reapply tape and hand-tighten, or could there be longer-term mold or water damage problems that need attention too?

    Mario The Plumber

    If you find a slow leak under the sink from missing plumber’s tape, reapplying tape and hand-tightening may stop the leak. However, you should also check thoroughly for any signs of water damage, mold, or lingering moisture around the area. If you notice discoloration, soft spots, or a musty smell, clean and dry the area well, and address any mold to prevent future issues.