Plumber Las Vegas News

Your trusted source for plumbing updates, DIY fixes, and industry insights in Las Vegas. Stay informed with practical tips, local trends, and expert advice for homeowners and professionals alike.

How to Set Up a Home Plumbing Workshop: Space, Storage, and Safety Essentials

Introduction: Why Every DIYer or Pro Needs a Dedicated Plumbing Workshop

Whether you’re an enthusiastic DIYer or a professional plumber working from home, a dedicated plumbing workshop can transform your approach to repairs, projects, and learning. Instead of searching for scattered tools or improvising on the kitchen floor, imagine having a space where every wrench, pipe, and fitting is in its place, safety is prioritized, and even large-scale projects feel manageable. Setting up your own home plumbing workshop isn’t just about convenience—it’s about efficiency, safety, and taking pride in your craft. In this guide, we’ll walk you through the essential steps to create a functional, organized, and safe plumbing workspace at home. From choosing the right space and planning the layout, to storage solutions, safety protocols, and even tips for handling hazardous materials, you’ll learn how to build a workshop that supports your plumbing ambitions for years to come.

Choosing the Ideal Space: Garage, Basement, or Shed?

Assessing Available Areas

The first step is to evaluate where your plumbing workshop will live. Consider the following options:

  • Garage: Offers ample space, good ventilation, and easy access to water lines. Ideal for larger projects and tool storage.
  • Basement: Often quieter and separate from living spaces. Moisture control and ventilation are critical concerns here.
  • Outdoor Shed: Great for keeping messes out of the house, but may lack climate control and security. Ensure it’s weatherproof and has safe power access.

Key considerations include proximity to water sources, electrical outlets, lighting, and how the space’s temperature and humidity might affect tools and materials.

Space Requirements

For basic plumbing projects, a 6’x8’ area can suffice, but more room is always better. Allow at least 3’ of clear space around your main workbench for movement and safe tool handling. If you plan on cutting pipe or working with large assemblies, a larger footprint (10’x12’ or more) is optimal.

Workshop Layout: Planning for Productivity and Safety

Work Zones

Divide your workshop into distinct zones for maximum efficiency:

  • Work Area: Main bench for assembly, repairs, and small projects.
  • Cutting & Soldering Zone: Dedicated spot for pipe cutting, threading, soldering, and welding, with fire-safe materials and ventilation.
  • Storage Zone: Racks, shelves, and bins for tools, fittings, and consumables.
  • Cleaning Area: Utility sink or cleaning station for washing tools and hands.

Workflow Optimization

Arrange zones in a logical sequence: material storage near the entrance, main workbench centrally located, hazardous activities (like soldering) positioned away from flammable materials and easy-to-access exits. Keep high-use tools within arm’s reach of the workbench, and reserve overhead or high shelves for seasonal or rarely used items.

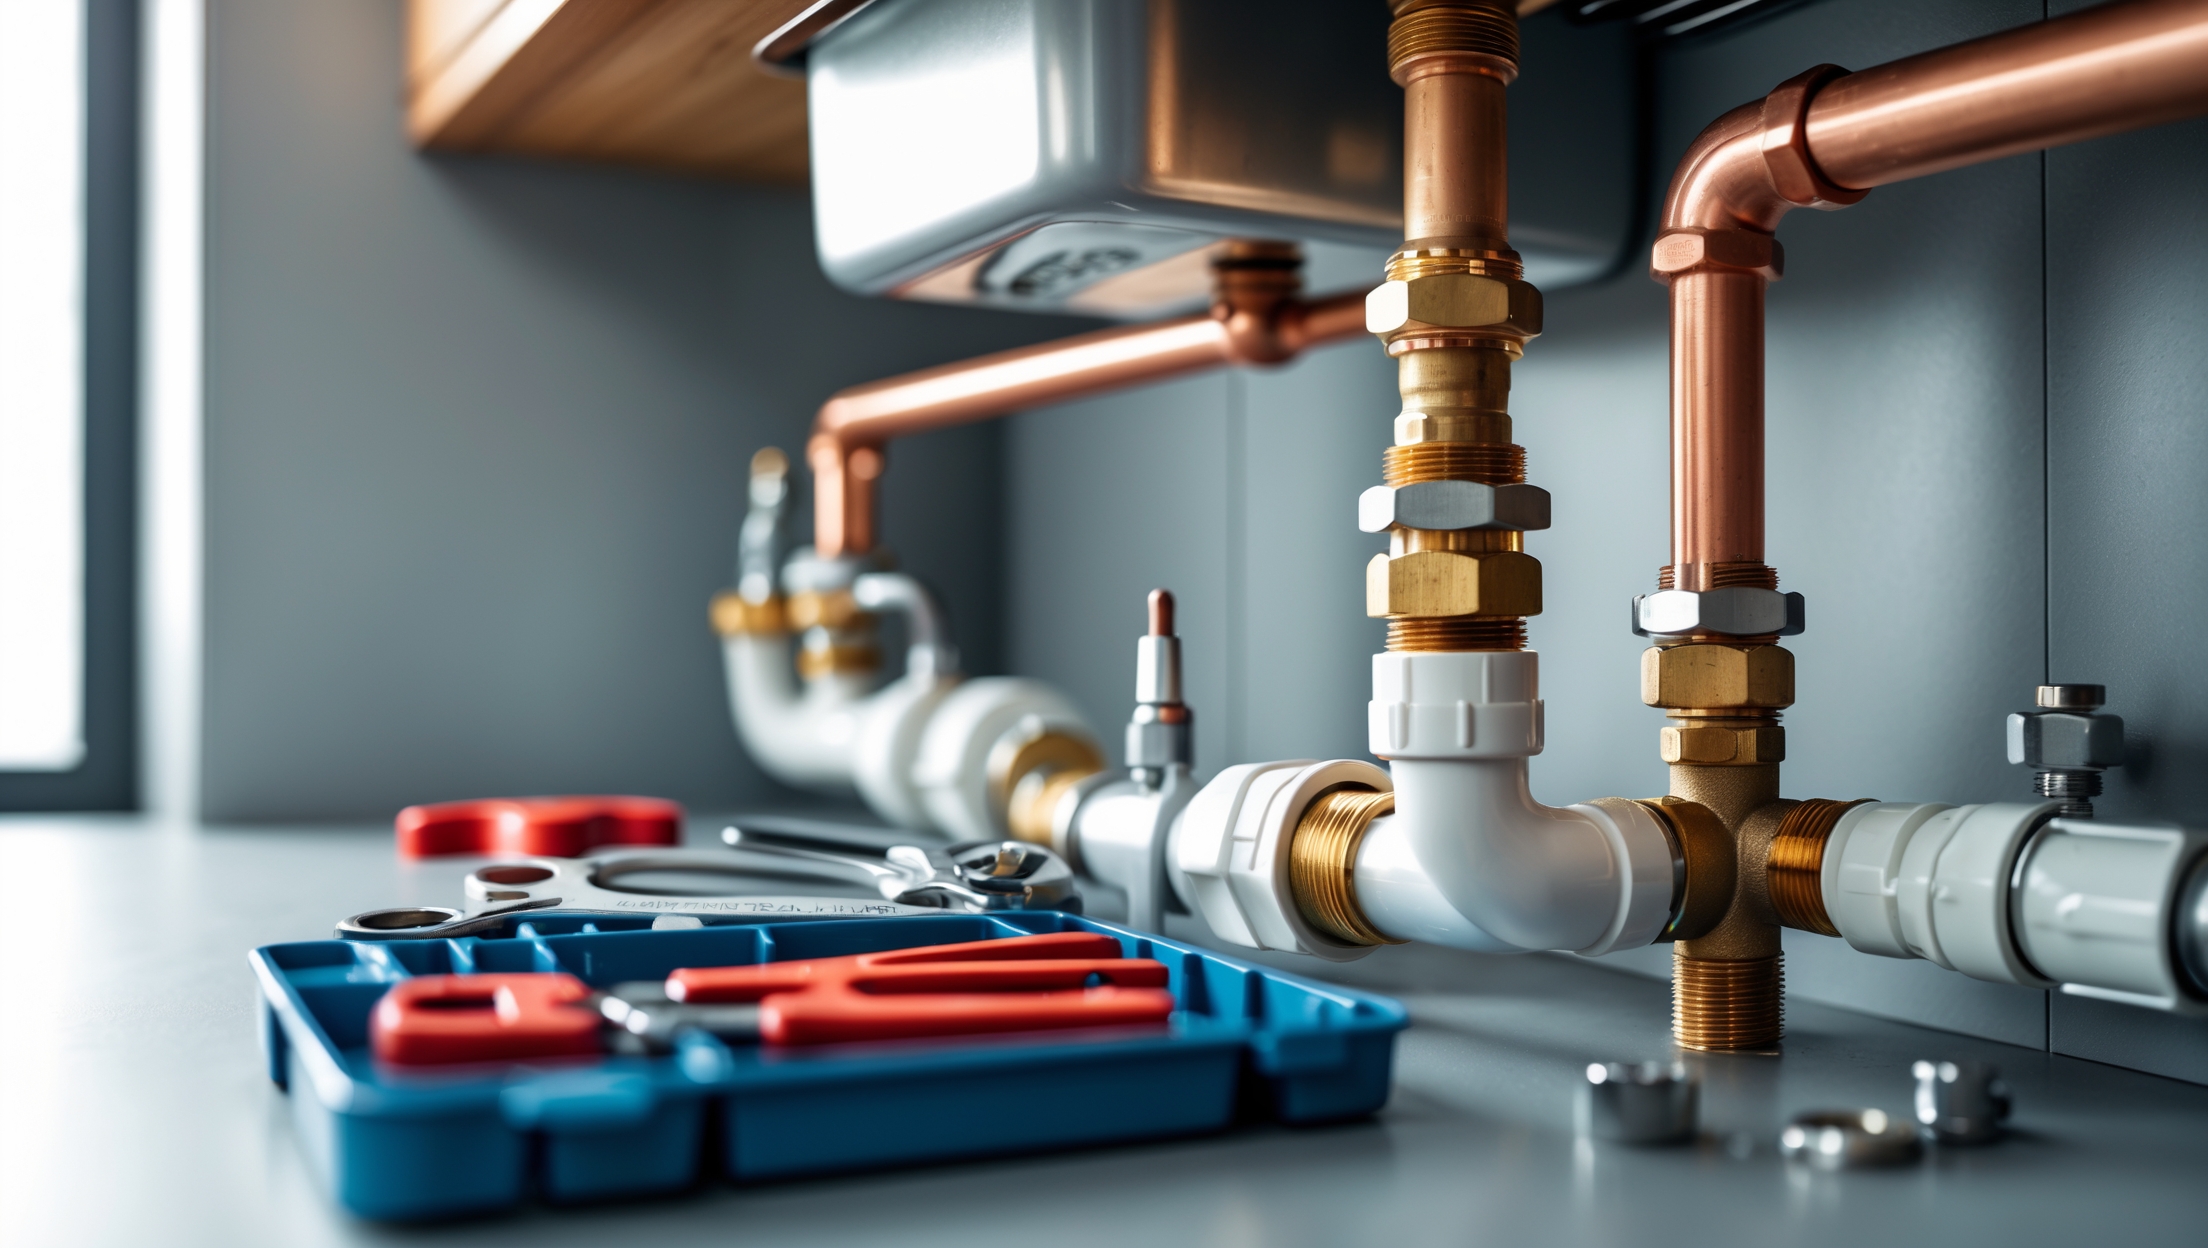
Essential Workbench and Surface Considerations

Workbench Features

Your workbench is the heart of the workshop. Select or build one that is:

  • Sturdy enough for heavy work (solid wood or steel frame recommended).
  • At least 36” deep and 60” wide for comfortable plumbing assembly.
  • Height-adjustable, or at a comfortable working height (typically 34-38” for most adults).
  • Equipped with a heavy-duty vise (minimum 4” jaw width), ideally pipe-specific.

Surface Materials

Choose a bench top that resists water, chemicals, and heat—marine plywood with a polyurethane coating, stainless steel, or heavy-duty laminate are all excellent choices. Avoid raw MDF or particleboard, which will quickly degrade in a plumbing environment.

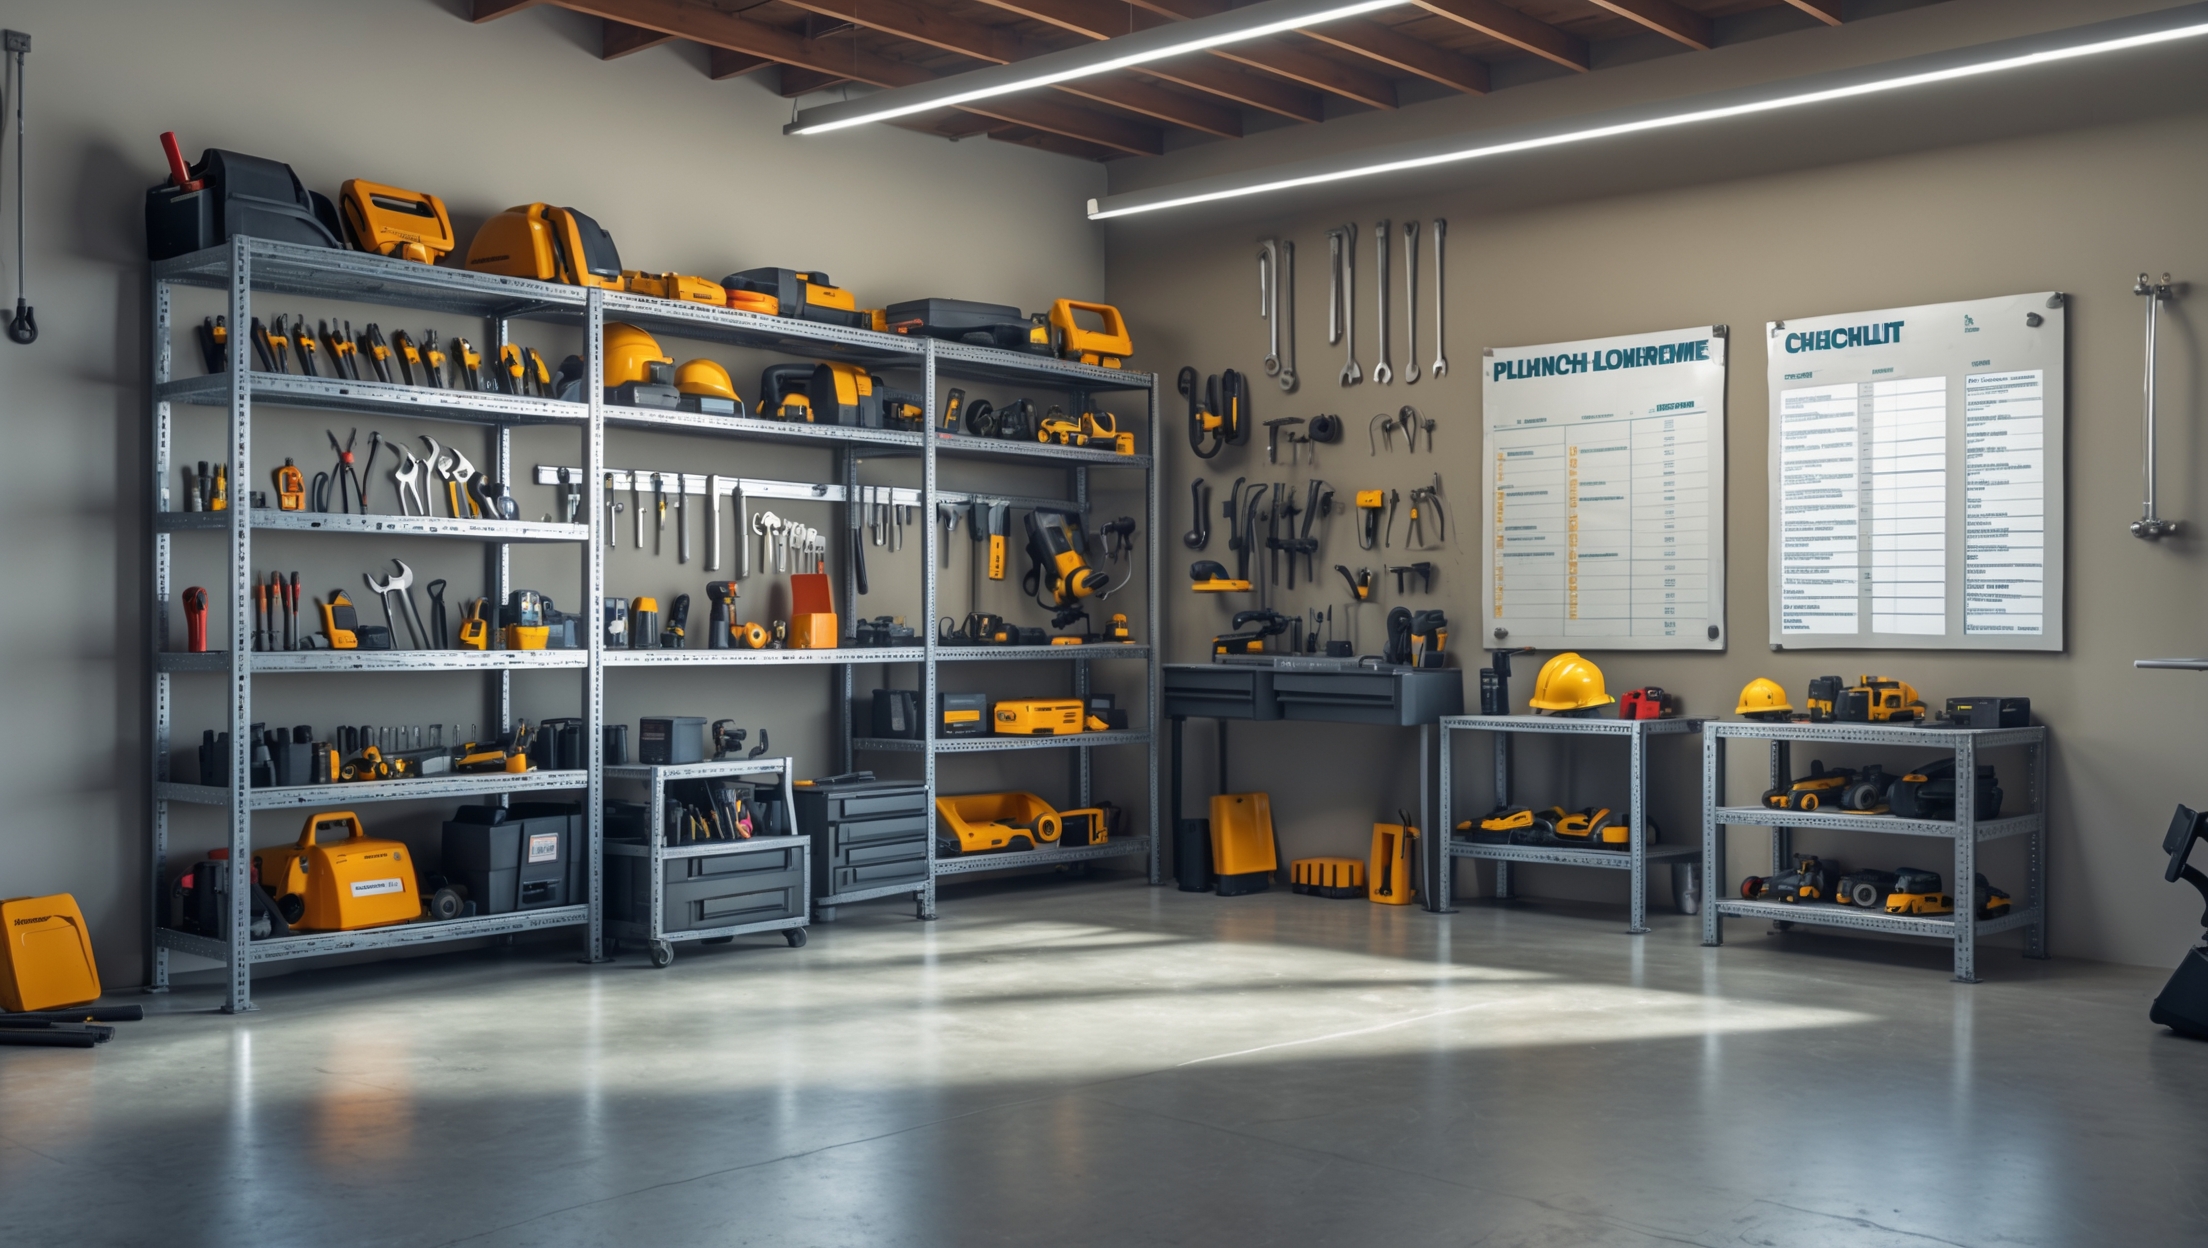
Tool Storage: Keeping Everything in Reach and in Order

Wall-Mounted Solutions

Wall space is prime real estate in a plumbing workshop. Use:

  • Pegboards: Hang wrenches, pliers, and frequently used hand tools for instant visibility and access.
  • Magnetic Strips: Perfect for holding small metal tools like screwdrivers and snips.
  • Wall Racks: Store pipe sections, levels, and long-handled tools off the floor.

Drawers, Bins, and Cabinets

  • Drawer Units: Organize small parts (washers, nuts, O-rings) with labeled dividers.
  • Clear Bins: Use stackable, see-through bins for fittings, valves, and pipe connectors.
  • Lockable Cabinets: Store chemicals, adhesives, or expensive tools securely.

Mobile Toolboxes and Caddies

For jobs around the house or offsite, a well-stocked rolling toolbox or portable caddy saves time and prevents tool loss. Keep these loaded with the essentials, and restock after each use.

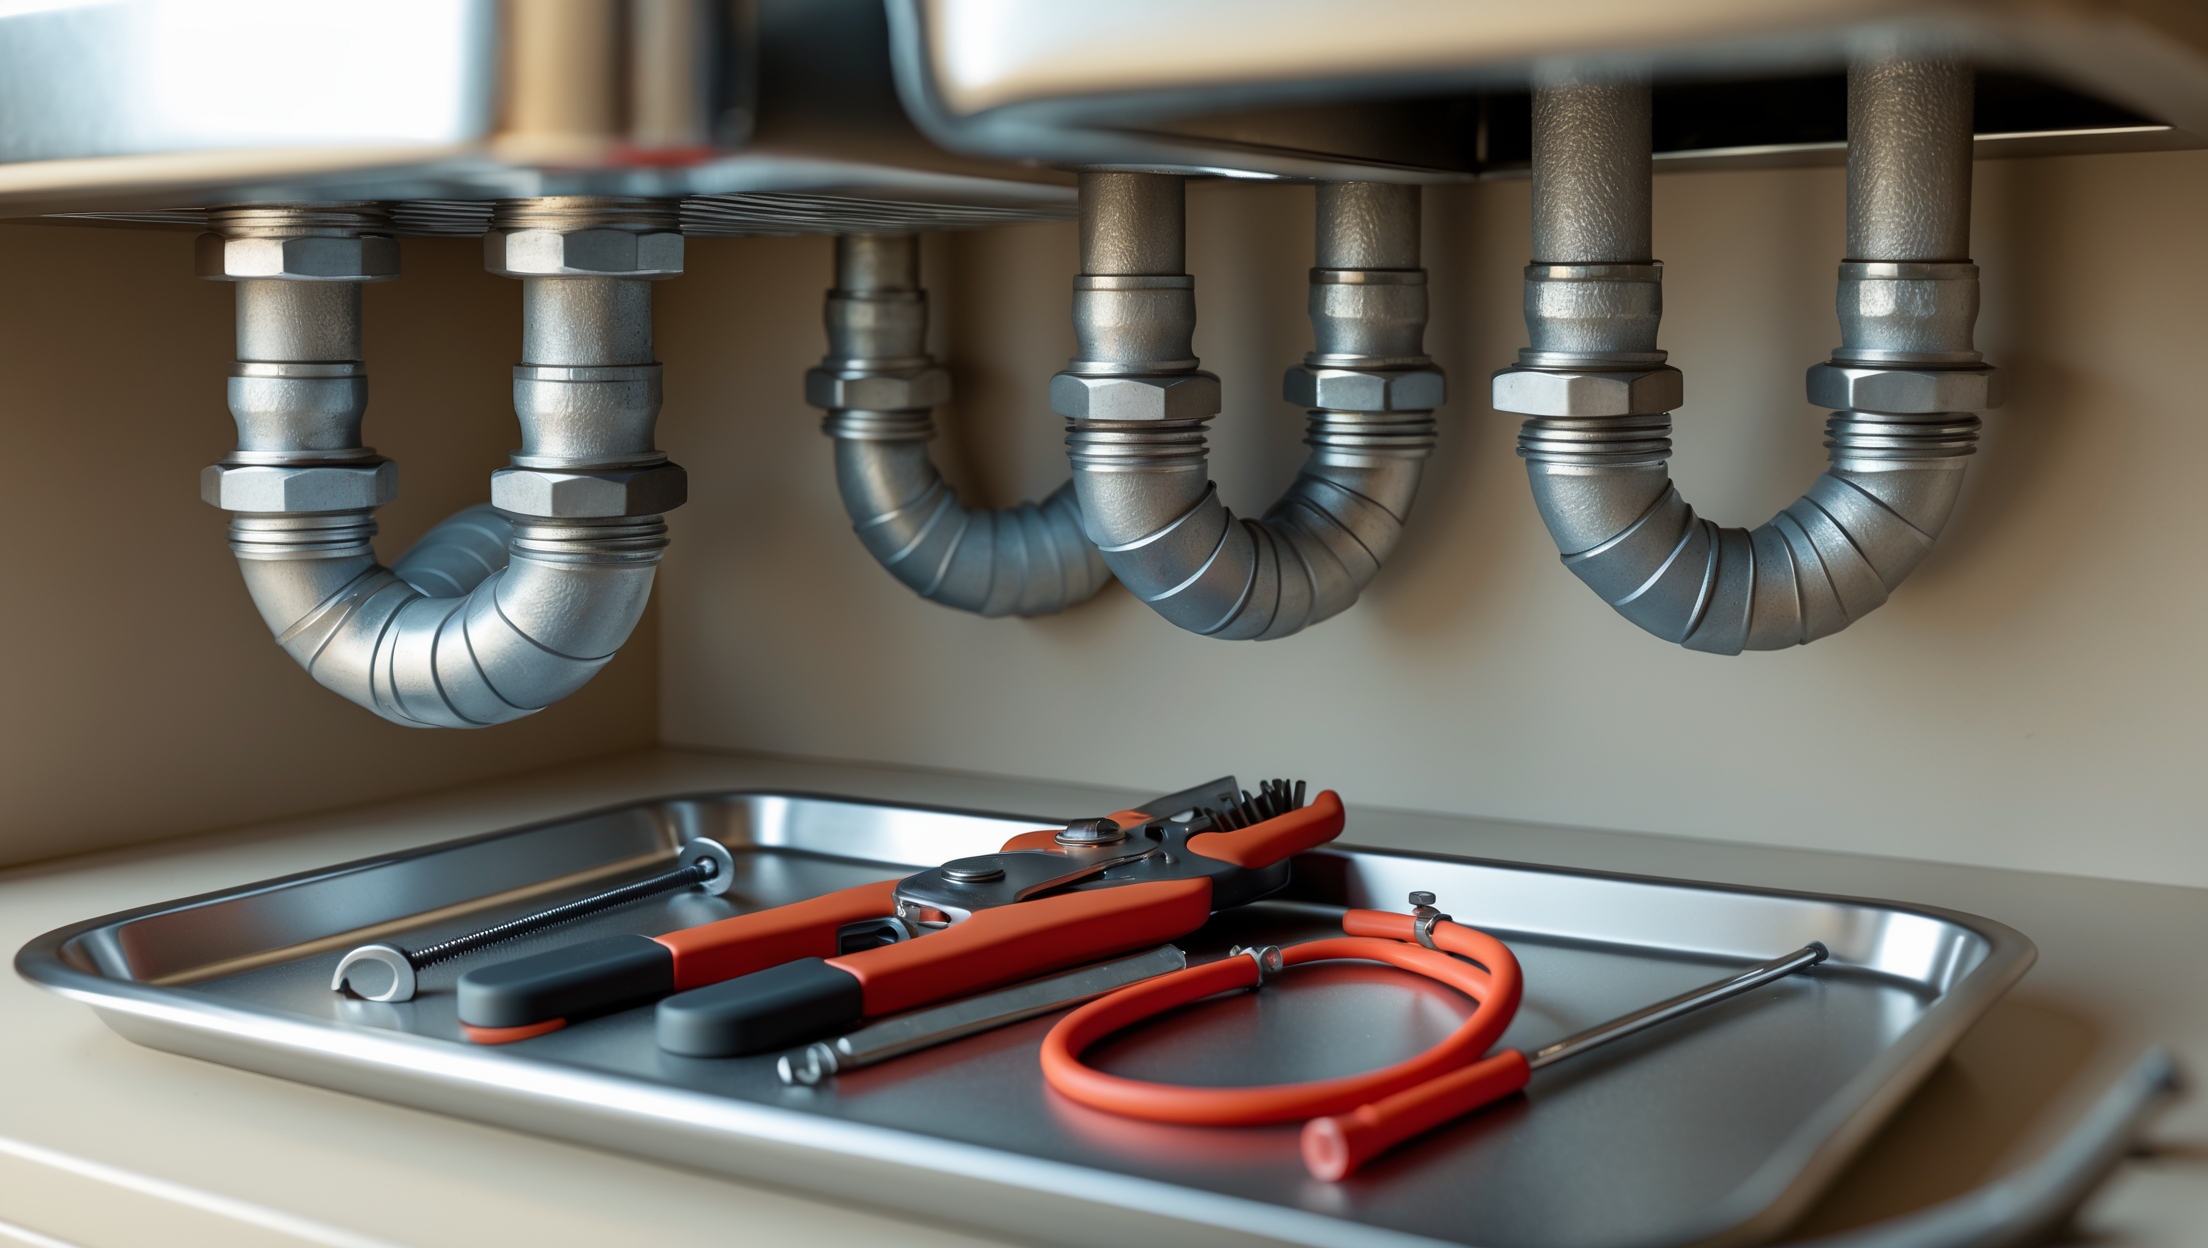
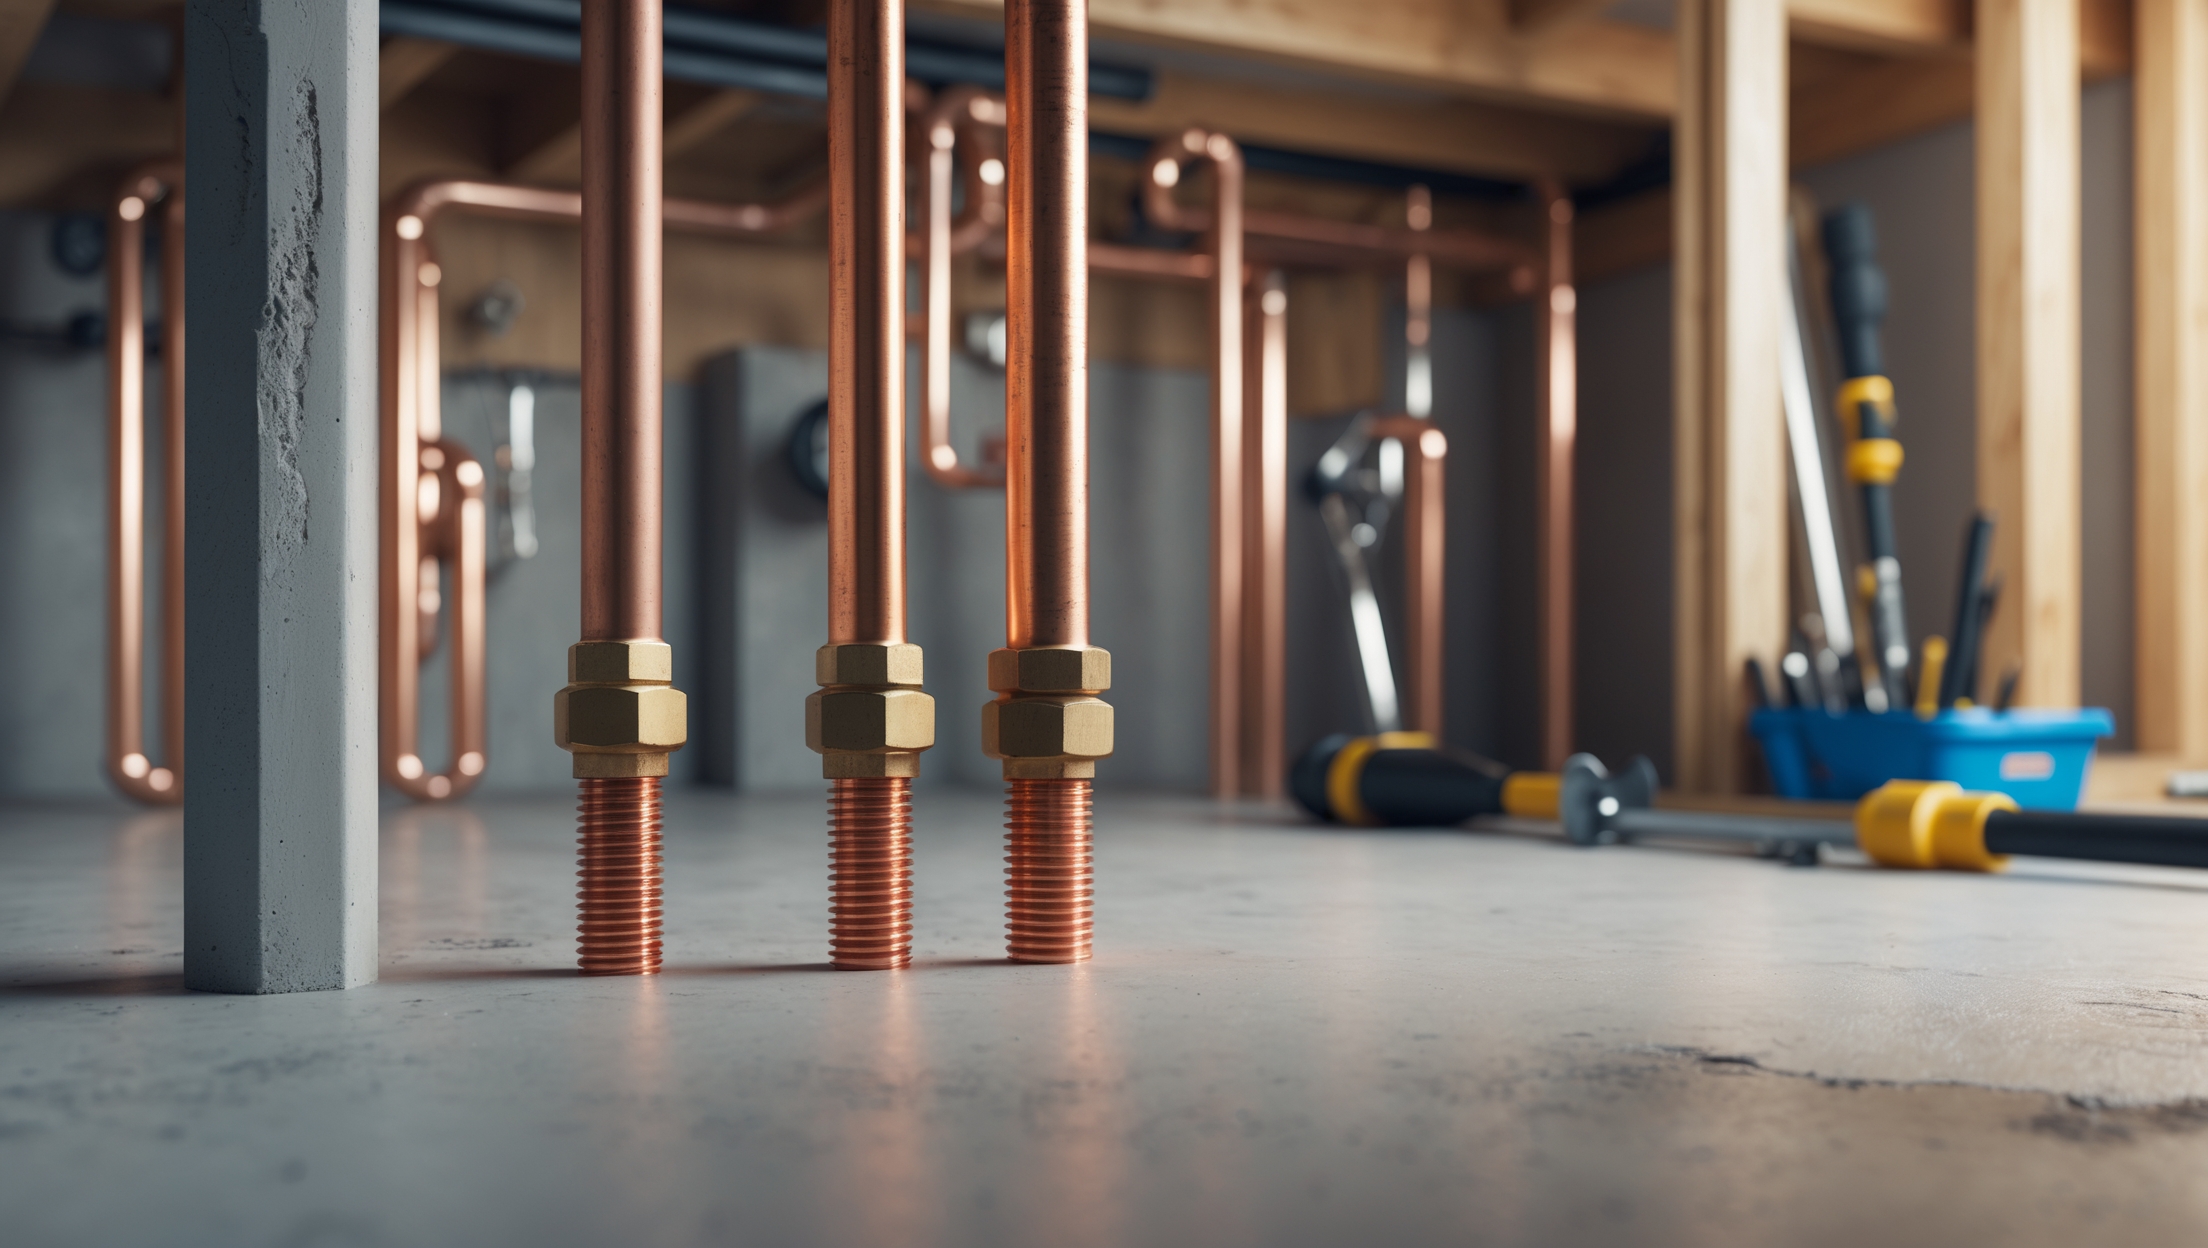
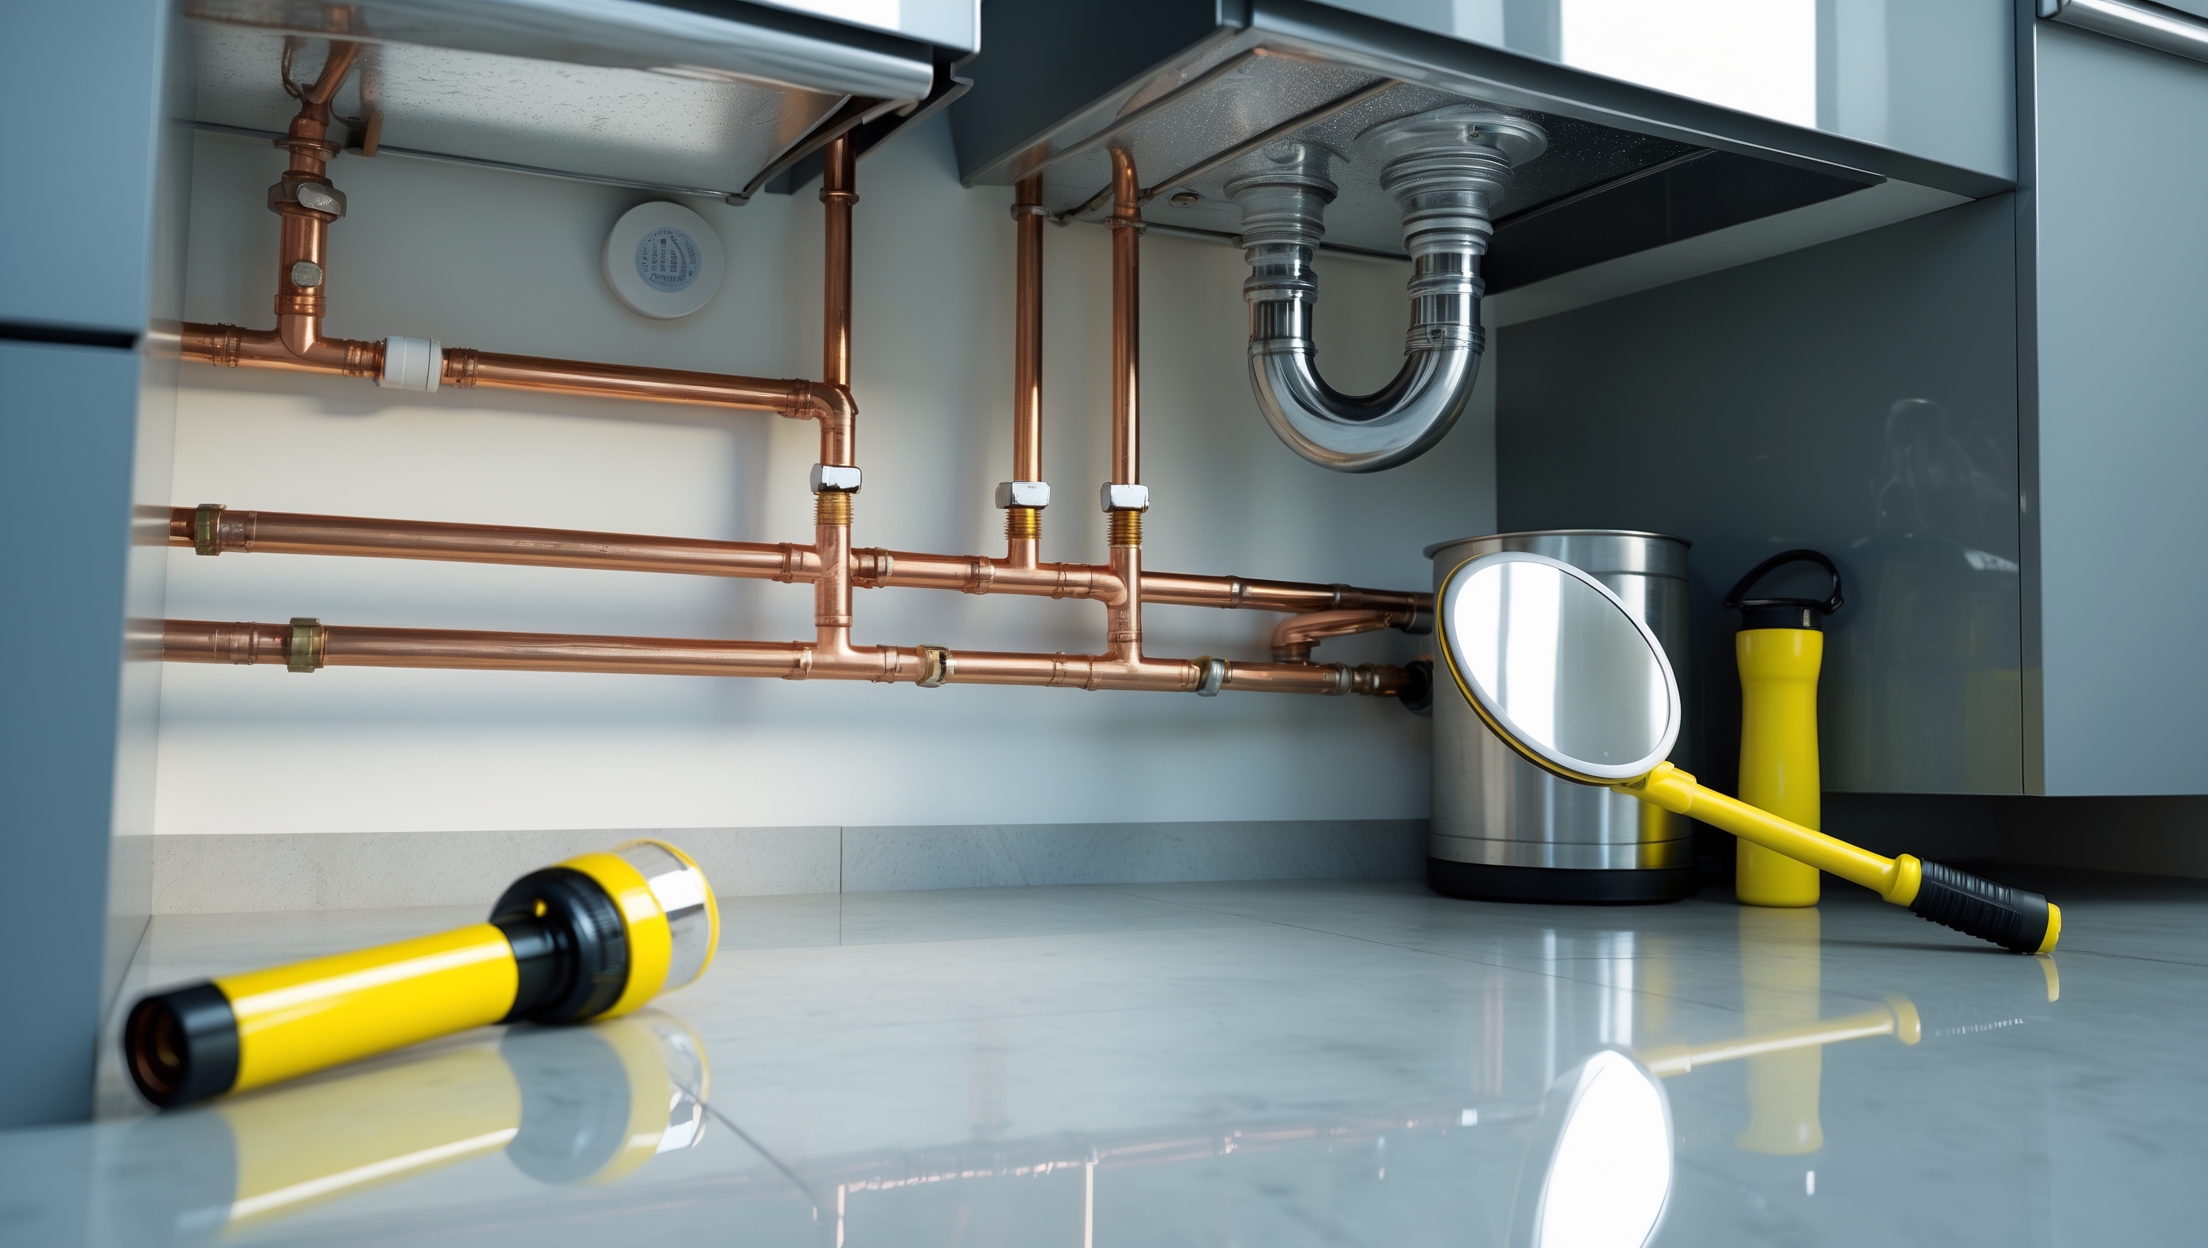
Pipe and Material Storage

Piping Organization

Pipe sections and tubing can quickly become tangled and hazardous. Install horizontal wall racks, ceiling-mounted pipe hangers, or vertical floor racks to separate copper, PEX, PVC, and steel pipe. Label sections by diameter and type.

Consumables and Spare Parts

Set up divided bins for pipe fittings, connectors, fasteners, gaskets, and joint compounds. Keep a running inventory, and rotate older stock to the front to avoid expired materials (especially sealants and adhesives).

Lighting, Power, and Ventilation: Creating a Safe Work Environment

Lighting

Effective lighting is non-negotiable. Overhead LED shop lights provide bright, energy-efficient illumination. Add task lighting at the bench and in shadow-prone corners. Position lights to minimize glare and avoid casting shadows on your work area.

Electrical Safety

  • Install ground-fault circuit interrupter (GFCI) outlets to reduce shock risk near water sources.
  • Use heavy-duty extension cords and avoid daisy-chaining power strips.
  • Keep cables off the floor to prevent tripping and water contact.

Ventilation

Many plumbing tasks produce fumes or dust—soldering, using PVC cement, or cutting metal pipe. Install a window fan, exhaust vent, or portable air purifier. In basements, a dehumidifier helps prevent mold and tool rust.

Organizing for Efficiency: Workflow, Labels, and Maintenance

Labeling and Inventory

  • Label every drawer, bin, and shelf with contents and, if needed, part numbers.
  • Post a laminated quick-reference chart for pipe sizes, fitting types, and thread standards above your bench.
  • Keep a digital or paper inventory to track tool and material usage.

Routine Cleaning and Upkeep

  • Wipe down benches and tools after each session to prevent corrosion and buildup.
  • Sharpen cutting tools and oil moving parts monthly.
  • Dispose of hazardous waste (solvents, old pipes) in accordance with local regulations.

Safety Essentials: Fire, Chemical, and Injury Prevention

Fire Safety

  • Mount a Class B/C fire extinguisher within easy reach.
  • Keep a fire blanket near the soldering/cutting zone.
  • Store flammable liquids in a dedicated, ventilated cabinet.

Chemical Handling

  • Use gloves, goggles, and, if needed, a respirator when handling solvents, flux, or pipe dope.
  • Store chemicals in original containers with labels intact.
  • Post Material Safety Data Sheets (MSDS) for all hazardous substances.

Personal Protective Equipment (PPE)

  • Stock up on safety glasses, work gloves, and hearing protection.
  • Wear steel-toed boots for heavy work and when handling large pipes.
  • Have a fully stocked first aid kit and eyewash station available.

Noise, Dust, and Waste Management

Controlling Noise

Plumbing workshops can get loud—pipe cutting, hammering, and power tools all contribute. Use rubber mats to dampen noise, install soundproofing panels if needed, and always wear hearing protection during loud activities.

Dust and Debris Collection

Install a shop vacuum with HEPA filters or a wall-mounted dust collector near the cutting area. Sweep floors regularly, and keep walkways clear of debris to prevent slips and falls.

Waste Disposal

  • Separate metal, plastic, and hazardous waste. Recycle scrap metal and unused pipe where possible.
  • Dispose of solder, adhesives, and chemical containers according to local hazardous waste rules.

Upgrading Your Workshop: Advanced Features and Extras

Plumbing-Specific Additions

  • Pipe Threading Station: Mount a manual or powered pipe threader for custom lengths and fittings.
  • Test Bench: Set up a bench with pressure gauges and water connections for leak-testing assemblies.
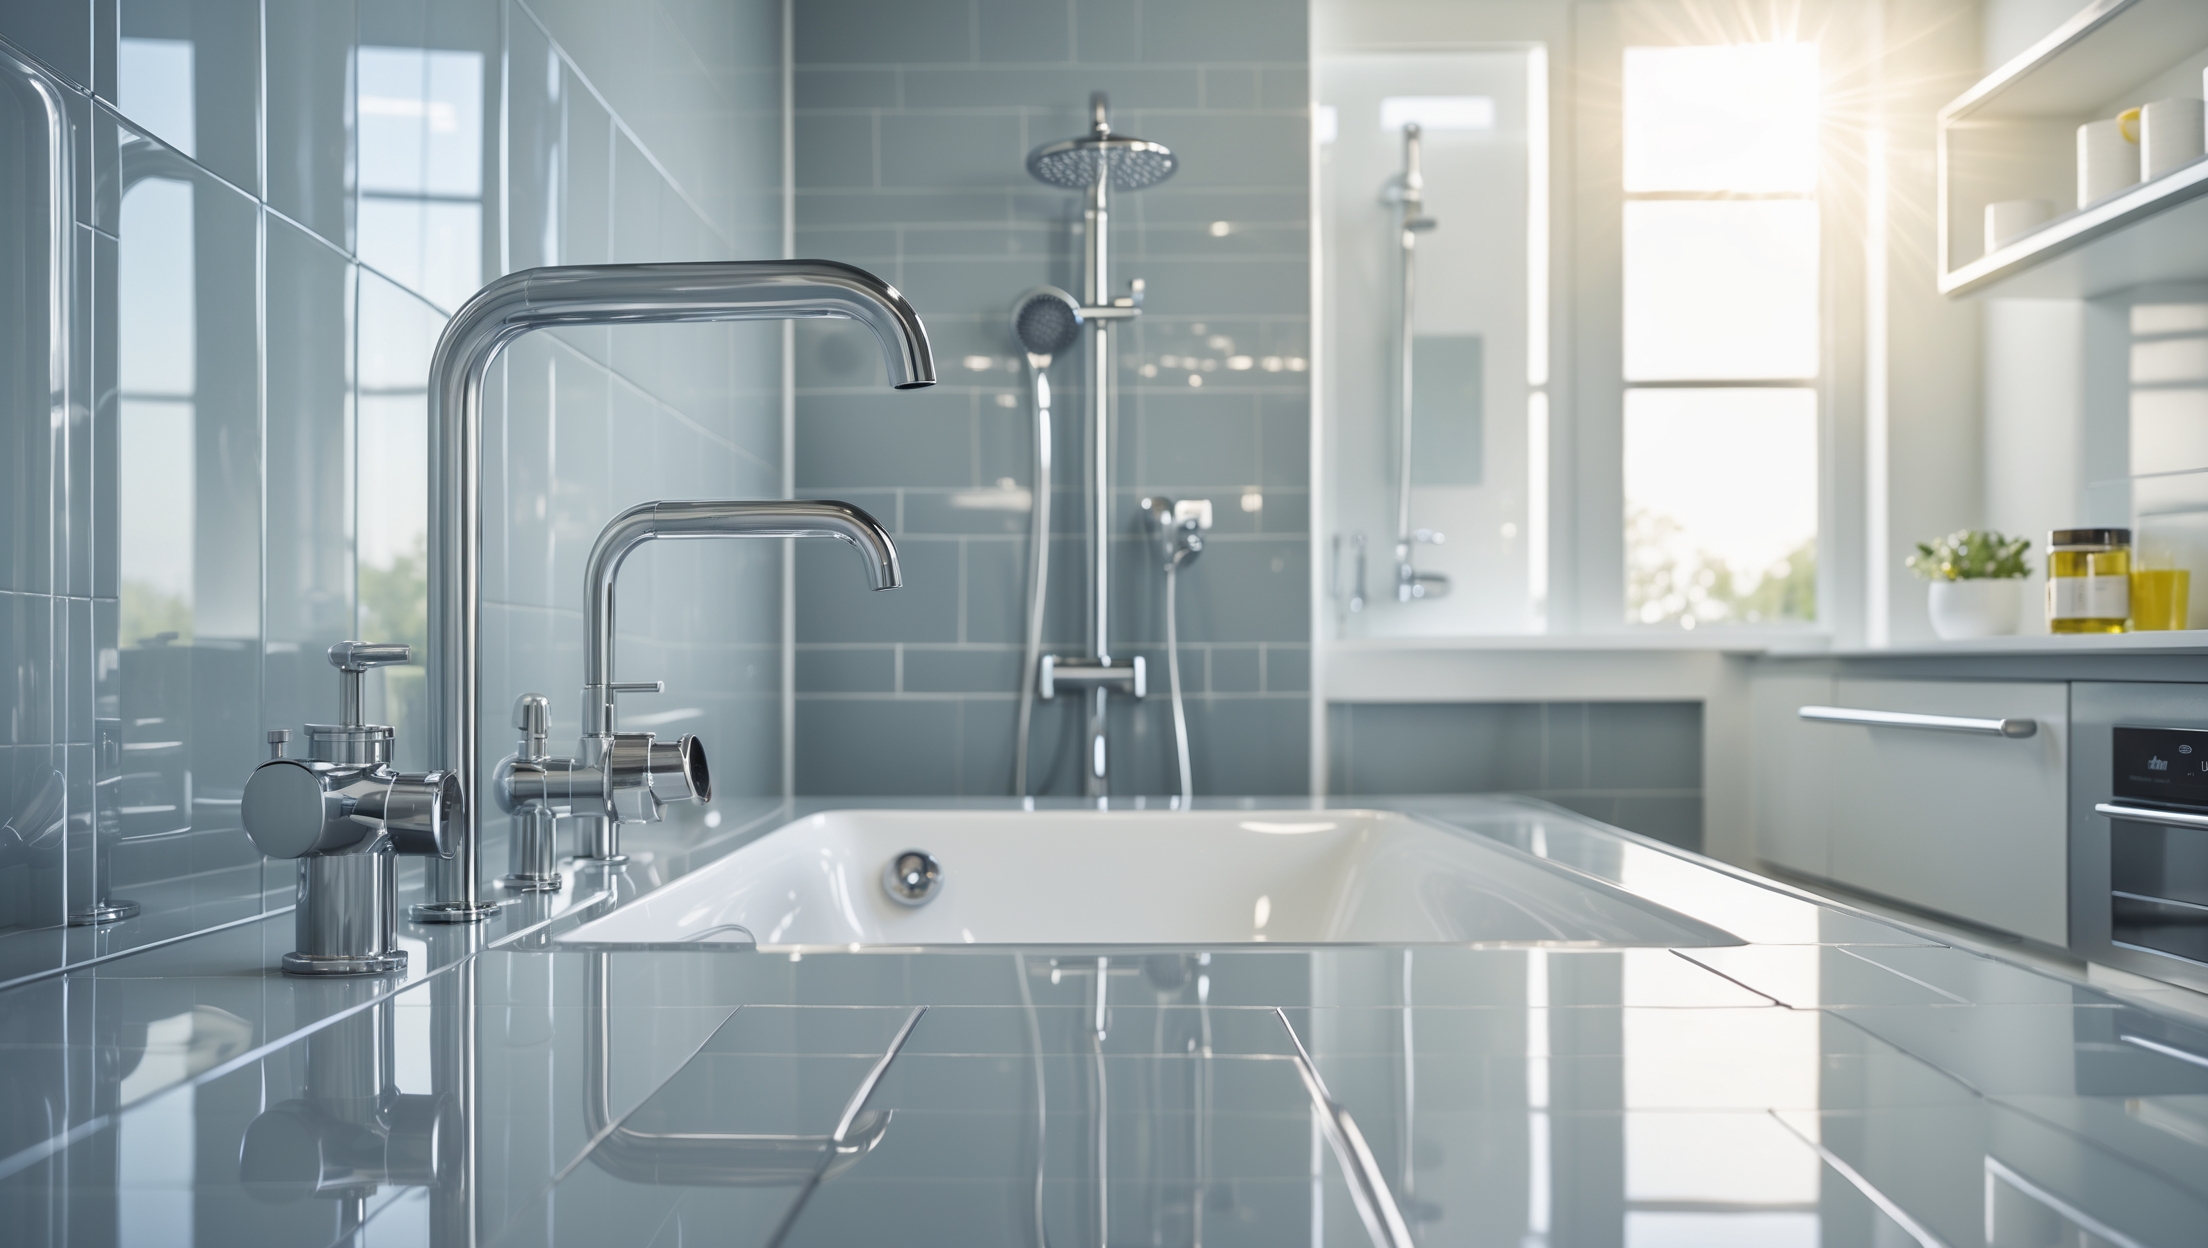
  • Dedicated Water Supply: If possible, install a utility sink or hose bib for cleaning and testing.

Technology and Organization Tools

  • Install a wall-mounted tablet or computer for viewing digital manuals, inventory management, or video tutorials.
  • Use barcode or QR code systems for quick inventory checks.
  • Integrate smart lighting or voice-activated switches for convenience.

Common Mistakes to Avoid When Setting Up Your Plumbing Workshop

  • Underestimating Space Needs: Crowded workspaces lead to clutter and accidents.
  • Neglecting Safety: Skipping PPE or fire protection can have serious consequences.
  • Poor Lighting: Insufficient lighting causes mistakes and increases injury risk.
  • Lack of Ventilation: Fumes from solvents and solder can be hazardous without proper airflow.
  • Improper Tool Storage: Tools left on benches or floors are easily damaged or lost.
  • Ignoring Moisture Control: Failing to manage humidity will rust tools and degrade materials.

Conclusion: Building a Workshop that Grows with You

Establishing a dedicated plumbing workshop at home is an investment in your skills, safety, and project satisfaction. By carefully selecting your space, organizing for efficiency, and implementing robust safety measures, you’ll create a workshop that empowers you to tackle everything from minor repairs to major installations with confidence. Remember, the ideal setup isn’t static—it evolves alongside your needs and ambitions. As you gain experience, you may find new tools or techniques that demand extra storage or specialized work zones. Stay proactive: keep your space clean, your inventory up-to-date, and your safety practices uncompromising. A well-maintained workshop isn’t just a convenience—it’s a foundation for quality workmanship and peace of mind. Whether you’re fixing a leaky faucet, building a custom shower, or just learning the ropes, the right workshop makes every plumbing challenge more manageable and rewarding. Start small if you must, but plan with growth in mind. Your future self—and your plumbing projects—will thank you.

144 comments
Andrew Clark

I have a basement that tends to get pretty damp and I’m worried about moisture affecting my plumbing tools. What are some effective ways to control humidity and prevent rust in a basement workshop?

    Mario The Plumber

    To keep humidity under control in your basement workshop, consider using a dehumidifier and make sure the space is well-ventilated, either with fans or by occasionally opening windows if possible. Store your plumbing tools in airtight containers or tool chests with silica gel packs to absorb moisture. Applying a light coat of oil on metal tools can also help prevent rust. Regularly check for leaks or standing water and address them quickly to maintain a dry environment.

Christopher White

You mentioned space requirements like a 6’x8’ area and clearances around the workbench. I’m trying to work with a pretty tight single-car garage—do you have tips on layout or storage solutions for cramped spaces?

    Mario The Plumber

    Absolutely, a single-car garage can still work well with some smart planning. Opt for wall-mounted pegboards and shelving to maximize vertical space for tools and supplies. Consider a fold-down workbench to save floor space when not in use. Use rolling storage carts that you can tuck away easily, and keep only essential tools accessible to avoid overcrowding. Good lighting and clear, labeled storage will also help keep things organized.

Matthew Johnson

When setting up a plumbing workshop in a basement, what are the best ways to control moisture and ensure proper ventilation, especially in older homes where humidity is already an issue?

    Mario The Plumber

    Controlling moisture in a basement workshop starts with using a good dehumidifier, ideally one with an auto-drain feature. Seal any cracks in walls or floors to prevent water intrusion. For ventilation, install an exhaust fan or vent system that can move damp air outside. In older homes, it also helps to keep plumbing pipes insulated to prevent condensation. Regularly check for leaks and store materials off the floor to avoid water damage.

Megan Perez

If I’m planning to gradually build out my workshop over a couple of weekends, what should I prioritize setting up first—the storage systems, ventilation, or main workbench?

    Mario The Plumber

    Start by setting up your main workbench first, since it will serve as the central area for your projects and give you a dedicated workspace right away. Next, organize basic storage for your essential tools so you can keep things tidy as you work. If your workshop space is enclosed or has limited airflow, make sure to address ventilation early on for safety, especially before handling any chemicals or soldering.

Sarah Gonzalez

If I’m just starting out with a few basic plumbing projects at home, what would you say are the most important safety precautions to set up first in my workspace before I begin collecting more specialized tools?

    Mario The Plumber

    To start safely, make sure your workspace has good lighting and ventilation, and keep the floor clear to prevent trips or slips. Have a basic first aid kit and a working fire extinguisher close by. Store all tools and any cleaning chemicals out of reach of children or pets. Wearing safety goggles and gloves for even simple plumbing tasks is also a good habit from the beginning.

Charles Garcia

Once the space is chosen and set up, what are some key first steps for organizing and labeling plumbing supplies so they’re easy to grab in the middle of a project? I tend to misplace fittings and want a better system.

    Mario The Plumber

    Start by grouping your plumbing supplies by type—fittings, pipes, valves, and tools. Use clear, stackable bins or drawer organizers, and label each container with both a name and a visual cue, like a picture or sample fitting. Pegboards are great for hanging tools. For small parts, compartmentalized boxes work well. Keep the most-used items at eye level and develop a habit of returning everything to its labeled spot after use.

Brian Lee

I’m considering turning my basement into a plumbing workshop, but you mentioned moisture control as a critical concern. Do you have any specific recommendations on preventing condensation or water damage to my tools and materials in a basement setting?

    Mario The Plumber

    Controlling moisture in a basement workshop is important to protect your plumbing tools and materials. Use a dehumidifier to keep humidity levels low and consider sealing any cracks in the walls or floors to prevent water seepage. Store tools in airtight containers or cabinets, and elevate them off the floor. Installing a vapor barrier on walls and floors can also help reduce condensation and potential water damage.

David Robinson

The article mentions the importance of proximity to water sources. If my only available space is a backyard shed, what are the best ways to safely run water and power lines out there without major renovations?

    Mario The Plumber

    Running water and power to a backyard shed can be done safely with some planning. For water, consider using a heavy-duty garden hose with quick-connect fittings for temporary use, or consult a plumber for a more permanent buried pipe with proper insulation against freezing. For power, use an outdoor-rated extension cord for light tasks, but for anything permanent or heavy-duty, hire a licensed electrician to install a weatherproof outdoor circuit. Always ensure all connections are protected from the elements and follow local codes.

Ashley Sanchez

How much time does it typically take to set up a fully functional plumbing workshop at home if I’m starting from scratch and only have weekends free to work on it?

    Mario The Plumber

    If you’re starting from scratch and can only work on weekends, setting up a fully functional plumbing workshop at home will typically take about 4 to 6 weekends. This includes clearing and preparing your space, organizing storage, acquiring tools and materials, and installing safety features. The timeline may vary based on the workshop size, your skill level, and how complex your setup needs to be.

John Lee

For someone working with a tight budget, what are your recommendations for affordable yet effective storage solutions to keep plumbing tools organized and easily accessible in a limited 6’x8’ space?

    Mario The Plumber

    For a compact 6’x8’ space and a tight budget, consider using wall-mounted pegboards for hanging smaller tools and frequently used items—they’re inexpensive and save floor space. Repurpose sturdy plastic bins or stackable containers for organizing fittings and spare parts. Add labeled shelves or even recycled wooden crates along the walls for larger items. Magnetic strips can also help keep metal tools handy while freeing up drawer space.

Diane White

The article mentions planning for large assemblies and pipe cutting. How much extra space beyond the 6’x8’ minimum should I realistically plan for if I occasionally take on bigger plumbing repairs?

    Mario The Plumber

    If you expect to work on larger assemblies or tackle bigger repairs from time to time, planning for at least an extra 2 to 4 feet of space in each direction beyond the 6’x8’ minimum is advisable. This gives you enough room to lay out long pipes, maneuver tools safely, and handle bulky materials without feeling cramped.

David Hernandez

How do you handle the issue of climate control in an outdoor shed being used as a plumbing workshop, especially with sensitive materials or adhesives that might get ruined by extreme cold or heat?

    Mario The Plumber

    Climate control is definitely important in an outdoor shed workshop. To protect sensitive materials and adhesives, consider installing insulation in the walls and ceiling, and use a portable heater in winter and a fan or portable air conditioner in summer. Store temperature-sensitive items in insulated cabinets or coolers if needed. Always check product labels for storage temperature ranges and try to bring especially sensitive supplies indoors during temperature extremes.

Joshua Rodriguez

I noticed the guide talks about the ideal space being at least 6’x8′, but is it possible to adapt some of these tips for people who only have a small corner to work with in an apartment or studio?

    Mario The Plumber

    Absolutely, even if you only have a small corner in an apartment or studio, you can still set up a functional plumbing workspace. Focus on vertical storage with wall-mounted racks or pegboards, use compact toolboxes, and keep only essential tools at hand. Make sure to use a sturdy, portable work surface that can be tucked away when not in use, and always prioritize safety by keeping the area well-lit and free of clutter.

Linda Smith

Is there a recommended budget range for setting up a safe and functional home plumbing workshop, especially considering storage solutions and electrical upgrades?

    Mario The Plumber

    A reasonable budget range for setting up a safe and functional home plumbing workshop is typically between $800 and $2,500. This estimate covers basic tools, sturdy storage solutions like shelving or cabinets, essential safety gear, and modest electrical upgrades such as adding outlets or proper lighting. Costs can vary depending on the size of your space and the quality of materials you choose, but staying within this range should provide a good starting point for most homeowners.

Sean Martin

You mention proximity to water sources is important. If my chosen room doesn’t have existing water lines, how hard is it to add them, and is that something a DIYer can realistically handle?

    Mario The Plumber

    Adding water lines to a room without existing plumbing can be challenging, especially if you’re not experienced. It involves running new pipes, possibly opening walls or floors, and ensuring proper connections to both supply and drainage. Some handy DIYers with plumbing knowledge and the right tools might handle straightforward installations, but for most, hiring a licensed plumber is safer and helps avoid leaks or code issues.

Christopher Lopez

If I want to use an outdoor shed as my plumbing workshop, what specific steps should I take to make sure it’s weatherproof and has safe power access, as the article suggests?

    Mario The Plumber

    To weatherproof your shed, start by sealing any gaps or cracks in the walls, roof, and around doors and windows to keep out moisture. Install proper insulation and consider using weather-resistant materials for flooring. For safe power access, have a licensed electrician install a dedicated circuit with grounded outlets, and use weatherproof electrical boxes and covers. Also, make sure lighting and power tools are suited for outdoor or workshop use to prevent electrical hazards.

Nathan Clark

If I want to eventually work on bigger plumbing projects at home, is it possible to expand the workspace easily once I’ve set the initial area up, or should I plan for extra space right from the start?

    Mario The Plumber

    It’s definitely easier to plan for extra space from the start if you anticipate tackling bigger projects later. While you can expand a workspace after setting it up, it may involve moving equipment or reorganizing your storage. If you have the room, setting aside a little extra space now will make future expansion much smoother and less disruptive.

Jennifer Sanchez

Could you elaborate a bit on how to manage moisture in a basement workshop, especially for those of us who live in humid areas? I’m concerned about rust and tool longevity if I choose my basement as the primary space.

    Mario The Plumber

    Managing moisture in a basement workshop is critical to preventing rust and protecting your tools. Use a dehumidifier to keep humidity below 50%, and consider installing a hygrometer to monitor levels. Store tools in airtight or moisture-resistant containers with silica gel packs. Elevate items off the floor and improve air circulation with fans. If possible, seal any cracks in the foundation to reduce water seepage. These steps will help maintain a dry environment and extend your tools’ lifespan.

Susan Davis

Could you provide more details about moisture control in basement workshops? What are some common mistakes people make in managing humidity that could damage plumbing tools or materials?

    Mario The Plumber

    Moisture control in basement workshops is crucial because high humidity can cause rust on tools and degrade materials like pipe sealants. Common mistakes include not using a dehumidifier, storing tools directly on concrete floors, and failing to seal foundation cracks. It’s best to use moisture barriers, keep tools on shelves or pegboards, and monitor humidity with a hygrometer to help protect your equipment.

Jennifer Miller

If I’m mainly working on smaller plumbing repairs, would a 6’x8′ space in my garage really be enough, or should I plan for more room in case my projects get bigger over time?

    Mario The Plumber

    A 6’x8′ space in your garage is generally adequate for smaller plumbing repairs, especially if you organize your tools and materials efficiently. However, if you think you might tackle bigger projects later—like pipe replacements or building larger assemblies—it’s wise to leave room for expansion. You could start with your current space and keep adjacent areas clear, just in case you need more room down the line.

Joseph Ramirez

If budget is tight, are there certain safety essentials or storage upgrades you’d consider non-negotiable, and which items could be added further down the line as funds allow?

    Mario The Plumber

    If you’re prioritizing on a budget, make sure to invest in basic personal protective equipment like safety goggles, gloves, and a first aid kit—these are non-negotiable for safe plumbing work. For storage, a sturdy toolbox or shelving to keep sharp tools organized and out of reach is essential. Extras like specialty organizers or advanced safety gear can be added later as your workshop and budget grow.

Karen Harris

You mention that lighting and ventilation are important when picking a workshop space. What type of lighting is best for plumbing projects, and how can I improve ventilation if I only have a small window?

    Mario The Plumber

    For plumbing projects, bright, even lighting is key. LED shop lights or adjustable task lights work well, as they reduce shadows and help you spot leaks or small parts. If you only have a small window, improve ventilation with a portable exhaust fan or a window fan to boost air circulation. You can also use a dehumidifier to help control moisture in the space.

Susan Thompson

You mention that a 6’x8’ area is the minimum recommended, but what should I do if I only have a smaller garage bay available? Are there layout tips for maximizing limited space without compromising safety?

    Mario The Plumber

    If your garage bay is smaller than 6’x8′, focus on vertical storage like wall-mounted racks and pegboards to keep tools organized and off the floor. Use stackable bins for fittings and parts. Prioritize only the most essential tools and equipment, and ensure you leave a clear walking path. Good lighting and securing heavy tools at waist height will help maintain safety even in a tighter space.

Margaret Thomas

I’m just getting into home plumbing and have a small basement that sometimes gets damp. The article mentions moisture control and ventilation—can you recommend specific ways I could handle humidity to protect both tools and any projects I’m working on down there?

    Mario The Plumber

    To manage humidity in a damp basement, consider using a dehumidifier to keep moisture levels in check. Installing a small exhaust fan or improving window ventilation can also help air circulation. Store tools in sealed plastic bins or moisture-resistant cabinets, and use silica gel packs or desiccants in drawers. Regularly check for leaks or standing water, and try to keep your workspace off the floor with shelves or wall-mounted racks.

Betty Jones

Could you elaborate on how much access to water lines is actually necessary for a home plumbing workshop? For basic projects, is it enough to be near a single faucet, or do you recommend a dedicated water hookup?

    Mario The Plumber

    For most basic plumbing projects, being near a single faucet or utility sink is usually sufficient. This gives you access to water for testing repairs, cleaning parts, and filling containers. A dedicated water hookup is helpful if you plan to build or test more complex assemblies regularly, but for general maintenance and DIY repairs, proximity to an existing faucet should work well. Just ensure you have reliable drainage and easy shutoff access for safety.

Margaret Garcia

How long does it typically take to fully outfit a small plumbing workshop with the essentials for both storage and safety, assuming I’m doing it on weekends while running my business?

    Mario The Plumber

    Outfitting a small home plumbing workshop with essentials for storage and safety usually takes about three to six weekends, depending on how much time you can dedicate and whether you already have some tools or storage solutions. Tasks like organizing the space, installing shelving, and setting up safety equipment can often be spread out. If you plan ahead and gather supplies in advance, you might even finish a bit sooner.

Thomas Thompson

If I’m working with a limited budget, what are the most essential storage solutions I should prioritize first for plumbing tools and hazardous materials?

    Mario The Plumber

    With a tight budget, start by using sturdy plastic bins or stackable containers to organize plumbing tools—they’re affordable and keep tools sorted. For hazardous materials like chemicals or adhesives, invest in a lockable metal box or cabinet to store them safely out of reach. Pegboards or simple wall hooks are also cost-effective ways to keep frequently used tools accessible and off your work surface.

Donna Gonzalez

About setting up a workshop in an outdoor shed, do you have recommendations for affordable ways to handle climate control and security, especially in areas with harsh winters? I want to keep my materials safe and in good shape year-round.

    Mario The Plumber

    For climate control in an outdoor shed, consider using insulated wall panels and weatherstripping to keep out cold drafts. Affordable space heaters with built-in thermostats can help maintain a stable temperature, but make sure they’re rated for shed use and safety. For moisture, a small dehumidifier can be effective. On the security side, use heavy-duty padlocks, reinforce doors and windows, and install motion-sensor lights around the shed. These options will help protect your tools and keep them in good condition through the winter.

Ashley Gonzalez

For someone who mostly handles basic repairs but wants to be ready for bigger projects in the future, should I start with the minimum suggested 6’x8’ space or plan for a larger area right away? How hard is it to expand the workshop later?

    Mario The Plumber

    If you expect to tackle bigger plumbing projects down the line, it’s wise to plan for a slightly larger space now—maybe 8’x10′ or so—if you have the room. Expanding a workshop later can be tricky, especially if you have to move heavy benches, storage, or plumbed fixtures. Starting with a bit more room gives you flexibility for extra tools and materials as your skills grow.

Linda Gonzalez

If I’m working out of my garage but don’t have existing water lines nearby, what are some practical steps or costs involved in setting up a water supply for plumbing projects?

    Mario The Plumber

    To set up a water supply in your garage, you’ll likely need to extend a water line from your home’s existing plumbing. This could involve running PEX or copper pipes through walls or ceilings, installing shut-off valves, and possibly hiring a plumber if you’re not experienced. Materials might cost $100–300, but professional installation could range from $500–1500 depending on distance and complexity. Don’t forget to consider permits and proper insulation for pipes if your garage gets cold.

Aaron White

I’m curious about workshop ventilation, especially in basements where moisture and air quality can be issues. What are some effective methods to improve ventilation and keep humidity under control for both safety and long-term tool storage?

    Mario The Plumber

    For basement workshops, using a combination of solutions works best. Install a high-quality exhaust fan to move stale air out, and consider a dehumidifier to maintain healthy humidity levels. If possible, open windows or vents occasionally for fresh air exchange. Make sure tools are stored off the floor and in sealed containers to protect against moisture. Regularly check for any leaks or damp spots to catch issues early.

Donna Thomas

If I want to set up my plumbing workshop in my basement, what are some practical ways to handle moisture and ventilation issues without a huge renovation budget?

    Mario The Plumber

    To manage moisture in your basement workshop, consider using a dehumidifier to keep humidity down and prevent tool rust. For ventilation, portable exhaust fans or window fans can help improve airflow. Store tools on shelves or in cabinets off the floor to avoid dampness. Sealing basement walls with waterproof paint and using moisture-absorbing products like silica gel can further help without requiring major renovation work.

Tyler Jackson

Once I have my main workbench and clear space set up, what should be my next steps for ensuring proper lighting and power supply in an outdoor shed workshop?

    Mario The Plumber

    After your workbench and space are ready, focus on installing bright, overhead lighting—LED strip lights or tube lights work well for sheds. Make sure outlets are accessible around your workspace for tools, and consider weatherproof, outdoor-rated fixtures and GFCI outlets for safety. If your shed isn’t already wired, consult a qualified electrician to run proper wiring and ensure everything meets local electrical codes.

Rachel Robinson

If starting out with just a 6’x8’ space, which storage solutions would you suggest to maximize efficiency and keep everything organized—especially when the area is tight but I still need to access tools quickly?

    Mario The Plumber

    With a 6’x8’ space, consider using wall-mounted pegboards and shelving to keep tools visible and off your work surface. Magnetic strips are great for holding metal hand tools within easy reach. Stackable clear bins or drawer units under your workbench can organize smaller parts and fittings. Also, try hanging frequently used items on hooks or racks for quick grab-and-go access. Keeping everything labeled will help you stay organized in a compact area.

Charles Davis

You mention that basements need special attention regarding moisture control and ventilation. Could you elaborate on the best ways to manage humidity and prevent rust or mold if someone chooses a basement for their plumbing workshop?

    Mario The Plumber

    Managing moisture in a basement workshop is crucial. Use a dehumidifier to keep humidity below 50%, which helps prevent mold and rust. Ensure the space is well-ventilated, either with an exhaust fan or by opening windows when possible. Store tools in airtight or moisture-resistant containers, and consider using silica gel packs in toolboxes. Regularly check for leaks or water infiltration and address them quickly to maintain a dry, safe workspace.

Ashley Lopez

Could you share an estimated budget range for outfitting a basic home plumbing workshop, factoring in costs for storage solutions, lighting, and safety equipment mentioned in the article?

    Mario The Plumber

    Outfitting a basic home plumbing workshop typically costs between $350 and $700. This estimate includes basic shelving or pegboards for storage ($100–$200), LED workshop lighting ($50–$120), and essential safety gear like gloves, goggles, and a fire extinguisher ($50–$100). The remaining budget can go toward a sturdy workbench and organizational bins. Prices may vary depending on brands and local suppliers.

Mark Ramirez

If I want to be able to handle hazardous materials safely in my workshop, what specific safety equipment or procedures should I look into from the start?

    Mario The Plumber

    To handle hazardous materials safely, you’ll need protective gear like gloves, eye protection, and possibly a respirator depending on the chemicals involved. Make sure your workshop has good ventilation, a clearly marked and accessible first-aid kit, and a fire extinguisher. Store hazardous substances in labeled containers away from heat or sunlight, and keep a spill kit on hand. Always follow the instructions and safety data sheets for each material you use.

Charles Johnson

When deciding between a garage and a basement for a plumbing workshop, how do you recommend handling moisture issues in the basement compared to temperature swings in the garage?

    Mario The Plumber

    In a basement, it’s important to address moisture by using a dehumidifier, sealing any cracks in the walls, and storing tools off the floor to prevent rust. For a garage, focus on insulation to minimize temperature swings and use a portable heater or fan as needed. Both spaces can work well if you manage these specific challenges.

Helen Martinez

The article mentions the need for good ventilation in both garages and basements. Are there specific ventilation systems or products you’d recommend to control moisture and fumes, especially if I’m planning to use the workshop regularly?

    Mario The Plumber

    For regular use, consider installing an exhaust fan or a ventilation system designed for workshops—these can help remove fumes and bring in fresh air. In basements, a dehumidifier is important to control moisture. Look for systems with HEPA filters if you’ll be using chemicals or soldering. For garages, wall-mounted exhaust fans or window fans work well, and make sure your setup allows for cross-ventilation by opening windows or vents when working.

Sean Brown

If I’m considering setting up my plumbing workshop in the basement, do you have any tips for managing moisture and ventilation, especially if I don’t have windows down there? I want to make sure my tools stay rust-free and the space is safe.

    Mario The Plumber

    Managing moisture and ventilation in a windowless basement is definitely important. Consider using a dehumidifier to keep humidity levels low, which helps prevent rust on your tools. For ventilation, you can install an exhaust fan or a ducted system to circulate air and remove fumes. Store your tools in airtight containers or cabinets with silica gel packs, and check regularly for any signs of dampness. Also, avoid placing tools directly on concrete floors, as they can transfer moisture.

Michelle Clark

For a small business with limited budget, what would be your top three storage solutions to prioritize first when organizing plumbing tools? I’m working with about a 6×8 foot area as suggested in the article.

    Mario The Plumber

    With a 6×8 foot space and a tight budget, start with sturdy wall-mounted pegboards for hanging your most-used hand tools, as they save floor space and keep items visible. Second, invest in stackable plastic bins or crates for smaller parts like fittings and connectors. Third, use a compact shelving unit to organize heavier tools and toolboxes. These options maximize your space and keep everything accessible.

Sean Perez

In the section about choosing a location, you mention the basement as an option but highlight moisture and ventilation as concerns. What are the best ways to control humidity in a basement workshop to prevent rust on my tools?

    Mario The Plumber

    To keep humidity under control in a basement workshop, consider using a dehumidifier set to maintain relative humidity below 50%. Good ventilation is important; installing exhaust fans or ensuring windows can open will help. Store your tools in airtight containers or use moisture-absorbing packs in your toolboxes. Regularly check for leaks or damp spots, and address any water intrusion promptly to prevent rust from developing.

Brian Gonzalez

Do you have any tips for setting up a workshop on a tight budget, like prioritizing which storage or safety essentials to invest in first?

    Mario The Plumber

    When working with a tight budget, start by investing in basic safety essentials like good-quality gloves, safety glasses, and a first-aid kit. For storage, sturdy plastic bins or wall-mounted pegboards are affordable and help keep tools organized. Focus on multipurpose items that offer flexibility, and gradually add specialized storage or safety gear as your budget allows.

Richard Thompson

Could you share some practical storage solutions for keeping all the small plumbing fittings and parts organized, especially if I’m working within a fairly tight 6’x8′ area like you mentioned?

    Mario The Plumber

    For a compact 6’x8′ workshop, consider using wall-mounted pegboards with hooks and small bins for fittings and parts. Clear, stackable drawer organizers work well on shelves or under benches for sorting washers, nuts, and valves. Magnetic strips can also hold metal tools and parts. Label everything clearly to find what you need quickly, and use vertical space as much as possible to keep your work area uncluttered.

Christopher White

If I plan on working occasionally with hazardous materials like pipe glue or cleaner, would you recommend any specific safety protocols or storage setups beyond the usual workshop basics mentioned in the article?

    Mario The Plumber

    When working with hazardous materials like pipe glue or cleaner, it’s important to ventilate your workspace well—consider adding a small exhaust fan or always working near an open window. Store these chemicals in a dedicated, clearly labeled cabinet away from direct sunlight and heat sources. Keep safety data sheets handy, wear gloves and eye protection, and always have a spill kit nearby for quick cleanup.

Thomas Perez

The article suggests a 6’x8′ area as a starting point, but how tight is that in practice if you’re working on something like a water heater replacement or assembling longer pipe runs? Does it make sense to plan for expansion from the get-go?

    Mario The Plumber

    A 6’x8′ area works well for storing tools and doing small repairs, but it can feel cramped for larger projects like replacing a water heater or handling long pipe assemblies. If you expect to tackle bigger jobs, it’s wise to plan for more space or at least keep the layout flexible so you can expand your workspace as needed in the future.

Richard Robinson

I am considering using an outdoor shed for my plumbing workspace, but I am worried about securing expensive tools and preventing theft. Do you have any tips or must-have security features for sheds used as workshops?

    Mario The Plumber

    Securing your tools in an outdoor shed is very important. Start by installing a quality deadbolt or padlock on the main door, and consider reinforced hinges. Adding motion sensor lighting outside the shed helps deter theft. If possible, use a lockable tool chest inside and secure valuables to the floor with a cable lock. For extra protection, you might add a battery-powered alarm system or security camera. Always avoid leaving tools visible from windows.

Ashley Lewis

I see you suggest a 6×8 area for basic projects, but what adjustments would you recommend for someone who’s mainly doing larger repairs, like assembling multi-piece drain systems at home?

    Mario The Plumber

    For larger repairs such as assembling multi-piece drain systems, you’ll want to expand your workspace to at least 8×10 feet or even larger if possible. This gives you enough room to lay out long pipes, use full-length tools, and move around safely. Consider adding a sturdy, extended workbench and extra shelving to keep all parts and fittings organized and easily accessible.

Mark Martinez

After setting up the main workspace, what steps would you suggest for safely handling and storing hazardous materials like pipe solvents or adhesives, especially if kids sometimes enter the area?

    Mario The Plumber

    After your workspace is set up, store all hazardous items like pipe solvents and adhesives in locked cabinets or high shelves well out of children’s reach. Make sure all containers are tightly sealed and clearly labeled. Consider installing childproof locks and always clean up spills immediately. It’s also wise to keep safety data sheets for each material handy and to ventilate the area well when using these substances.

Kimberly Taylor

You mention moisture control and ventilation as critical for a basement workshop. Do you have specific recommendations for handling humidity and preventing rust on tools when setting up in a basement environment?

    Mario The Plumber

    To handle humidity in a basement workshop, consider using a dehumidifier to keep moisture levels below 50%. Good ventilation is also key—an exhaust fan or even a small window fan can help circulate air. For tool protection, store tools in airtight containers or use silica gel packs in your tool drawers. Regularly wiping down metal surfaces with a light oil can also help prevent rust.

Daniel Miller

You mentioned a 6’x8’ area is enough for basic projects, but how cramped would that feel if I wanted to tackle something bigger, like building a shower pan? Should I plan for more space right from the start?

    Mario The Plumber

    A 6’x8’ area works well for basic repairs and smaller projects, but building a shower pan can feel pretty tight in that space, especially when you lay out materials and tools. If you think you’ll tackle larger installations or need room to move freely, planning for a bit more space—like 8’x10’—will make things more comfortable and efficient in the long run.

Joseph Lee

When setting up a plumbing workshop in a basement, what would you recommend for dealing with moisture and ventilation? Have you found any specific dehumidifiers or setups that work well for keeping tools from rusting over time?

    Mario The Plumber

    Moisture control is key in a basement workshop. A quality dehumidifier is essential—look for one rated for the square footage of your space and with a built-in humidistat for automatic control. Brands like Frigidaire and Honeywell are reliable. Ventilation helps too, so if possible, install an exhaust fan or use a box fan in a window. Store tools in airtight cases or use silica gel packs in drawers to further reduce rust risk.

Nathan Gonzalez

The article mentions moisture control as a critical concern in basement workshops. Do you have any specific recommendations for dehumidifiers or moisture barriers that work well for plumbing spaces, especially in older homes with more humidity?

    Mario The Plumber

    For basement workshops in older, humid homes, a high-capacity dehumidifier (50–70 pints per day) is ideal. Brands like Frigidaire and Honeywell often perform well in these conditions. For moisture barriers, consider installing a heavy-duty 6-mil polyethylene vapor barrier against walls and floors before setting up your workspace. Also, sealing any visible cracks with waterproof sealant can make a noticeable difference in controlling humidity.

George Miller

For someone just getting started, how long does it typically take to set up a basic home plumbing workshop from scratch, assuming you have to adapt an existing basement or garage?

    Mario The Plumber

    Setting up a basic home plumbing workshop in an existing basement or garage usually takes about one to two weekends. This includes time for clearing out space, gathering essential tools and materials, installing shelving or pegboards for storage, and setting up a safe work area. If you already have some storage units or tools, it could be even faster.

Patricia Garcia

If I only have about a 6’x8’ space to dedicate in my outdoor shed, what are the most important storage solutions to keep everything organized without making the area feel cramped and unsafe?

    Mario The Plumber

    With a 6’x8’ space, using vertical storage is key—install wall-mounted shelves, pegboards for hanging tools, and magnetic strips for small metal items. Stackable bins or clear drawers under a small workbench can hold fittings and accessories. Keep the floor clear for safety, and prioritize storing only essential tools to avoid overcrowding. Good lighting and a designated spot for each item will help maintain order in your compact workshop.

Mary Thompson

Once I’ve chosen the space and set up the workbench, what are the most important next steps to make sure my workshop meets standard safety protocols, particularly regarding handling hazardous materials?

    Mario The Plumber

    After setting up your workbench, secure proper ventilation to avoid buildup of fumes from glues or chemicals. Store hazardous materials in clearly labeled, lockable cabinets away from any heat sources. Keep a fire extinguisher and first aid kit within easy reach. Make sure to use protective gear like gloves and safety glasses, and post safety instructions where they’re easily visible. Regularly check your area for leaks or spills, and clean up immediately to prevent accidents.

Mary Rodriguez

You mentioned proximity to water sources and electrical outlets when choosing a workshop space. What’s the best way to safely run new water lines or power to a garage or shed if they aren’t available already?

    Mario The Plumber

    To safely add water or power to a garage or shed, hire licensed professionals. For water, a plumber will trench a line from your main supply, using approved materials and installing shut-off valves. For electricity, an electrician will run a dedicated circuit in conduit, ensuring outlets are grounded and up to code. Always check local building codes and get the necessary permits before starting work.

Elizabeth Brown

The article mentions the advantages of having easy access to water lines in your workshop space. For those without an existing water hookup in their garage or shed, what’s typically involved in adding one, and what should be considered cost-wise?

    Mario The Plumber

    Adding a water hookup to your garage or shed usually involves running new plumbing lines from your home’s main water supply. This can require cutting into walls, trenching if your workshop is separate from your house, and possibly installing a drain. Costs vary, but labor and materials can range from a few hundred to a few thousand dollars, depending on distance, local codes, and complexity. Always check for permit requirements and consider hiring a licensed plumber for safety and compliance.

Helen Thompson

How long does it realistically take to get a home plumbing workshop up and running, from picking the space to organizing all your equipment?

    Mario The Plumber

    Setting up a home plumbing workshop usually takes between one to two weekends, depending on your space and how much equipment you have. Choosing and clearing the space might take a few hours, while setting up storage, organizing tools, and ensuring safety can take a day or two. If you have a lot of tools or are building shelves, it might take a bit longer, but most people can complete the setup in about a week.

Daniel Harris

I’m just starting out and have both a garage and a basement available. How do I decide which one is better for a plumbing workshop if my basement tends to be a little damp but my garage isn’t insulated?

    Mario The Plumber

    Since your basement is damp, it could lead to rust on tools and possible mold growth if not managed carefully. The uninsulated garage might be chilly in winter or hot in summer, but it’s generally better for tool storage if you can add some weatherproofing or portable heating. If you can address insulation in the garage or dehumidify the basement, either could work, but dryness and ventilation are key for plumbing workshops.

Joshua Martinez

After choosing the right space and setting up the main essentials, what are the next steps to ensure all safety protocols are met for both everyday tasks and when handling hazardous materials in a home plumbing workshop?

    Mario The Plumber

    Once your workshop is set up, focus on clear safety signage and personal protective equipment like gloves, goggles, and masks. Store chemicals and hazardous materials in labeled, ventilated cabinets away from heat sources. Keep a first aid kit and fire extinguisher within easy reach. Make sure you have proper lighting and unobstructed pathways. Regularly review safety procedures and maintain a tidy workspace to minimize risks during both routine and hazardous tasks.

David Lopez

I’m trying to decide between setting up my plumbing workspace in my garage or basement. You mentioned moisture control is a concern in basements—do you have tips for handling humidity and potential water leaks in that kind of environment?

    Mario The Plumber

    Managing humidity and potential leaks in a basement workspace starts with a good dehumidifier to keep moisture levels down. Consider using waterproof mats on the floor and storing tools on shelves, not directly on the ground. Install a sump pump if your basement is prone to flooding, and regularly check for pipe leaks. Good ventilation, either through windows or a small exhaust fan, can also help prevent dampness that could damage your equipment.

Elizabeth Brown

Could you clarify how important access to a nearby water source really is for a home plumbing workshop? If I only have electrical outlets but no plumbing nearby, will that limit the kind of projects I can take on?

    Mario The Plumber

    Having a nearby water source in your home plumbing workshop is quite important, especially if you plan to test fittings, pipes, or fixtures as you work. Without access to water, you’ll be limited to dry assembly, repairs, or tool maintenance. Projects that require water flow testing or leak checks would be harder to perform, so for maximum versatility, having plumbing as well as electricity is ideal.

Kimberly Ramirez

Once the space is chosen and organized, what are some essential first safety steps—for example, should I prioritize grounding electrical outlets or setting up a specific hazardous materials disposal area before starting any projects?

    Mario The Plumber

    Before starting any projects, it’s wise to make sure your electrical outlets are properly grounded, especially if you’ll be using power tools. This helps prevent electrical shocks. Next, designate a specific spot for storing and disposing of hazardous materials like old chemicals or pipe adhesives. Also, keep fire extinguishers and first aid kits readily accessible. These steps will help ensure a safe and well-prepared workspace.

James Ramirez

I have a small garage space, roughly 6×10 feet. Do you think that’s enough room for basic plumbing work, or should I look for another area?

    Mario The Plumber

    A 6×10 foot garage space can absolutely work for basic plumbing tasks, especially if you keep your setup organized. Use vertical storage like wall-mounted shelves or pegboards to save floor space. Just be sure to have enough lighting and leave some open area for movement and tool use. As long as you’re mainly working on smaller projects and keep safety in mind, that space should be sufficient.

Aaron White

You mentioned that a 6’x8′ area can work for basic plumbing projects. If I want to eventually tackle bigger jobs like water heater replacements, should I plan on a bigger space right from the start?

    Mario The Plumber

    If you’re considering larger projects like water heater replacements in the future, it’s wise to plan for a bigger workspace now. While a 6’x8′ area is fine for basic repairs, bigger jobs often require more room for maneuvering bulky equipment and safely storing larger tools. An area closer to 10’x12′ gives you added flexibility and can save you the hassle of relocating or reorganizing later on.

Karen Brown

Regarding access to water sources, what’s the best way to run a safe and temporary water line into a workshop space without making major renovations? Any pitfalls to watch out for when setting this up in a garage or basement?

    Mario The Plumber

    A safe and temporary water line can be set up using a hose connected to an existing utility sink or laundry faucet with a quick-connect adapter. For indoor use, consider using potable-grade hoses. Watch out for leaks at connections—use plumber’s tape if needed—and always shut off the supply when not in use. Avoid running hoses across walkways to prevent tripping. In basements and garages, ensure drainage is handled safely to prevent water damage or mold.

Charles Jackson

If I want to dedicate part of my garage to a plumbing workspace but still need to park my car, how can I efficiently use the 6’x8’ recommended area and what storage solutions help maximize limited garage space?

    Mario The Plumber

    You can efficiently use a 6’x8’ area by installing wall-mounted pegboards and shelving to keep tools off the floor and organized. Use stackable bins or drawers under a compact workbench for small parts. A fold-down workbench can free up space when not in use. Consider ceiling-mounted racks for storing pipes or infrequently used items, making sure nothing interferes with your car’s space.

Kevin Taylor

You mention allowing at least a 6’x8′ area for a basic setup. If I want to future-proof my workshop for bigger projects, how much additional space would you recommend, and how should I plan the layout for flexibility?

    Mario The Plumber

    If you’re thinking about larger projects in the future, consider expanding your workshop to at least 10’x12′ or even 12’x16′. This gives you room for bigger tools, extra storage, and space to assemble larger plumbing mock-ups. For flexibility, keep workbenches and storage units on casters so you can rearrange as needed. Use open shelving and pegboards for adaptable tool organization, and leave open floor space for project setup.

Patricia Martinez

If I only have a small outdoor shed that isn’t fully insulated, are there certain plumbing tools or materials I should avoid storing out there due to temperature or humidity issues?

    Mario The Plumber

    Yes, it’s wise to be cautious about what you store in an uninsulated shed. Avoid keeping items like glues, pipe sealants, and solder, as temperature extremes can make them less effective or unusable. Power tools with batteries can also suffer in cold or damp conditions. Try to store these materials indoors and keep only basic hand tools in the shed if possible.

Lisa Jones

Are there any starter safety protocols or must-have safety gear you would recommend for someone new to setting up a home plumbing workshop, especially in terms of handling hazardous materials or power tools?

    Mario The Plumber

    For beginners setting up a home plumbing workshop, essential safety gear includes safety goggles, heavy-duty gloves, ear protection, and a dust mask. Always keep a fire extinguisher and first aid kit nearby. When handling hazardous materials, ensure good ventilation and store chemicals in clearly labeled containers. For power tools, use them with proper guards and never operate them with wet hands. Reading instruction manuals and wearing closed-toe shoes also helps prevent accidents.

Patricia Thomas

The article mentions the need for good ventilation in a garage workshop. What are some cost-effective ways to improve airflow and reduce fumes, especially if installing a full ventilation system isn’t feasible for a small business budget?

    Mario The Plumber

    You can boost ventilation in your garage workshop by using portable solutions like box fans or window fans to create cross-breezes and direct fumes outside. Installing a vented window or a door vent can help too. If possible, work with the garage door partially open. Also, consider using air purifiers with activated carbon filters to help reduce odors and fumes without major renovations.