Plumber Las Vegas News

Your trusted source for plumbing updates, DIY fixes, and industry insights in Las Vegas. Stay informed with practical tips, local trends, and expert advice for homeowners and professionals alike.

Plumbing for Beginners: The Most Common DIY Mistakes and How to Avoid Them

Introduction: Why DIY Plumbing Mistakes Happen—and What This Guide Offers

Plumbing is one of the most common areas where homeowners attempt DIY fixes. With countless online tutorials and easy-to-find tools, it’s tempting to handle leaks, clogs, or even bigger projects yourself. But even the most enthusiastic beginners can fall prey to simple mistakes—ones that can lead to costly repairs, water damage, or even safety hazards down the line. Understanding the most frequent DIY plumbing errors, and how to sidestep them, is essential if you want to protect your home, save money, and gain confidence in your repair skills.

This comprehensive guide is tailored specifically for those new to plumbing. We’ll cover the most common missteps made during DIY plumbing projects, explain why they happen, and provide clear, actionable advice to avoid them. Expect practical tips rooted in real-world experience, straightforward safety recommendations, and product suggestions where appropriate. Whether you’re fixing a dripping faucet, replacing a section of pipe, or just want to be prepared for the next minor emergency, this guide will help you do it right the first time.

The Most Common DIY Plumbing Mistakes

1. Over-Tightening Connections

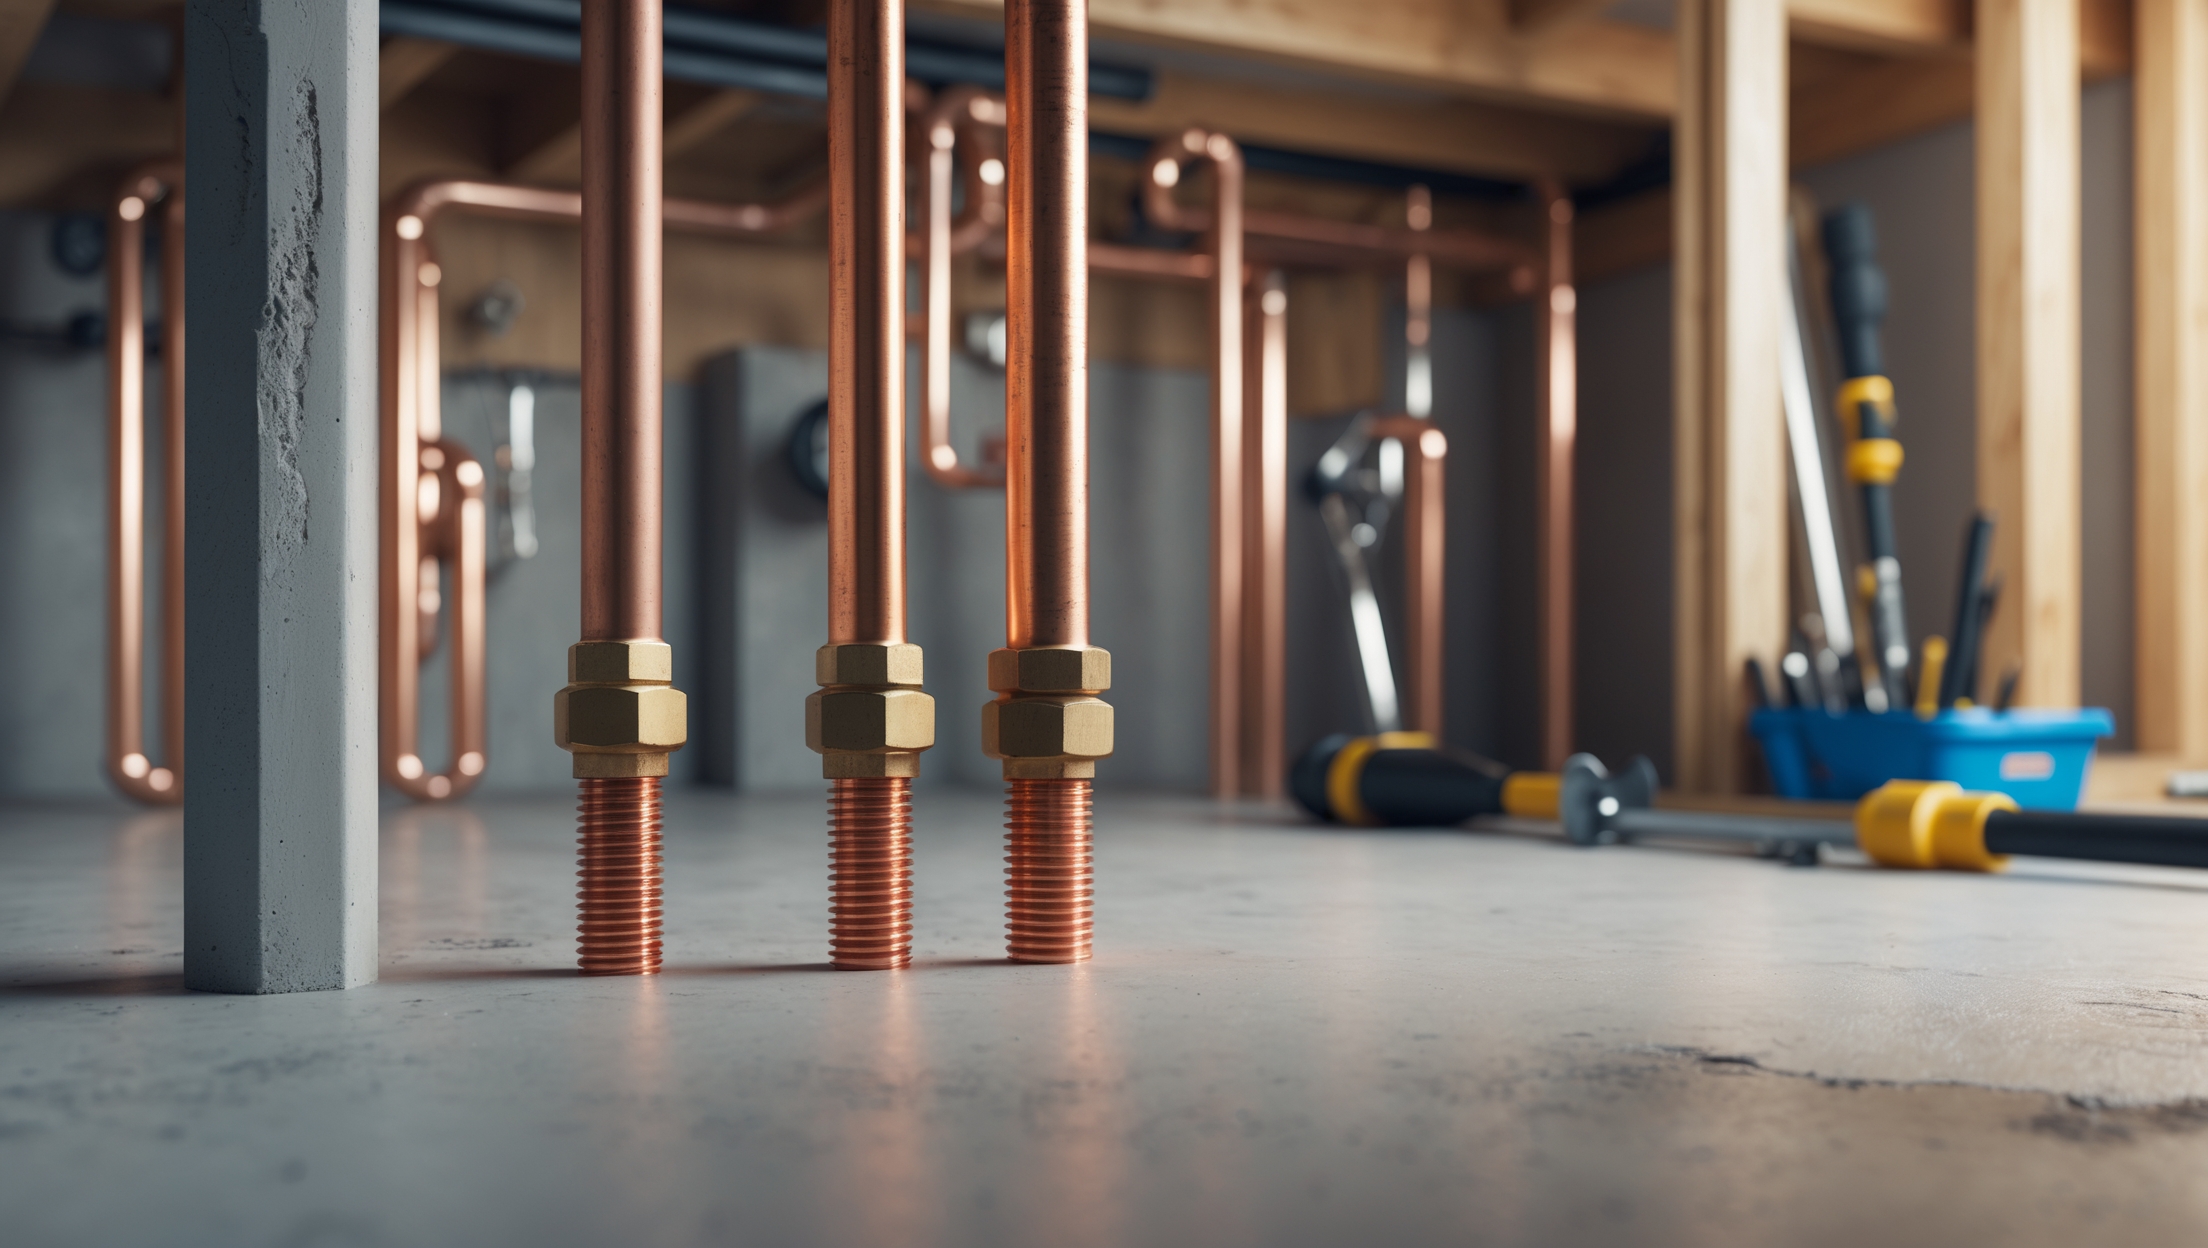
One of the most frequent errors beginners make is over-tightening pipe fittings, supply lines, or valve connections. The instinct to “make sure it’s secure” can backfire: excessive force can strip threads, crack fittings, or damage seals. This mistake often leads to slow leaks or catastrophic breaks—sometimes days or weeks after you thought the job was finished.

  • How to Avoid: Use hand-tightening plus an additional quarter-turn with a wrench. Stop when you feel resistance; never force further.
  • Pro Tip: For compression fittings, overtightening can actually deform the ferrule, causing leaks. Tighten just until snug.

2. Using the Wrong Tools (or No Tools at All)

Grabbing whatever’s handy—like pliers or an adjustable wrench—can cause more harm than good. Tools not designed for plumbing can slip, round off fasteners, or damage fixtures. In some cases, using no tools at all (such as hand-tightening plastic nuts) will result in loose, leaky connections.

  • How to Avoid: Invest in a basic set of plumbing tools: a pipe wrench, basin wrench, channel locks, and Teflon tape. For plastic fittings, use hand tools only and never overtighten.
  • Pro Tip: Always use the correct size wrench for compression and supply line fittings to prevent rounding or stripping.

3. Ignoring Water Shutoff Valves

Attempting repairs without shutting off the water supply is a recipe for disaster. Even a small drip can become a gusher when a pipe is cut or a fitting is removed, leading to flooding and water damage.

  • How to Avoid: Always locate and turn off the nearest shutoff valve before starting any plumbing work. For whole-house projects, use the main water shutoff.
  • Pro Tip: Test the water line by turning on the faucet after shutting off the valve to ensure no water is flowing.

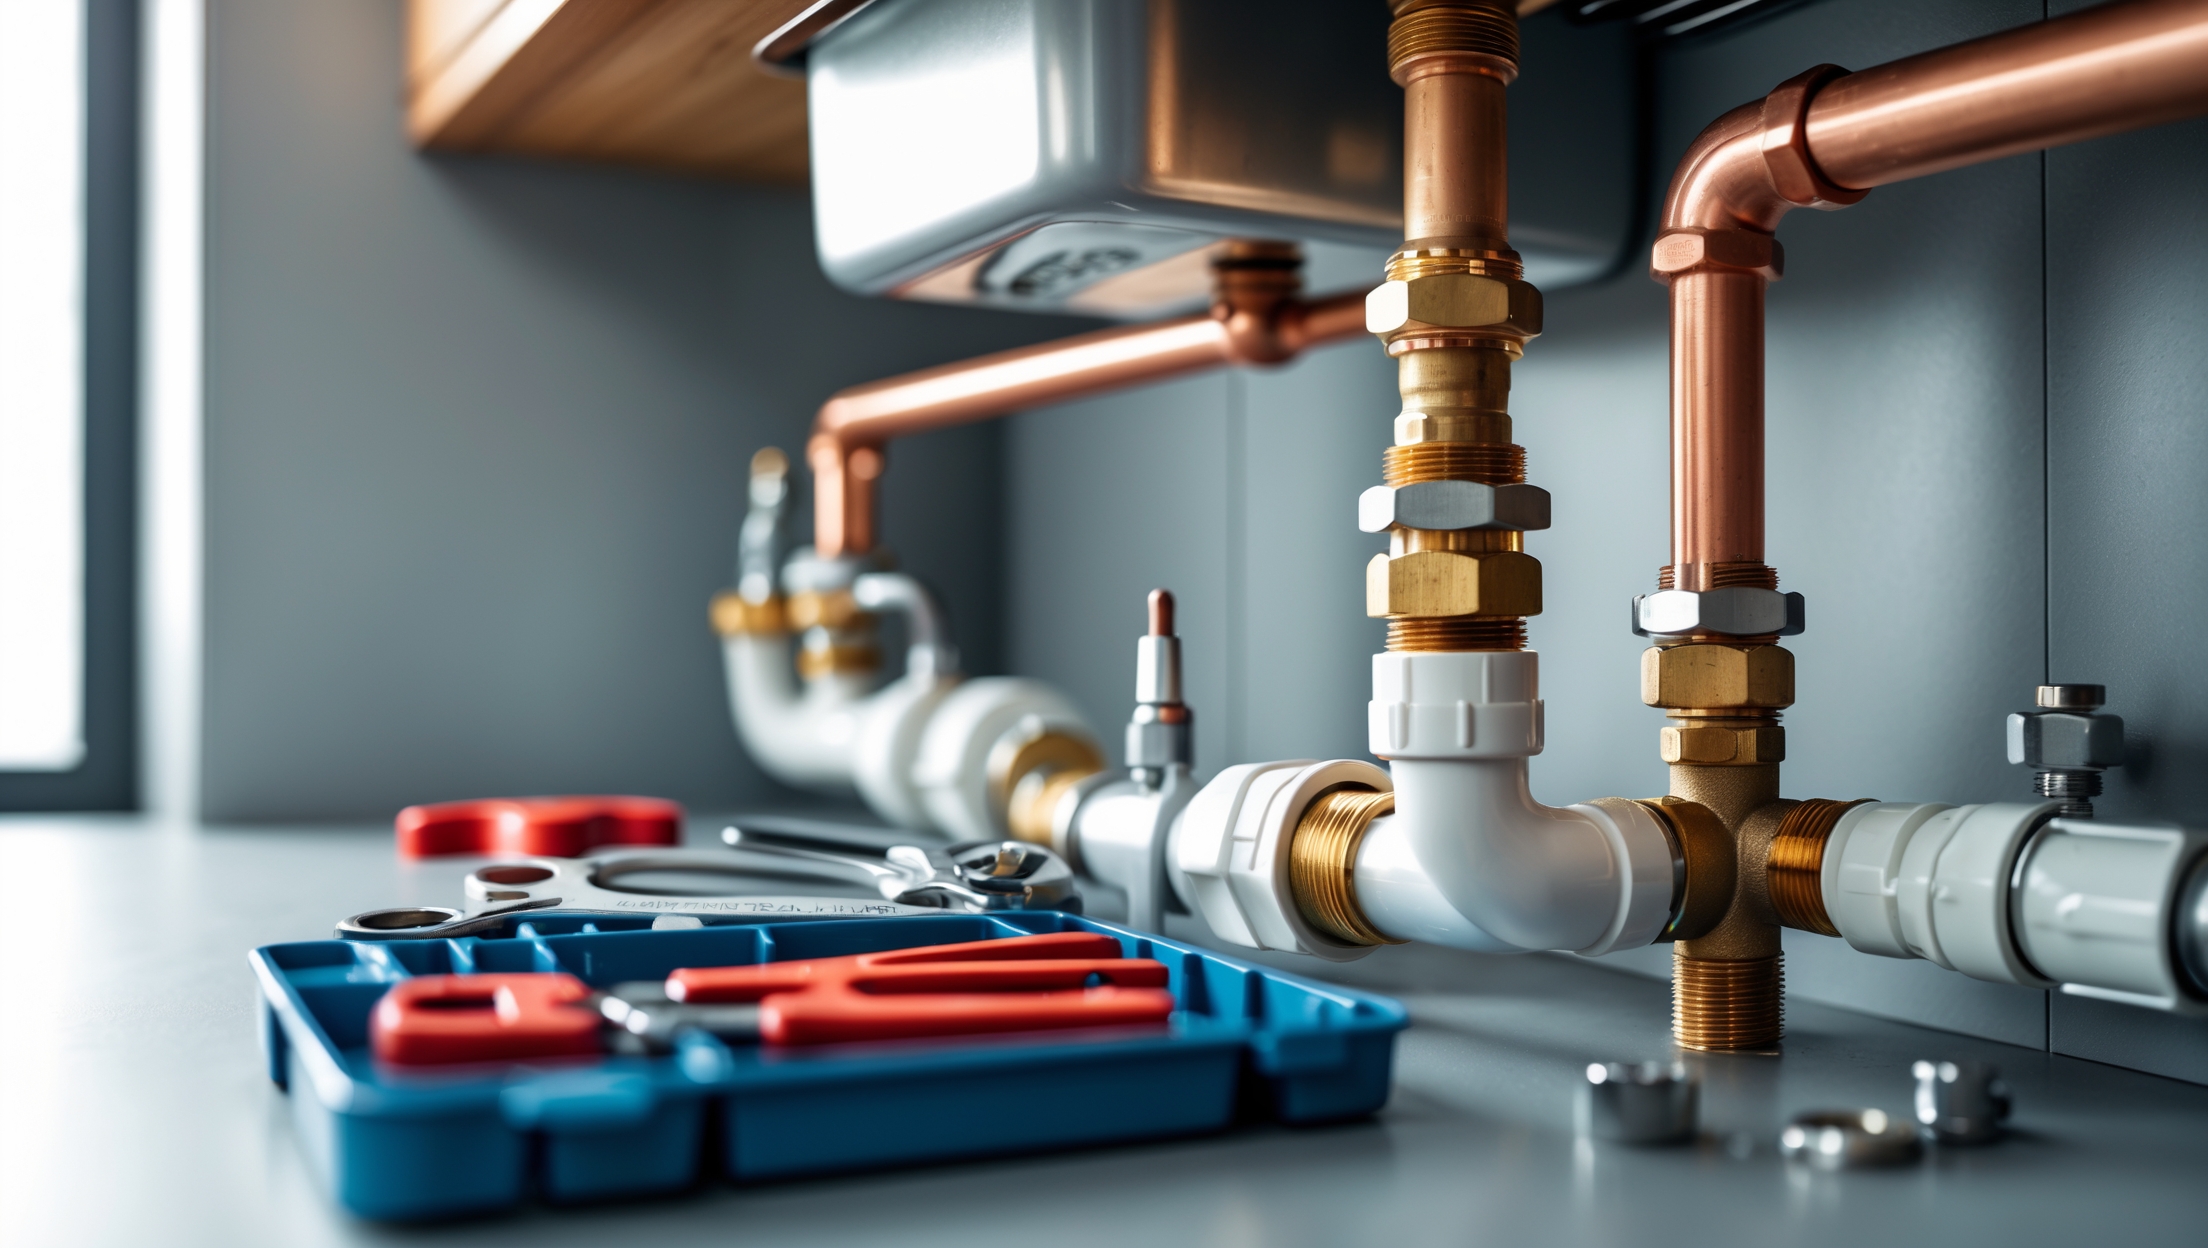
4. Using the Wrong Materials

Not all pipes, fittings, or sealants are interchangeable. Using incompatible materials—like connecting copper directly to galvanized steel without a dielectric union—can cause corrosion, leaks, or even health hazards.

  • How to Avoid: Match materials carefully. Use only approved fittings for your pipe type (PVC, PEX, copper, etc.). When in doubt, consult manufacturer guidelines or a pro.
  • Pro Tip: Always use plumber’s tape (PTFE/Teflon tape) on threaded metal connections, and pipe dope on metal-to-metal or gas fittings only.

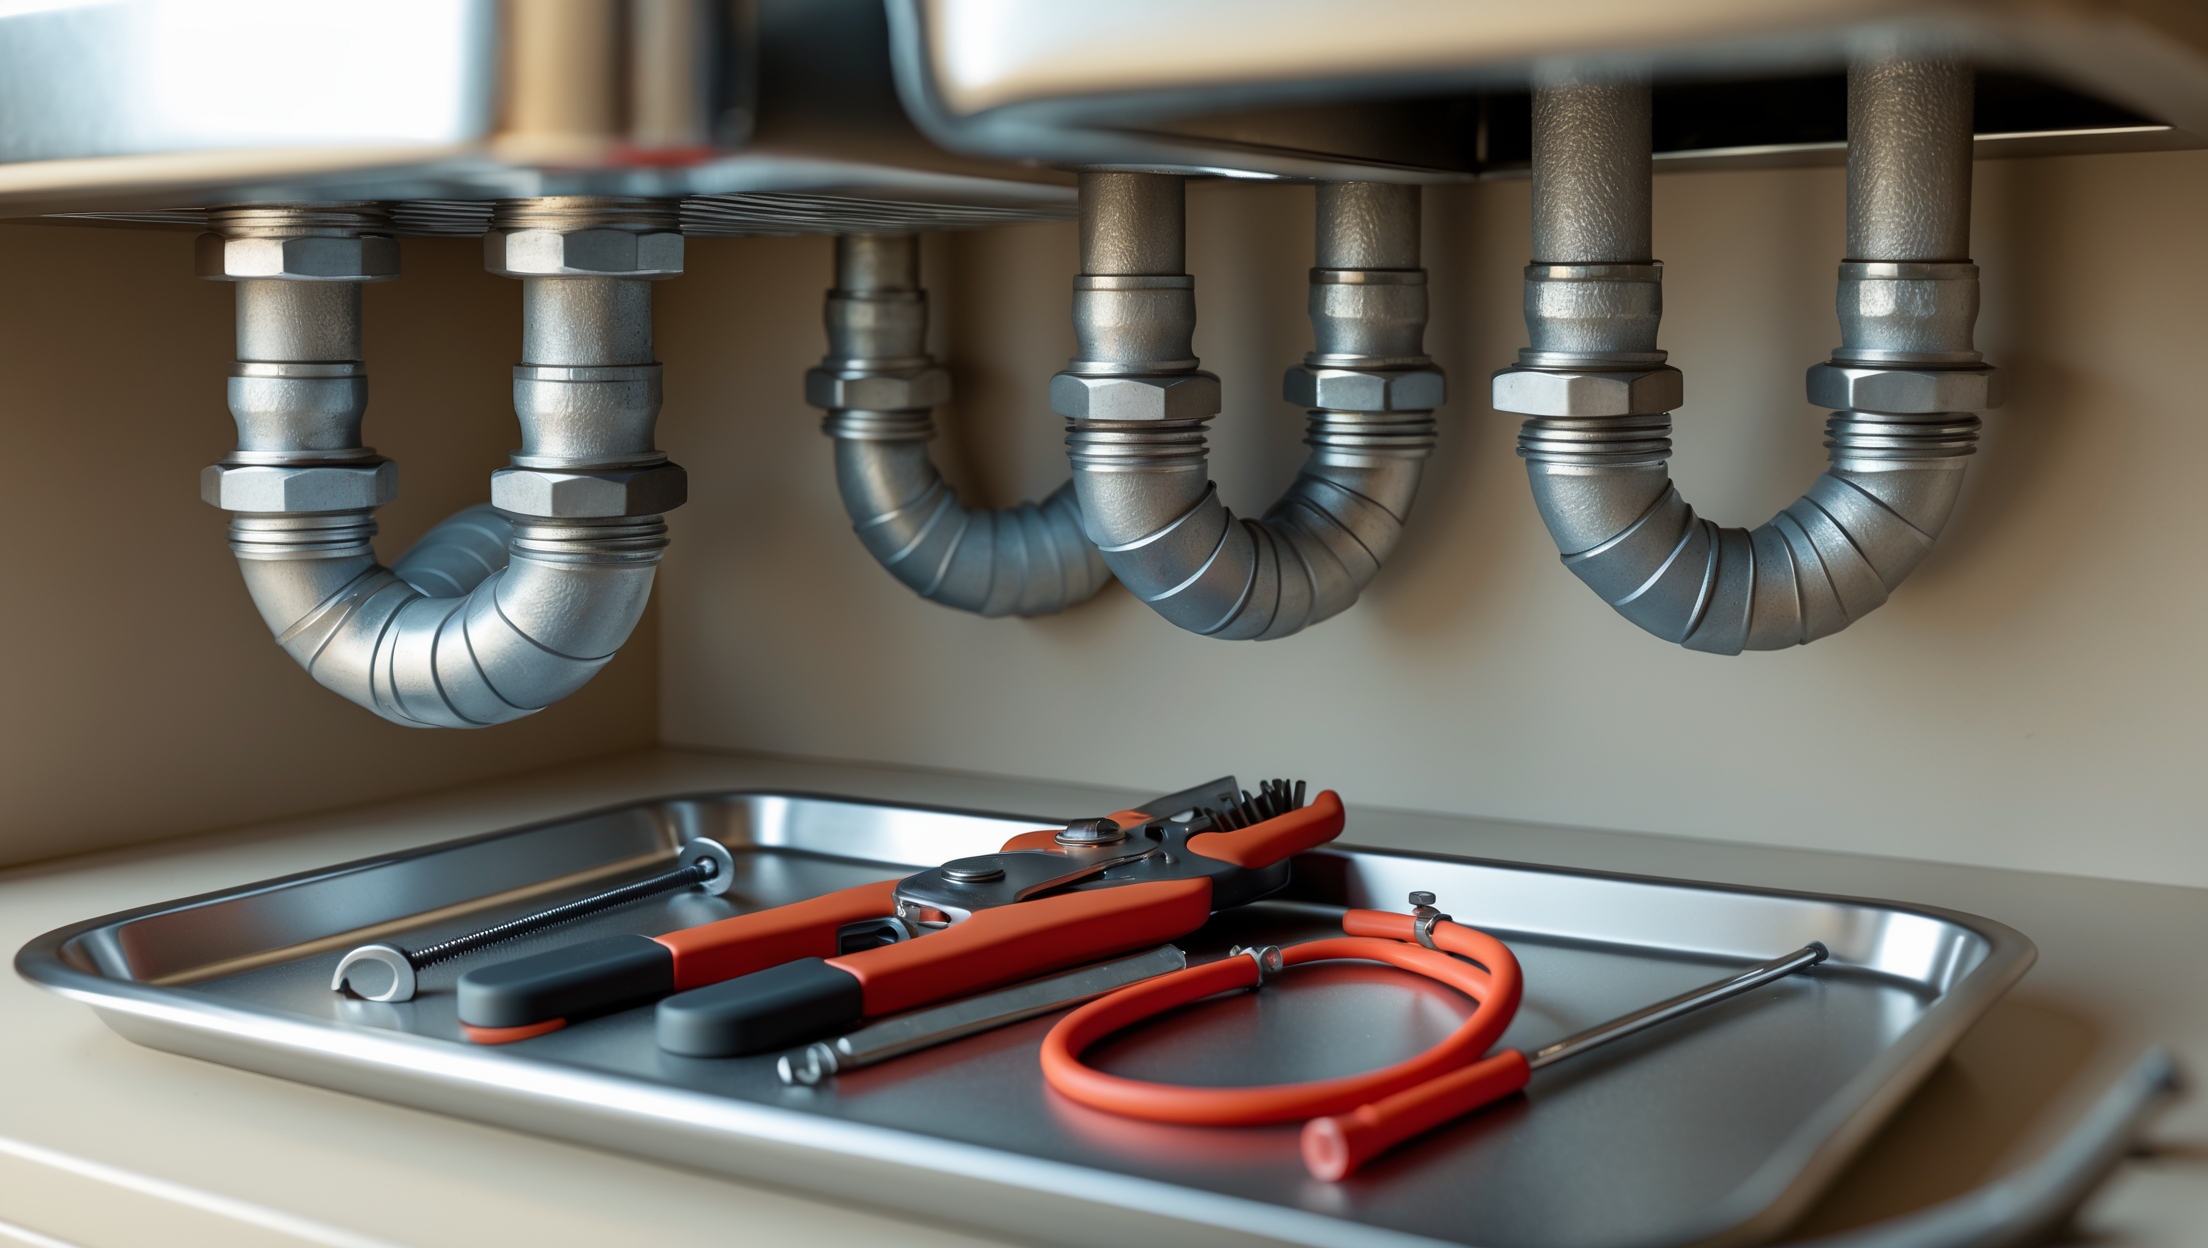
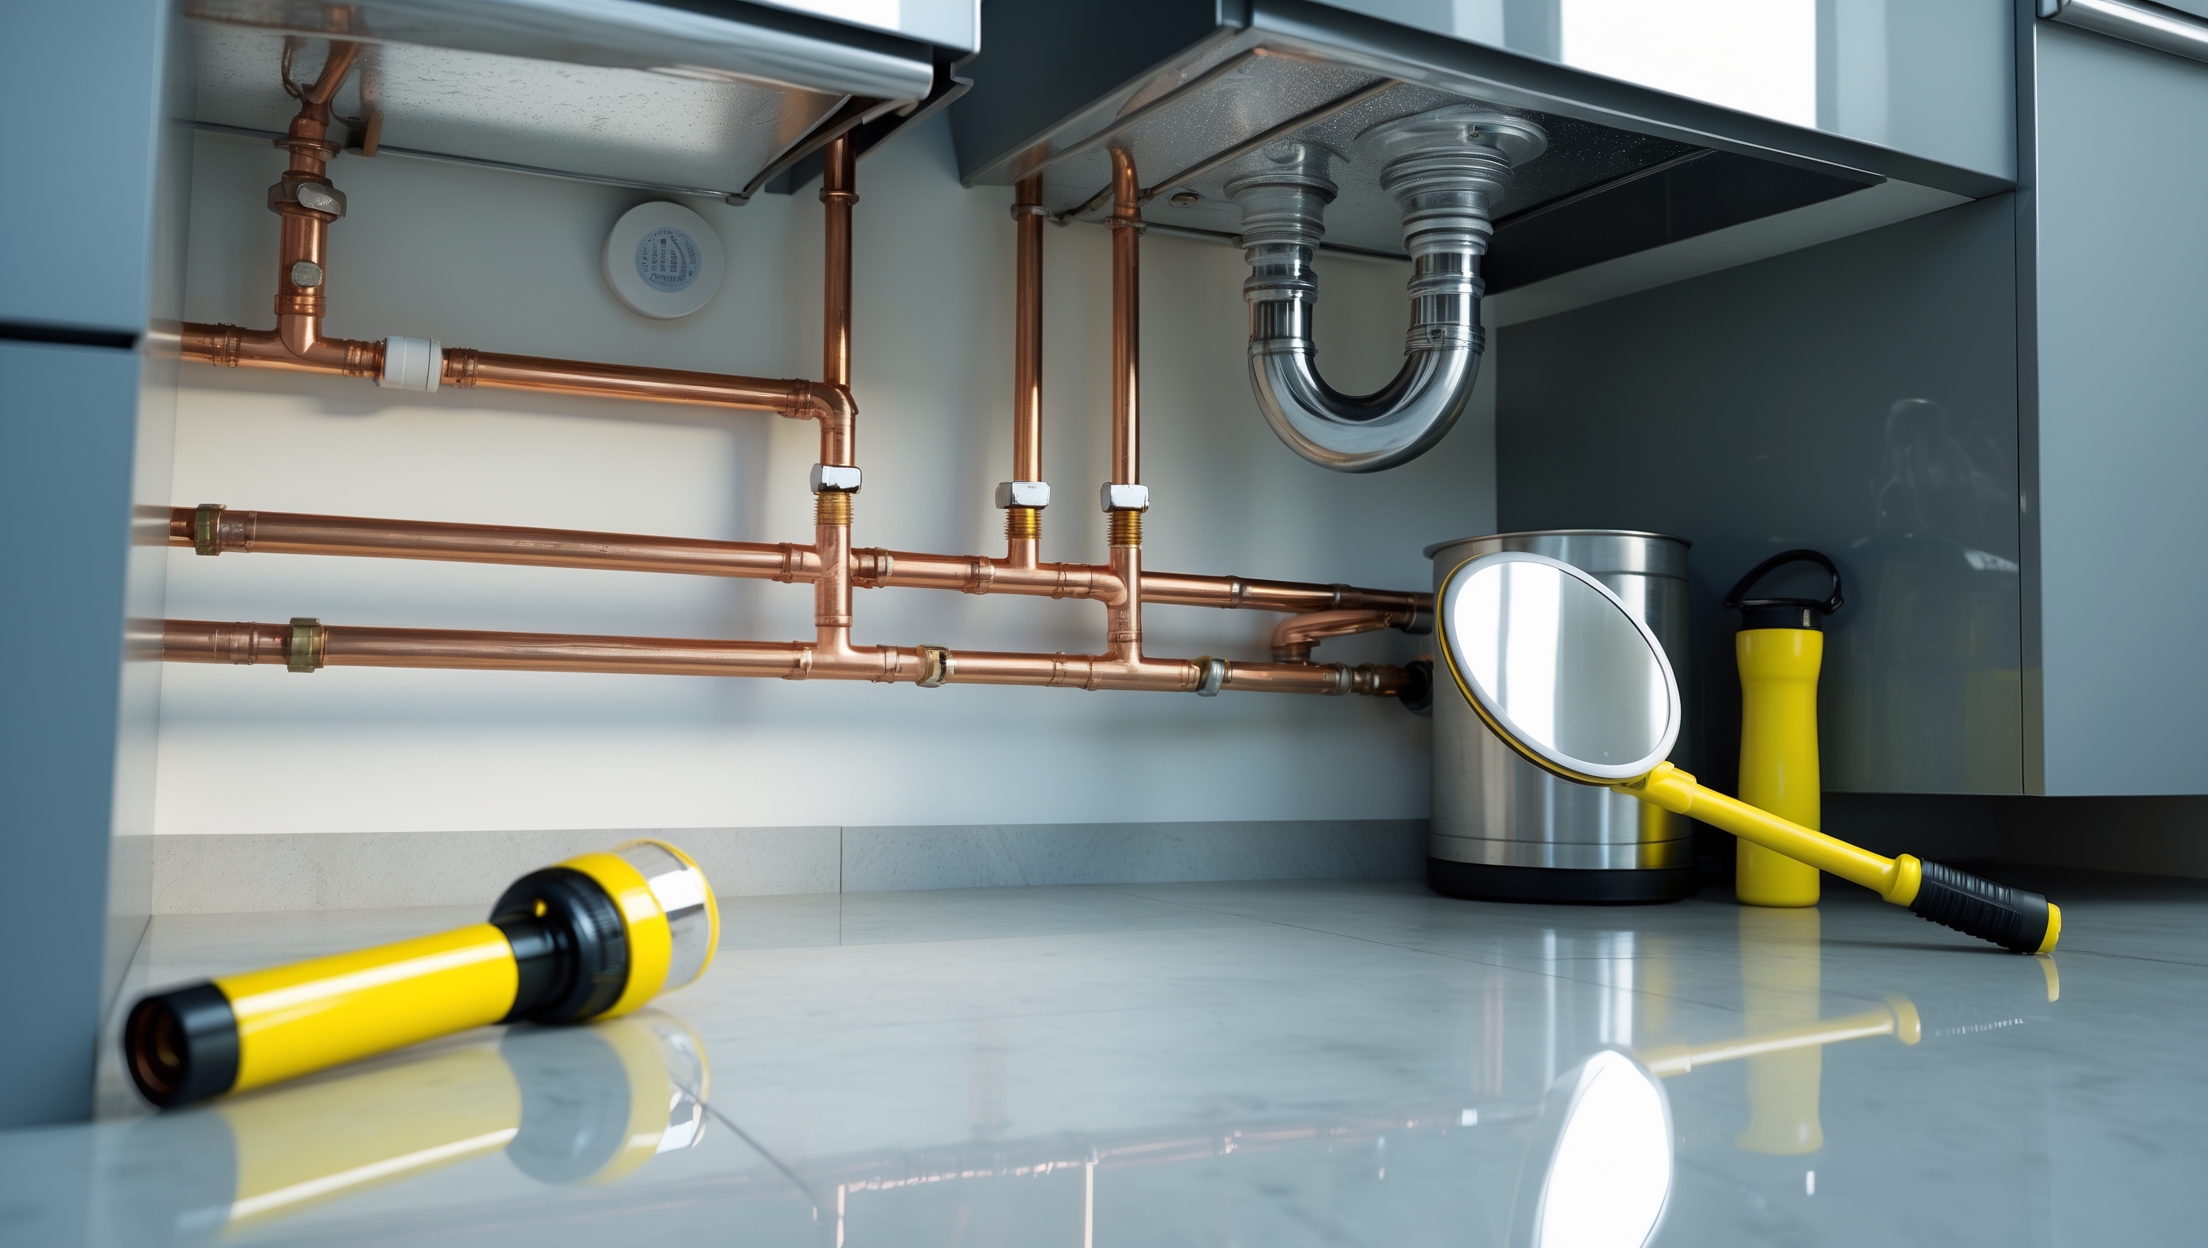
5. Skipping the Drain Trap

Some beginners mistakenly remove or fail to reinstall the P-trap (the U-shaped pipe under sinks) during repairs. The P-trap is essential for preventing sewer gases from entering your home and blocking debris from clogging deeper pipes.

  • How to Avoid: Always reinstall the P-trap after repairs. Inspect the washers and connections for leaks before finishing.
  • Pro Tip: Keep a bucket underneath when disassembling the P-trap to catch residual water and debris.

6. Misusing Chemical Drain Cleaners

Chemical drain cleaners seem like a quick fix for clogs, but overuse—or using them incorrectly—can damage pipes, especially older metal or PVC systems. They may also fail to clear the clog, leaving behind caustic residue that’s hazardous to handle.

  • How to Avoid: Use mechanical methods first, such as a plunger or drain snake. Reserve chemical cleaners for last resorts, and always follow the manufacturer’s instructions exactly.
  • Pro Tip: If you’ve used a chemical cleaner, warn any plumber who works on the same line afterward to prevent chemical burns.

7. Failing to Slope Drain Pipes Properly

When replacing or extending drain pipes, beginners sometimes install them level or even sloping in the wrong direction. Proper slope (typically 1/4 inch per foot) is essential for waste to flow by gravity; too little or too much slope can cause blockages or slow drainage.

  • How to Avoid: Use a level to ensure the correct slope when installing horizontal drain lines.
  • Pro Tip: Secure pipes with hangers or brackets every 4 feet for horizontal runs to maintain consistent slope.

8. Forgetting to Test for Leaks

Completing a repair and putting away your tools without checking for leaks is a common oversight. Even small, slow leaks can cause significant water damage over time.

  • How to Avoid: Once you’ve finished, turn the water back on gradually and inspect every connection, joint, and fitting for drips.
  • Pro Tip: Use a dry paper towel to check for tiny leaks along seams and under fittings.

9. Poor Pipe Support and Securing

Pipes that aren’t properly supported can sag or vibrate, causing noise (water hammer), leaks at joints, or even breaks due to stress over time.

  • How to Avoid: Use appropriate pipe supports and hangers, especially for longer runs. Don’t rely on friction or tight spaces to hold pipes in place.
  • Pro Tip: For copper pipes, use cushioned supports to prevent noise and wear from expansion and contraction.

10. Not Checking Local Codes

Even small plumbing jobs are subject to local codes. Failing to comply can mean failed inspections, fines, or the need for expensive rework if you sell your home.

  • How to Avoid: Before starting any significant project, check your city or county’s plumbing code. Some areas restrict DIY work beyond basic repairs.
  • Pro Tip: Permits may be required for water heater installs, moving supply or drain lines, or adding fixtures. When in doubt, call your building department.

Essential Safety Tips for DIY Plumbers

Wear Proper Protective Gear

Always wear gloves, safety glasses, and old clothes. Plumbing repairs can expose you to sharp edges, chemicals, and dirty water.

Watch Out for Electricity

Never work on plumbing near electrical outlets, switches, or appliances without first shutting off the power. Water and electricity are a dangerous combination.

Ventilate When Using Chemicals

If you must use chemical cleaners or adhesives, open windows and doors to ensure good airflow. Wear a mask if fumes are strong.

Know Your Limits

If you’re unsure about a repair, or if a situation seems unsafe, it’s always wise to consult a professional plumber. Don’t risk injury or property damage.

Step-by-Step: Fixing a Leaky Sink Trap (A Beginner’s Tutorial)

Tools and Materials Needed

  • Channel-type pliers or adjustable wrench
  • Replacement washers or P-trap kit (if needed)
  • Bucket
  • Rags or towels
  • Plumber’s tape (for threaded connections)

Step 1: Turn Off the Water

Locate the shutoff valves under your sink and turn them clockwise until they stop. Open the faucet to relieve pressure and drain remaining water.

Step 2: Place a Bucket Under the Trap

Slide a bucket beneath the P-trap to catch any water that spills when you disconnect the pipes.

Step 3: Loosen the Slip Nuts

Using your hands or pliers, loosen the slip nuts on either side of the P-trap. Carefully remove the trap and dump out any water and debris.

Step 4: Inspect and Clean the Trap

Look for cracks or wear. If the washers are worn or missing, replace them. Clean the inside of the trap thoroughly.

Step 5: Reassemble with New Washers (If Needed)

Reinstall the trap, ensuring washers are seated correctly. Tighten the slip nuts by hand, then give a gentle extra turn with pliers—do not overtighten.

Step 6: Test for Leaks

Turn the water back on and run it for at least 30 seconds. Check all joints for leaks. If you see drips, gently tighten the connections until they stop.

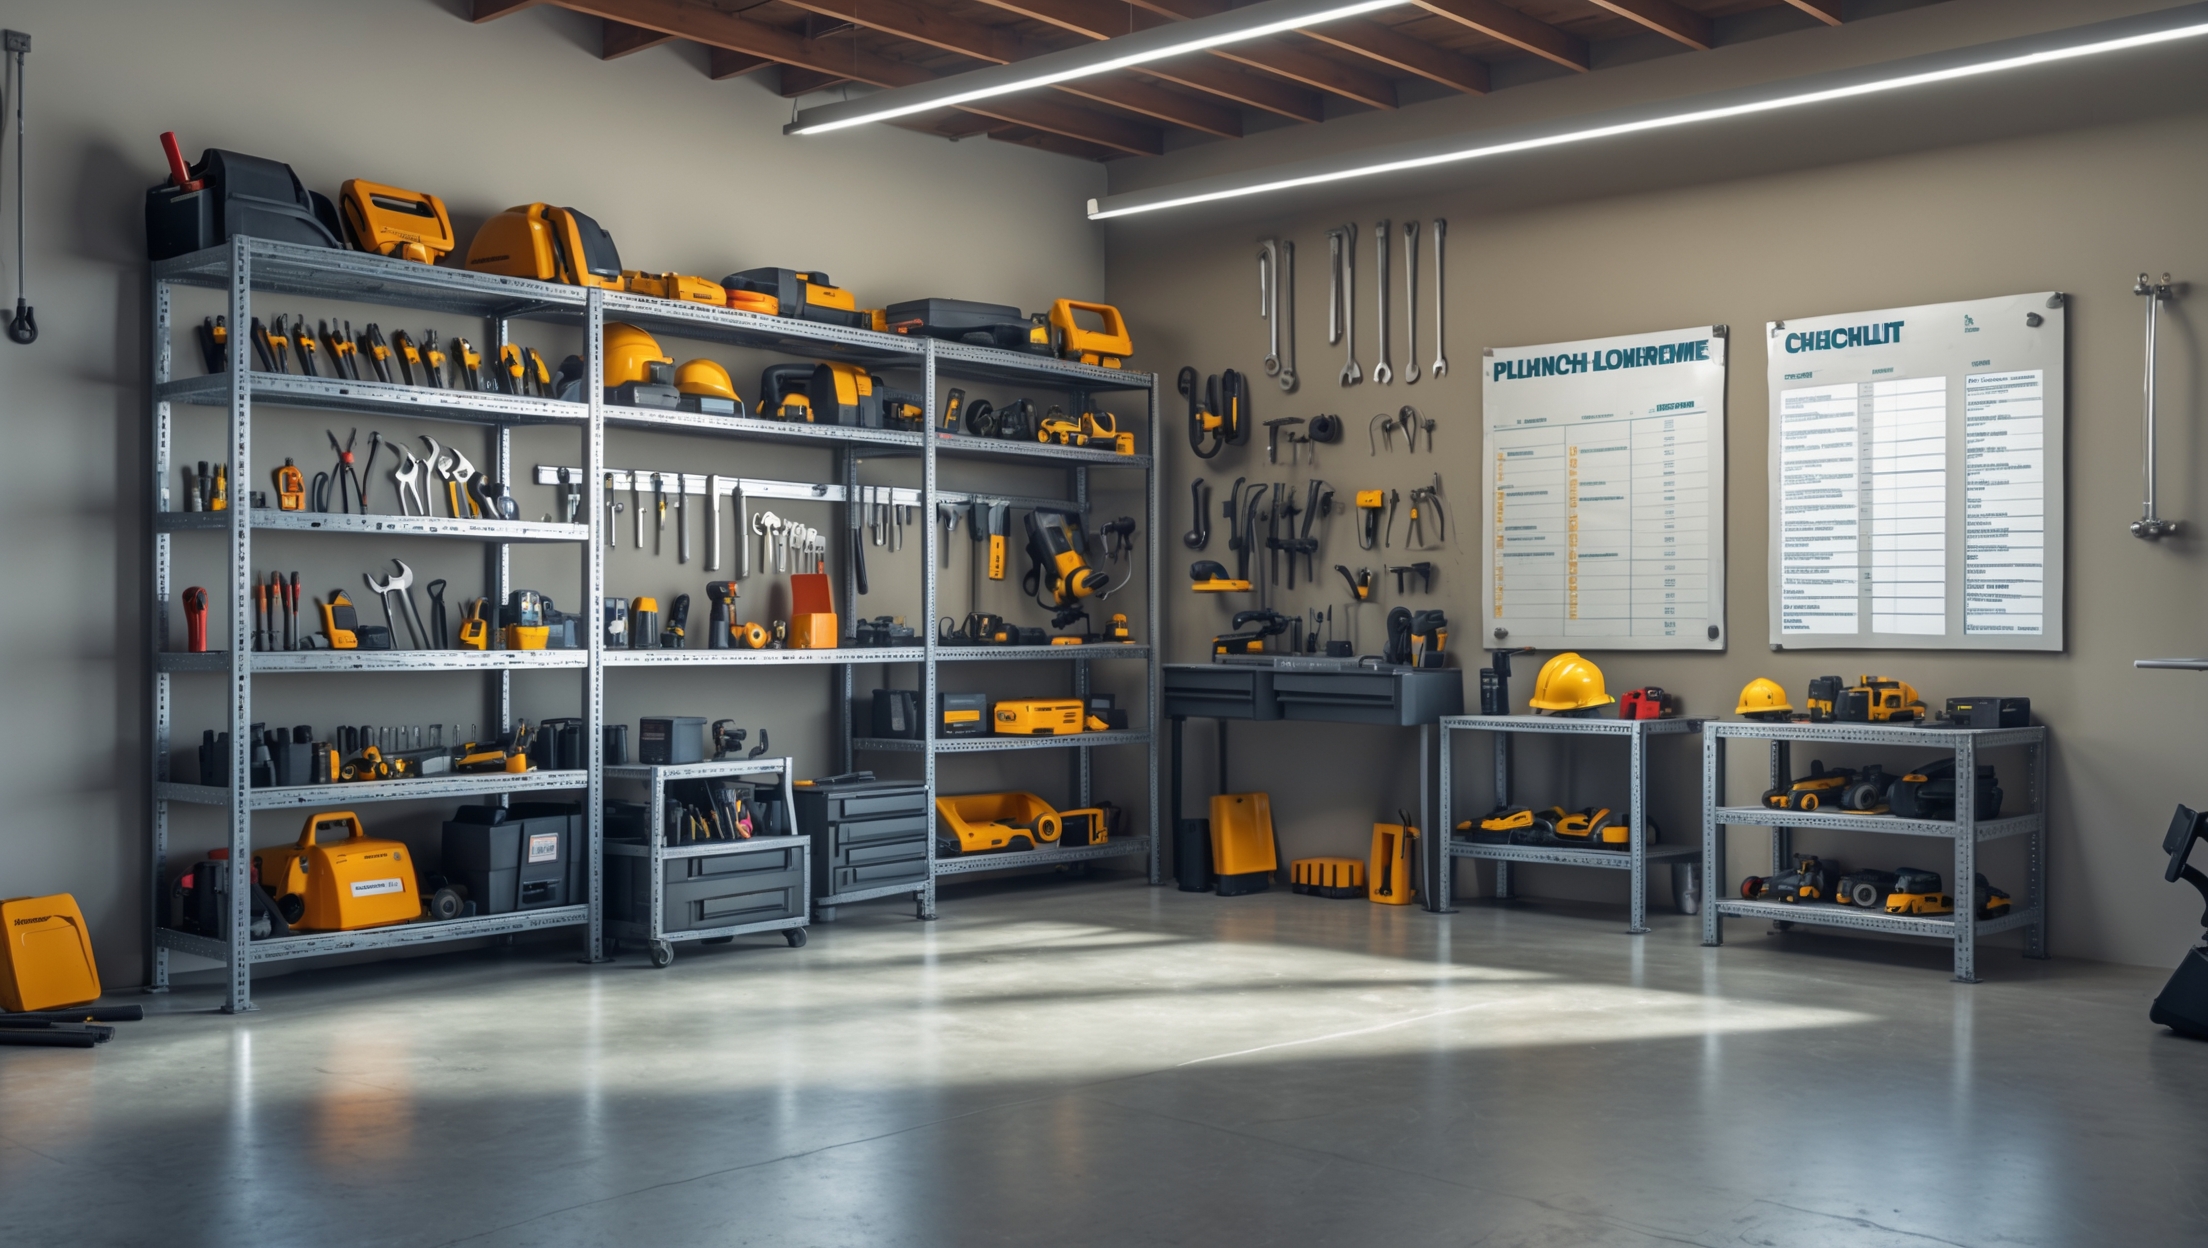
Bonus: Quick Reference Checklist for DIY Plumbing Success

  • Plan the repair—know what parts and tools you need before starting.
  • Always shut off water and, if necessary, power.
  • Use the right tool for every connection.
  • Double-check all fittings and washers before reassembly.
  • Test thoroughly for leaks after finishing a job.
  • Clean up and properly dispose of any waste or old parts.
  • Know when to call a professional—never guess with gas lines or major water leaks.

Conclusion: Mastering DIY Plumbing—Confidence and Caution Go Hand in Hand

Tackling your own plumbing repairs can be incredibly rewarding, saving you money and expanding your home maintenance skillset. However, as we’ve explored in this guide, beginner mistakes are common—and often preventable with the right preparation and knowledge. By understanding the most frequent pitfalls, from over-tightening fittings to ignoring safety basics, you equip yourself to handle repairs more safely and effectively.

Remember, successful DIY plumbing is about patience, attention to detail, and respecting the unique requirements of pipes, fittings, and fixtures. Always double-check your work, never skip safety steps, and don’t hesitate to research or ask questions before starting a project. With each successful fix, your confidence will grow—just be sure to recognize your limits and call in a professional when the situation calls for it.

Above all, treat every plumbing project as an opportunity to learn. Mistakes happen, but with the right approach, they’ll become fewer and less costly. Armed with this knowledge and a commitment to safe, careful work, you’re well on your way to becoming your household’s trusted plumbing expert.

402 comments
Patricia Lewis

When you say to go hand-tight and then a quarter turn with a wrench, does that apply to all types of plumbing connections (like PVC, copper, or supply lines), or are there exceptions I should know about?

    Mario The Plumber

    Hand-tight plus a quarter turn is a general guideline, but there are exceptions. For PVC connections, overtightening can crack the fittings, so usually hand-tight is enough. For copper connections with compression fittings, follow the manufacturer’s instructions, as some require a bit more tightening. Flexible supply lines usually follow the hand-tight plus a quarter turn rule, but always check package directions for best results.

Diane Perez

When trying to avoid over-tightening connections as you mentioned, how do you know if you’ve reached the right amount of resistance, especially if you’re new and unsure about how tight is ‘snug’?

    Mario The Plumber

    A good rule of thumb is to tighten connections by hand until they feel snug, then give an extra quarter turn with a wrench. If you feel strong resistance or the fitting stops turning easily, that’s tight enough. Over-tightening can crack fittings or damage seals, so if you’re unsure, it’s better to be a bit cautious and check for leaks after turning the water back on.

Rachel Johnson

The article talks about avoiding excessive force on valve connections, but if someone is unsure about how tight is too tight, are there any beginner-friendly tools or products that help prevent overtightening?

    Mario The Plumber

    Yes, there are beginner-friendly tools to help prevent overtightening. Torque wrenches or adjustable torque spanners are designed to apply specific amounts of force so you don’t go beyond what’s safe for valve connections. Some plumbing fittings also come with built-in torque indicators that click or give tactile feedback when you’ve reached the correct tightness. These tools can give you confidence and help avoid damage from overtightening.

Betty Jackson

You talked about using the right tools instead of grabbing whatever is handy. If I’m just starting out and only want to buy a few tools, which basic ones should I invest in first for most plumbing repairs?

    Mario The Plumber

    For basic plumbing repairs, it’s a good idea to start with an adjustable wrench, a pipe wrench, a pair of tongue-and-groove pliers, and a plumber’s tape (Teflon tape). These tools will help you handle most simple jobs like tightening fittings, loosening pipes, and preventing leaks. As you gain experience, you can add more specialized tools to your kit.

Michael Lopez

After reading about common mistakes like damaging seals and ferrules, I’m wondering how soon after a DIY repair I should check for leaks or problems. Is there a recommended timeframe to inspect my work to catch issues before they get worse?

    Mario The Plumber

    It’s a good idea to check your repair immediately after turning the water back on, watching closely for any leaks. Then, inspect the area again after a few hours and once more the next day. Checking periodically over the next week can help catch slow leaks or issues that take time to show up. This routine will help you catch problems early and prevent bigger damage.

Susan Thompson

Could you explain how to tell if you’ve over-tightened a connection before it causes damage? Is there a telltale sign I should watch for while working, or do problems usually show up only later?

    Mario The Plumber

    Over-tightening a connection can sometimes be caught right away if you notice the fitting or pipe starting to crack, squeak, or deform as you tighten. If you’re using a wrench, stop when you feel firm resistance rather than trying to force it tighter. In many cases, though, leaks or damage from over-tightening might only appear later, so it’s important to test for leaks after finishing and check connections again after a day or two.

Richard Anderson

I see that using the wrong tools is a common beginner mistake. If someone doesn’t have specialized plumbing tools on hand, are there any specific budget-friendly tools you’d recommend buying first for basic home repairs?

    Mario The Plumber

    For basic home plumbing repairs, a few affordable tools can make a big difference. A good adjustable wrench, a pair of channel-lock pliers, a pipe wrench, and a plumber’s tape (Teflon tape) are very useful. A basic plunger is also essential for clearing clogs. These tools cover most minor repairs and are widely available without breaking the bank.

Robert Martinez

If I accidentally overtighten a connection and damage a fitting, what are the immediate steps I should take to fix it before any leaks or damage occur?

    Mario The Plumber

    If you’ve overtightened a connection and notice damage to the fitting, stop tightening right away and turn off your water supply to prevent leaks. Carefully unscrew the fitting, inspect both the fitting and pipe for cracks or deformities, and replace any damaged parts. Always use a new fitting rather than trying to reuse a compromised one. When reassembling, tighten the new fitting snugly by hand and then give it just a slight turn with a wrench to avoid repeating the mistake.

Jessica Anderson

I like that you talk about practical safety tips. For a parent whose kids sometimes like to watch DIY projects, are there particular plumbing safety precautions I should focus on so everyone stays safe during repairs?

    Mario The Plumber

    Absolutely, safety is especially important with kids around. Make sure tools, sharp objects, and small parts are kept out of their reach. Always turn off the water supply and, if necessary, electricity before starting repairs. It’s helpful to use child safety gates or set clear boundaries to keep kids at a safe distance while you work. Also, explain to your children why certain areas or tools are off-limits to help them understand the risks.

Joshua Lee

How much time should a beginner realistically budget to complete a simple DIY plumbing job, like fixing a dripping faucet, given the learning curve and the chance of making one of these common mistakes?

    Mario The Plumber

    For a beginner, fixing a dripping faucet can usually take between 1 and 2 hours. This estimate allows time to gather tools, watch tutorial videos, and work slowly to avoid mistakes like overtightening or forgetting to shut off the water. If you run into unexpected issues, it might take a bit longer, but setting aside a couple of hours should be realistic.

Jennifer Gonzalez

If I accidentally stripped the threads on a pipe fitting by overtightening, is there a way to fix the problem without replacing the whole section of pipe?

    Mario The Plumber

    If you’ve stripped threads on a pipe fitting, you might be able to repair it using a thread repair kit or plumber’s tape if the damage is minor. For larger problems, a pipe thread sealant could help provide a temporary seal, but it’s not a permanent solution. If the threads are too damaged, replacing the fitting is usually the safest option to prevent leaks.

Patricia Thompson

You mention that overtightening compression fittings can deform the ferrule and cause leaks. If I think I’ve already overtightened one, what’s the best way to check for damage before I put everything back together?

    Mario The Plumber

    If you suspect you’ve overtightened a compression fitting, first unscrew the nut and slide it back to inspect the ferrule and the pipe. Look for any visible cracks, deep grooves, or distortion on the ferrule, and check the pipe for dents or scoring. If the ferrule seems out of shape or the pipe is damaged, it’s best to replace the affected parts before reassembling to ensure a proper seal.

Christopher Hernandez

For beginners wanting to assemble a basic plumbing toolkit, could you list which specific wrenches or tools are essential and which ones can wait until we tackle more advanced repairs?

    Mario The Plumber

    For beginners, it’s smart to start with a few core tools. An adjustable wrench, a pair of channel-lock pliers, and a pipe wrench are essential for most basic plumbing tasks. Also, a basin wrench is very helpful for tightening or loosening faucet connections. More specialized tools, like a pipe cutter, plumber’s torch, or a tubing bender, can usually wait until you take on advanced repairs or work with copper pipes. Start simple and build your toolkit as your projects get more complex.

Mark Thomas

Could you provide a little more detail on how to avoid damaging seals when tightening pipe fittings? I’ve had issues before with small leaks showing up later, so I want to make sure I’m doing it right.

    Mario The Plumber

    To avoid damaging seals when tightening pipe fittings, always hand-tighten first before using a wrench. Once you feel resistance, use the wrench to turn the fitting just a quarter to half turn more—never overtighten, as this can crush or dislodge the seal. Also, inspect seals for debris or defects before installing. Using the correct type and size of seal for your fittings is important to prevent leaks.

Barbara Perez

You mention using the right tools for plumbing tasks. If I’m only planning to do basic fixes like a leaky faucet or unclogging drains, which specific tools would you recommend I buy first on a tight budget?

    Mario The Plumber

    For basic plumbing fixes on a budget, start with a good adjustable wrench and a pair of slip-joint pliers. A plunger is essential for unclogging drains. Also consider a small pipe wrench and a basin wrench for hard-to-reach nuts under sinks. Teflon tape for sealing threads and a basic drain snake are helpful and inexpensive additions.

Susan Thompson

The article mentions product suggestions—what are some budget-friendly tools beginners should invest in instead of just using whatever is around the house? I’m a student on a tight budget and want the bare essentials for basic plumbing jobs.

    Mario The Plumber

    For basic plumbing jobs on a student budget, start with a good adjustable wrench, a pair of channel-lock pliers, a basic pipe wrench, a plunger, and a roll of plumber’s tape. These essentials will cover most simple repairs and are often available in affordable starter sets at hardware stores. It’s better to have these tools than use makeshift items, as they make the job safer and easier.

Anthony White

How much does it typically cost to correct an over-tightened fitting versus calling a pro in if the problem escalates? I’m trying to plan ahead for possible mistakes and budget accordingly.

    Mario The Plumber

    Fixing an over-tightened fitting yourself usually costs just the price of a replacement washer or fitting, which is often under $10-$20. However, if the over-tightening leads to cracked pipes or leaks and you need a professional, repairs can range from $100 to $300 or more depending on the extent of the damage. Planning for minor DIY fixes is inexpensive, but it’s wise to budget extra in case professional help becomes necessary.

Daniel Davis

When trying to fix a dripping faucet, I get confused about how tight to make everything since sometimes I still get leaks after assembly. Is there a troubleshooting process you recommend if a connection keeps leaking even when I’m careful not to overtighten?

    Mario The Plumber

    If a faucet connection keeps leaking, first check that the washers and O-rings are in good shape and seated properly. Make sure all surfaces are clean before reassembly. Hand-tighten the connections, then use a wrench for another quarter to half turn—avoid overtightening. If it still leaks, try replacing worn parts or using plumber’s tape on threaded joints. Sometimes, misaligned parts or debris can also cause persistent leaks.

Mark Davis

When you suggest hand-tightening plus a quarter-turn with a wrench, does the type of pipe or fixture material affect this rule? For example, should I tighten differently on plastic versus metal fittings to avoid stripping or breaking anything?

    Mario The Plumber

    Yes, the material definitely matters. For plastic fittings, you should be extra careful—usually, just hand-tightening or at most a slight tweak with a wrench is enough to avoid cracking or stripping. With metal fittings, the hand-tighten plus a quarter-turn rule is safer, as metal is more durable. Always check manufacturer instructions if you’re unsure, since overtightening is a common mistake, especially with plastic.

Andrew Moore

I noticed you recommend using the right tools rather than whatever’s handy. For someone on a tight budget, could you suggest a couple of essential plumbing tools that offer a good balance between affordability and reliability for beginners?

    Mario The Plumber

    For beginners on a budget, a good-quality adjustable wrench and a basic pipe wrench are smart investments. These tools handle most simple plumbing tasks and are usually affordable at hardware stores. A plumber’s tape (Teflon tape) is also inexpensive and crucial for sealing threaded connections. Starting with these basics will help you tackle common DIY jobs safely and effectively without overspending.

Nathan Harris

If a beginner only has basic tools at home, which single specialized plumbing tool would you recommend they buy first to avoid damaging fittings or stripping threads like you mentioned?

    Mario The Plumber

    A good quality adjustable pipe wrench would be the best first specialized plumbing tool to buy. It gives you the grip and leverage needed without damaging pipe fittings or threads, as regular pliers can easily slip or deform them. Choose one with smooth jaws and adjust it carefully to fit the pipe or fitting securely.

William Jones

You mention avoiding over-tightening and using the right tools, but how much extra time should I realistically budget for a simple project like fixing a dripping faucet if it’s my very first time doing it?

    Mario The Plumber

    For your first time fixing a dripping faucet, it’s wise to set aside about 1 to 2 hours. This gives you time to carefully gather tools, follow instructions, and avoid rushing—especially when making sure you don’t over-tighten fittings or use the wrong tools. Taking it slow helps prevent mistakes and builds your confidence for future repairs.

George Sanchez

I’m a bit worried about making costly mistakes since replacing cracked fittings sounds expensive. For someone on a tight budget, are there affordable products you recommend to help avoid these beginner issues, or maybe a basic starter kit I should look for?

    Mario The Plumber

    You don’t need to spend a lot to get started with basic plumbing repairs. Look for a beginner toolkit that includes an adjustable wrench, plumber’s tape, a pipe cutter, and a set of pliers. Plumber’s tape is inexpensive and great for preventing leaks at threaded connections. You can also buy assorted rubber washers and a small tube of plumber’s putty, which are useful for quick fixes and cost very little.

Lisa Williams

When dealing with a small drip or leak under a sink, how much time should a beginner spend monitoring the repair afterward to make sure no slow leaks develop, based on your experience with these common mistakes?

    Mario The Plumber

    After fixing a small drip or leak under the sink, it’s a good idea to monitor the area closely for the first 24 hours. Check the repair immediately after finishing, then again after a few hours, and once more the next day. Over the next week, glance under the sink daily to catch any slow leaks early. This helps ensure your repair holds and avoids hidden water damage.

Lisa Brown

The article brings up catastrophic breaks happening days or even weeks after overtightening. If I recently did some plumbing repairs and I’m worried I might have overtightened, are there any early warning signs I should look for to catch problems before they get serious?

    Mario The Plumber

    If you’re concerned about overtightening, watch for signs like slow dripping at joints, damp spots under sinks, or subtle changes in water pressure. Sometimes fittings can develop hairline cracks or start to leak over time, so check your repairs regularly for moisture or corrosion. Also, listen for any hissing or unusual noises in the plumbing. Catching these early can help you address the issue before it turns into a bigger problem.

Diane Martin

How can I tell if I’ve overtightened a fitting before it turns into a hidden leak? Are there warning signs or immediate steps I should take to check my work before finishing up the repair?

    Mario The Plumber

    Ovetightened fittings can show warning signs like cracked nuts or fittings, squeaking as you tighten, or difficulty aligning parts. Before finishing, inspect for hairline cracks, and gently wiggle the fitting—there shouldn’t be movement. After assembly, turn the water on slowly and look for any drips or moisture around the joint. Wrapping a dry tissue around the fitting can help spot small leaks before you finish up.

Susan White

You mentioned using proper tools instead of grabbing pliers or adjustable wrenches at random. Can you recommend which specific tools are must-haves for someone just starting their home plumbing kit on a tight budget?

    Mario The Plumber

    A basic plumbing kit for beginners on a budget should include a pipe wrench, a pair of channel-lock pliers, a basin wrench (great for tight spots like under sinks), a plumber’s tape (Teflon tape), and a pipe cutter if you’ll be working with copper or plastic pipes. These tools will handle most minor repairs and help you avoid damaging fixtures by using the right tool for each job.

Richard Anderson

Is there a recommended way to practice getting the right tightness for different types of fittings without risking actual damage to my home plumbing?

    Mario The Plumber

    A safe way to practice tightening fittings is to buy a few inexpensive spare parts—like pipe sections, connectors, and fittings—from a hardware store and assemble them on a workbench or table. This lets you practice tightening by hand or with tools to get a feel for how much resistance is enough. If possible, use both plastic and metal fittings, since each has a different tolerance. Practicing off-site like this prevents any accidental damage to your real plumbing.

Donna Robinson

Could you provide some examples of what the right amount of resistance feels like when tightening different types of connections? As a beginner, I always worry about stopping too soon or going too far, especially with plastic versus metal fittings.

    Mario The Plumber

    When tightening metal fittings, you’ll feel them get snug and then offer stronger resistance—usually a quarter to half turn after hand-tight is enough. For plastic fittings, stop as soon as you feel moderate resistance after hand-tightening; overtightening can crack the plastic. If you’re unsure, always err on the side of slightly less tight and check for leaks, tightening a bit more only if needed.

George Davis

You mention that overtightening compression fittings can actually deform the ferrule and cause leaks. For someone just starting out, how can you tell the difference between ‘snug’ and ‘too tight’ on a fitting without risk of under-tightening?

    Mario The Plumber

    A good guideline is to hand-tighten the compression nut until it feels snug, then use a wrench to give it another half-turn, or about 180 degrees. You should feel some resistance, but don’t force it. If you notice the nut deforming, or if it takes a lot of force to keep tightening, that’s too much. After turning the water on, check for leaks and gently tighten a little more only if needed.

Richard Thompson

When fixing a dripping faucet, how can I tell if the issue is from overtightening versus a faulty washer, and what’s the recommended troubleshooting order for beginners?

    Mario The Plumber

    If a faucet keeps dripping after you turn it off, first check the washer—it’s often worn out or damaged and is the most common culprit. Replace the washer and see if that solves the problem. If the faucet handle feels hard to turn or you had to use extra force to close it, overtightening might have compressed or damaged internal parts. For beginners, start by replacing the washer, then inspect for overtightening or distorted parts only if the drip continues.

Nancy Johnson

In the section about overtightening, you mentioned compression fittings and deforming the ferrule. Could you explain a bit more about what a ferrule is and how to tell if I’ve tightened it enough?

    Mario The Plumber

    A ferrule is a small metal ring inside a compression fitting that forms a seal when compressed by tightening the nut. If you tighten the nut too much, you can deform or crack the ferrule, leading to leaks or damage. To tighten it correctly, hand-tighten the nut and then use a wrench to turn it about one half-turn further. Stop if you feel significant resistance or if the connection feels snug—avoid forcing it.

Julie Rodriguez

I’ve struggled with compression fittings leaking even after what felt like careful tightening. Can you elaborate on how to tell the difference between ‘snug’ and overtightening for someone new to plumbing?

    Mario The Plumber

    With compression fittings, ‘snug’ means tightening the nut until you feel resistance, then giving it another quarter to half turn. If you keep tightening beyond that, you risk overtightening, which can crush the ferrule or deform the pipe, causing leaks. A good tip: after making the connection, turn the water on and check for drips; if there’s a small leak, gently tighten in small increments until it stops.

Margaret Martinez

The article talks about using the right tools instead of whatever is on hand. Could you recommend a basic starter toolkit for someone new to plumbing repairs? I’d like to know which tools are absolutely necessary versus nice to have.

    Mario The Plumber

    For basic plumbing repairs, you’ll want to have a few essential tools: a pipe wrench, adjustable wrench, pliers (channel lock type), a plumber’s tape (Teflon tape), a basin wrench for hard-to-reach nuts under sinks, and a plunger. A hacksaw and a small set of screwdrivers are also very useful. Nice-to-have extras include a drain snake, a tubing cutter, and a faucet valve seat wrench. Starting with the basics will cover most simple fixes, and you can add more specialized tools as needed.

Andrew Harris

When you talk about using the wrong tools, could you share a list of basic plumbing tools that a beginner should have before starting a simple project like fixing a dripping faucet?

    Mario The Plumber

    For a simple project like fixing a dripping faucet, it’s helpful to have a few basic tools on hand. These include an adjustable wrench, channel-lock pliers, a basin wrench, a flathead screwdriver, a Phillips screwdriver, plumber’s tape (Teflon tape), and a small bucket or towel for catching water. Having these tools ready will make the job much easier and help prevent common mistakes.

Thomas Jones

You mentioned that using the wrong tools can actually make things worse, but as a beginner, how do I know which tools are really necessary for the basics? Is there a starter kit you would recommend for someone just tackling small leaks and faucet repairs?

    Mario The Plumber

    For small leaks and basic faucet repairs, a starter kit should include an adjustable wrench, a pair of tongue-and-groove pliers, a pipe wrench, a plumber’s tape (Teflon tape), a utility knife, and a set of screwdrivers. These tools cover most simple tasks and help prevent damage that the wrong tool might cause. As you gain confidence, you can add specialty tools, but these basics will get you started safely.

Tyler Wilson

I’ve got a pretty basic toolbox—what are the absolute must-have plumbing tools a beginner should invest in, so I’m not just reaching for random pliers like the article warns?

    Mario The Plumber

    For beginner plumbing projects, a few essential tools will make your work much easier and help prevent those common mistakes. Invest in an adjustable wrench, a pair of channel-lock pliers, a pipe wrench, a basin wrench for tight spots, a plumber’s tape (Teflon tape), and a pipe cutter. These basics will handle most simple repairs and reduce the risk of damage from using the wrong tool.

Betty Sanchez

I sometimes worry about making a minor leak worse if I intervene. After fixing a small drip, how long should I monitor the area to make sure I didn’t cause another hidden issue, as you mentioned leaks can develop days later?

    Mario The Plumber

    It’s wise to keep an eye on the area after fixing a leak. Monitor the spot closely for at least 48 hours, checking several times a day for any signs of moisture. After that, do a daily check for the next week. Sometimes slow leaks develop or hidden issues only become apparent over a few days. If you notice any dampness or water, act quickly to prevent further damage.

Elizabeth Robinson

The article mentions compression fittings and how overtightening can deform the ferrule and cause leaks. What should I do if I suspect I already damaged the ferrule—does it need to be replaced, or can it be reused safely?

    Mario The Plumber

    If you suspect the ferrule is deformed from overtightening, it’s best to replace it rather than try to reuse it. A damaged ferrule may not create a proper seal and could lead to leaks. Simply cut off the damaged section of pipe, fit a new ferrule and nut, and tighten carefully—just enough to stop leaks without crushing the ferrule.

Karen Thomas

I noticed the article points out that using the wrong tools can cause damage, but for a beginner, what are the absolute must-have tools you’d recommend starting with for most basic plumbing fixes?

    Mario The Plumber

    For most basic plumbing fixes, it’s helpful to have a few essential tools: an adjustable wrench, a pair of channel-lock pliers, a pipe wrench, a basin wrench for hard-to-reach nuts, a plunger, a roll of plumber’s tape, and a set of screwdrivers. These will cover most simple repairs like fixing leaks, tightening fittings, or unclogging drains.

Sean Thomas

I noticed the article mentions over-tightening connections can cause slow leaks or even catastrophic breaks later on. How can I tell if I’ve already over-tightened something, and is there a way to fix it before it causes damage?

    Mario The Plumber

    You can usually tell if you’ve over-tightened a plumbing connection if you see cracked fittings, deformed washers, or if the joint feels excessively stiff. If you’re unsure, carefully loosen the connection and inspect the threads and washers for damage. If everything looks intact, reconnect it using firm hand-tightening, then add a quarter turn with a wrench—no more. If you find damage, replace the affected part right away to prevent leaks or breaks.

Julie Taylor

When you suggested using hand-tightening plus a quarter-turn with a wrench, does that guideline apply to all kinds of fittings, like both plastic and metal pipes? Or do some materials need a different approach to avoid cracking them?

    Mario The Plumber

    The hand-tightening plus a quarter-turn with a wrench rule is generally safe for metal fittings, but plastic pipes and fittings need extra care. For plastic, it’s best to stick to hand-tightening only, unless the manufacturer says otherwise. Over-tightening plastic can easily crack or damage it, so always check the product instructions for the best approach.

James Taylor

You mention that over-tightening connections is a common beginner mistake. If I do accidentally over-tighten something and suspect I’ve caused damage, what signs should I look for and is it possible to fix it myself without calling a plumber?

    Mario The Plumber

    If you’ve over-tightened a plumbing connection, look for signs like cracked fittings, warped threads, or leaks around the joint. Sometimes, leaks may not appear immediately but develop over time due to stress on the parts. If you notice cracks or stripped threads, it’s usually best to replace the damaged part. For minor cases, simply loosening and reseating the connection with fresh plumber’s tape can help, but if damage is obvious, replacing the fitting is a safe DIY fix before calling a plumber.

Brian Williams

You mentioned that grabbing the wrong tools can make problems worse. Could you list out the basic tools that a beginner should have on hand before starting common plumbing repairs, and are there affordable options for someone who doesn’t want to spend a lot upfront?

    Mario The Plumber

    Absolutely, having the right tools makes a big difference. For most basic plumbing repairs, you’ll want to have an adjustable wrench, a set of pliers, a pipe wrench, a plunger, a plumber’s tape (Teflon tape), and a basin wrench. Many hardware stores offer affordable starter kits or you can find budget-friendly versions of these tools individually. For beginners, there’s no need to buy top-of-the-line brands—just look for sturdy and reliable options within your price range.

Sarah Martin

After finishing a DIY plumbing fix, how long should I wait or what signs should I look for to be sure that I haven’t made any of these common mistakes, like over-tightening or using the wrong tool?

    Mario The Plumber

    After finishing your DIY plumbing fix, check for leaks by running water through the fixture for a few minutes. Watch for slow drips, dampness, or unusual noises around the pipes. If you used threaded fittings, inspect them a few hours later to ensure no moisture appears. Over-tightening may cause small cracks, so feel the connections gently for any give or stress. If you notice any odd smells, water pressure changes, or stains, investigate further. Monitoring for 24 hours is a good practice to catch slow leaks early.

Sandra White

You talk about compression fittings and the risks of deforming the ferrule by overtightening. What are some signs I should look for during or after installation that might indicate I made this mistake and need to redo the connection?

    Mario The Plumber

    If you’ve overtightened a compression fitting, you might notice a few warning signs. During installation, if the ferrule feels crushed, flattens unevenly, or you hear cracking sounds, that’s a red flag. After installation, look out for persistent leaks or dampness around the joint. If the pipe or fitting is visibly distorted near the connection, that’s another sign. If you spot any of these issues, it’s best to disassemble the joint, check the ferrule, and replace it if necessary before reinstalling.

Thomas Johnson

The article mentions that over-tightening can actually cause leaks days or weeks later. How can a homeowner quickly check if a connection was over-tightened before it turns into a bigger problem?

    Mario The Plumber

    To check if a plumbing connection has been over-tightened, look for hairline cracks or slight deformations in fittings, especially around plastic or rubber washers. After tightening, gently test the joint by hand—if it feels brittle, that’s a warning sign. Also, run water through the fixture and closely inspect for slow drips or moisture around the joint over the next few days to catch early leaks.

Jessica Martin

You talk about using the right tools instead of whatever’s handy. For someone just starting out, what are the essential plumbing tools I really need so I don’t end up damaging fittings or stripping threads?

    Mario The Plumber

    For basic plumbing tasks, a few essential tools can make a big difference and help avoid damage. Start with an adjustable wrench, a basin wrench for hard-to-reach nuts, channel-lock pliers, and a pipe wrench for sturdy pipes. Also, have a plumber’s tape (Teflon tape) and a pipe cutter or hacksaw for clean cuts. A plunger and a small hand auger are helpful for clearing clogs. With these, you’ll be able to work on most beginner projects safely.

Sarah Ramirez

After finishing a DIY plumbing project, how long should I monitor the repair to be sure there aren’t any slow leaks or hidden issues from mistakes like overtightening?

    Mario The Plumber

    It’s wise to monitor your plumbing repair for at least 24 to 48 hours after finishing the job. Check for any signs of moisture, slow drips, or dampness around the area several times during the first day. For critical connections, a quick check after a week is also a good idea, since some leaks from overtightening or missed fittings can be slow to appear.

Patricia Lee

You mention that overtightening fittings can cause damage over time, but how soon would a leak typically show up if I did make this mistake? Are there signs I should watch for in the days after a repair?

    Mario The Plumber

    A leak from overtightening fittings might not show up right away—sometimes it takes days or even weeks for stress cracks or thread damage to cause visible leaks. After a repair, check the area daily for any moisture, drips, or a musty smell. Also, watch for discoloration or swelling in nearby walls or cabinets, which can be early signs of a slow leak.

Charles Perez

If I’m only using basic tools I already have at home, what are some specific plumbing tasks that might be okay for a beginner, and which jobs should I avoid until I can get the right equipment?

    Mario The Plumber

    With just basic tools like an adjustable wrench, pliers, and a plunger, you can safely tackle small tasks such as clearing simple drain clogs, tightening loose fittings, or replacing washers in faucets. Avoid jobs like cutting pipes, replacing water heaters, or working on major leaks, as these require specialized tools and expertise. Stick to minor repairs until you can get the right equipment and feel more confident.

Betty Lopez

For someone who’s just starting out, how much time should they realistically budget for a small project like fixing a dripping faucet, assuming they want to avoid the common mistakes listed in the article?

    Mario The Plumber

    If you’re new to plumbing, it’s wise to set aside about 1 to 2 hours for fixing a dripping faucet. This gives you enough time to gather tools, carefully follow each step, and double-check your work to avoid mistakes like over-tightening or using the wrong parts. Working patiently will help prevent common DIY errors and give you a better result.

Mary Jackson

If a supply line starts leaking a few weeks after I finish a DIY repair, what should I check first to figure out if it’s from over-tightening or another common mistake?

    Mario The Plumber

    If your supply line starts leaking after a few weeks, first check the connection points for visible cracks or distorted fittings—these could indicate over-tightening, which can damage washers or threads. Also, inspect if the washer or gasket is seated correctly and not worn out. Sometimes, leaks come from loose fittings, so gently try tightening by hand, but avoid using too much force. Double-check that you used the correct type of supply line and fittings for your plumbing system.

Karen Perez

The article mentions that over-tightening connections is a major mistake, but sometimes it’s hard to gauge how tight is tight enough. Are there any specific tips or signs to look for so you don’t accidentally under-tighten and end up with leaks anyway?

    Mario The Plumber

    You’re right, finding the right balance is tricky. Hand-tighten fittings first, then use a wrench for an extra quarter turn—usually that’s enough. If you feel major resistance, stop tightening. For compression fittings, you might see the ferrule compress slightly. After finishing, turn the water on and check for slow drips or moisture around the connection. If you see leaks, tighten by small increments rather than forcing it all at once.

Christopher Harris

When you mention stopping after feeling resistance while tightening fittings, is there a specific torque or measurement to follow for different pipes or materials, or is it mostly based on feel for beginners?

    Mario The Plumber

    For beginners, tightening until you feel firm resistance and then stopping is generally based on feel, as over-tightening can damage fittings or pipes. Most DIY guides don’t specify an exact torque because it varies by material and fitting size. If you have access to manufacturer instructions, they sometimes provide torque specs. Otherwise, hand-tighten and give an extra quarter to half turn with a wrench, especially for metal fittings, but always avoid forcing it further.

Tyler Anderson

I noticed the article mentions compression fittings specifically. Are there other types of fittings where overtightening causes different issues, or is this mostly a problem with compression joints?

    Mario The Plumber

    Overtightening isn’t limited to compression fittings—other types like threaded fittings (such as galvanized or brass pipe connections) can also be damaged if overtightened, leading to cracked fittings or stripped threads. Plastic fittings are especially prone to splitting from too much force. In general, most plumbing joints benefit from firm but not excessive tightening, so it’s always best to follow manufacturer recommendations.

James Perez

I noticed you mention using the right tools is important, but as a beginner, how can I know which tools are actually worth investing in versus ones I can just borrow or improvise with for small jobs?

    Mario The Plumber

    For most beginner plumbing tasks, it’s worth investing in basics like an adjustable wrench, a pipe wrench, a plunger, and plumber’s tape—these are used often and handy to have. For more specialized tools, such as a pipe cutter or basin wrench, borrowing or renting is perfectly fine for occasional use. Improvising with household tools can sometimes work, but for anything that requires a tight seal or precise fit, the right plumbing tool is best to avoid damage or future leaks.

Kevin Hernandez

You mentioned that overtightening connections can actually cause leaks later on. In your experience, how can someone know they’ve reached the right amount of tightness without under-tightening or leaving room for leaks?

    Mario The Plumber

    A good rule of thumb is to hand-tighten the connection until it feels snug, then use a wrench to turn it about a quarter to a half turn more. If you feel significant resistance, stop—going further can damage threads or washers. Afterward, check for leaks once the water is running, and tighten just a bit more if you see any minor drips.

Susan Clark

I’m curious about how much time a typical beginner should set aside for their first plumbing repair, like fixing a dripping faucet, especially when trying to avoid these common mistakes mentioned in the article.

    Mario The Plumber

    For a beginner tackling their first plumbing repair like fixing a dripping faucet, it’s a good idea to set aside about two to three hours. This gives you enough time to gather tools, carefully follow instructions, and avoid common mistakes such as over-tightening or forgetting to turn off the water supply. Taking your time reduces stress and helps ensure a successful repair.

Linda Smith

For someone who’s new to DIY plumbing, what’s your advice on distinguishing when a repair is safe to try versus when it’s better to call a professional? Are there certain projects that are just too risky for beginners?

    Mario The Plumber

    When starting out with DIY plumbing, stick to simple tasks like unclogging drains, fixing leaky faucets, or replacing showerheads. If a repair involves the main water line, gas lines, or complex pipe systems, it’s best to call a professional. Anything that risks major leaks, water damage, or involves permits is safer left to an expert. If you’re unsure or uncomfortable, it’s wise to get professional help.

Karen Jones

For time-sensitive repairs, like a small leak under a sink, is it better to attempt a quick DIY fix described here or would you generally recommend calling a pro right away to avoid larger water damage?

    Mario The Plumber

    For a small leak under the sink, a quick DIY fix—such as tightening fittings or applying plumber’s tape—can often prevent immediate water damage if you feel confident. However, if the leak persists, worsens, or you’re unsure of the cause, it’s safest to call a professional right away. Fast action is important, but make sure your repair is solid to avoid bigger problems later.

Emily Lopez

How much time should I set aside for tackling a first-time DIY plumbing fix, like replacing a section of pipe, to make sure I’m not rushed into making one of these beginner errors?

    Mario The Plumber

    For a first-time DIY pipe replacement, it’s wise to set aside at least half a day, even if the actual repair might only take a couple of hours. This gives you plenty of time to read instructions, gather tools and materials, and deal with unexpected issues like stubborn fittings or leaks. Working slowly and carefully reduces the chance of making common beginner mistakes.

Nancy Harris

Could you explain what to do if you suspect you’ve already over-tightened a fitting or possibly damaged a seal—are there visible signs to look for before a leak starts?

    Mario The Plumber

    If you think you’ve over-tightened a fitting or damaged a seal, look for visible cracks, warped threads, or a pinched or deformed rubber washer—these are early warning signs. You might also notice stress marks or a slightly misshapen pipe. It’s wise to loosen the fitting, inspect the components, and replace any seals that look crushed or uneven to prevent leaks before turning the water back on.

David Jackson

You talk about the risk of overtightening compression fittings and damaging the ferrule. If I realize afterward that I’ve overtightened, is there a way to fix it without replacing the whole connection?

    Mario The Plumber

    If you’ve overtightened a compression fitting and damaged the ferrule, it’s difficult to fix without replacing the ferrule itself. Usually, once a ferrule is compressed too much, it won’t seal properly even if you try to loosen the nut. The best approach is to cut off the damaged section of pipe, fit a new ferrule, and reconnect. Unfortunately, reusing the old ferrule rarely provides a leak-free seal.

Mary Gonzalez

When it comes to fixing a dripping faucet as mentioned, what would be the best way for a novice to determine whether the issue is with the washer, the cartridge, or if it’s actually due to over-tightening from a previous repair?

    Mario The Plumber

    To figure out the cause of a dripping faucet, start by turning off the water and dismantling the faucet handle. Check the washer first—it should be flat and not worn out. If the washer looks fine, examine the cartridge for cracks or mineral buildup. Over-tightening is often obvious if components are deformed or the faucet is hard to turn. Replace any damaged parts, and reassemble gently to avoid over-tightening.

Megan Robinson

You mention over-tightening connections as a big beginner mistake. Can you give examples of how much is ‘too much’ for common household connections, like under a sink or with a showerhead? I never know when to stop tightening.

    Mario The Plumber

    It’s a common concern! For most household plumbing, like under-sink fittings or showerheads, tighten the connection by hand until snug, then use a wrench or pliers to turn it just a quarter to half turn more. If you feel significant resistance, or if it starts to creak, stop—going further can crack fittings or strip threads. Always check for leaks after turning the water back on and adjust only if needed.

Jason Thomas

For someone who’s never worked with compression fittings before, could you explain what a ferrule is and how to tell if it’s been deformed by overtightening?

    Mario The Plumber

    A ferrule is a small metal or plastic ring that fits around the pipe inside a compression fitting, helping to create a watertight seal when tightened. If the ferrule is deformed by overtightening, you might notice it looks squashed, deeply grooved, or has edges that are uneven and misshapen. It should keep its ring-like shape; once misshapen, it can’t provide a good seal and should be replaced.

Margaret Miller

For a first-timer, how long should I realistically set aside for a basic task like stopping a dripping faucet, considering possible mistakes or troubleshooting based on what you’ve seen beginners struggle with?

    Mario The Plumber

    For someone new to plumbing, it’s wise to set aside 1 to 2 hours for fixing a dripping faucet. This gives you time to gather tools, turn off the water supply, disassemble the faucet, and replace worn washers or seals. Beginners often need extra time for troubleshooting if parts are stuck or if identifying the source of the leak takes longer than expected. Setting aside a couple of hours helps you avoid feeling rushed and lets you handle any minor surprises calmly.

Michelle Lee

The article mentions that using the wrong tools can lead to issues, but for someone on a tight budget, are there any must-have plumbing tools you’d recommend for beginners to avoid damaging pipes or fittings?

    Mario The Plumber

    For beginners on a budget, a few essential plumbing tools can really help you avoid damaging pipes or fittings. I recommend getting an adjustable wrench, a pipe wrench for larger fittings, a basin wrench for hard-to-reach spots, plumber’s tape (Teflon tape), and a basic pipe cutter if you’re working with copper or plastic pipes. These basics will cover most simple repairs and reduce the risk of causing leaks or overtightening connections.

Christopher Thompson

The article mentions that over-tightening can cause problems days or weeks later. Is there a way to regularly check your work or spot early signs of damage if you’re unsure how tight is too tight?

    Mario The Plumber

    Yes, you can periodically check your plumbing connections for early signs of over-tightening. Look for small leaks, drips, or moisture around joints and fittings, as these may indicate damaged threads or cracked parts. Also, watch for any unusual noises or restricted water flow. If you notice anything unusual, turn off the water supply and inspect the fittings closely. It’s a good idea to gently feel the connections for cracks or looseness every few weeks after a repair.

Emily White

You mentioned using the right tools instead of just whatever is handy. Are there a few essential plumbing tools you recommend beginners invest in first, especially for small jobs like fixing a dripping faucet?

    Mario The Plumber

    For most small plumbing jobs like fixing a dripping faucet, it’s smart to have a few key tools on hand. I recommend an adjustable wrench for tightening or loosening nuts, a basin wrench for hard-to-reach spots under sinks, a set of screwdrivers, and plumber’s tape to ensure good seals. A small plunger and a pair of channel-lock pliers are also helpful for various common tasks.

Jessica Johnson

You talk about the dangers of using the wrong tools or just grabbing pliers for a plumbing job. For someone just starting out, are there a few essential tools you’d recommend investing in to avoid damaging pipes or fittings?

    Mario The Plumber

    Absolutely, having the right tools makes a big difference and helps prevent damage. For beginners, I recommend starting with a pipe wrench for tightening and loosening fittings, a basin wrench for hard-to-reach nuts under sinks, a plumber’s tape (Teflon tape) for sealing threaded joints, an adjustable wrench, and a quality plunger. These basics will cover most simple repairs and help you avoid harming pipes or fittings.

Michael Robinson

How much time should a beginner realistically set aside for a basic repair, like fixing a dripping faucet, to avoid feeling rushed and possibly making mistakes? I want to plan ahead and not rush through important steps.

    Mario The Plumber

    For a beginner, it’s wise to set aside at least 1 to 2 hours for a basic repair like fixing a dripping faucet. This gives you time to gather tools, review instructions, turn off the water supply, work carefully, and double-check your work without feeling rushed. Planning for extra time helps you avoid mistakes and makes the experience less stressful.

John White

The article advises stopping when you feel resistance while tightening connections. In practice, how do you differentiate between normal resistance versus overtightening, especially if you lack experience or hand strength?

    Mario The Plumber

    It’s normal to feel some resistance as fittings seat, but overtightening usually feels like a sudden, sharp stop or requires significant extra force. For beginners, hand-tighten until snug, then use a wrench for a quarter turn more. If the fitting creaks, distorts, or feels like it won’t turn further, stop—it’s likely tight enough. If in doubt, check the manufacturer’s instructions for specific torque or turns.

Joshua Taylor

You mentioned that using the wrong tools can cause damage when doing plumbing repairs. What are the absolute essential tools a beginner should have on hand before tackling small DIY plumbing projects like fixing a drip or swapping a supply line?

    Mario The Plumber

    For small plumbing projects like fixing a drip or replacing a supply line, you should have a few key tools ready: an adjustable wrench, channel-lock pliers, a pipe wrench, a basic set of screwdrivers, plumber’s tape (Teflon tape), and a small pipe cutter if you’re working with copper pipes. Having a bucket and some old towels nearby also helps contain any spills during the repair.

John White

Can overtightening connections cause immediate leaks, or is it more common for the damage to show up later? I’m worried about hidden issues popping up weeks after a repair, so how can I check that my work is really solid before finishing up?

    Mario The Plumber

    Overtightening connections can sometimes cause immediate leaks by cracking fittings or stripping threads, but often the damage develops over time as weakened parts fail. After completing your repair, run water and carefully check for any drips. Also, dry the area and revisit it after a few hours and again a few days later to catch any slow leaks. Listening for odd sounds or feeling for moisture can help catch hidden problems early.

Daniel White

If I have already overtightened a valve connection and notice a slow drip, is it usually enough to carefully loosen and retighten it, or does this mean I should replace the seal or fitting to prevent bigger problems?

    Mario The Plumber

    If you’ve overtightened a valve and notice a slow drip, simply loosening and retightening might not always fix the problem. Overtightening can damage the seal or threads, so it’s a good idea to inspect the washer or seal for damage. If it looks worn or misshapen, replace it before reconnecting. This helps prevent bigger leaks and ensures a proper seal.

Margaret Lee

Is there a big price difference between beginner-friendly tools and professional-grade plumbing tools? I’m trying to stick to a reasonable budget but still want to avoid mistakes like those described in the article.

    Mario The Plumber

    There is usually a noticeable price difference between beginner-friendly tools and professional-grade plumbing tools. Basic tools like adjustable wrenches, pipe cutters, or pliers are much more affordable and are sufficient for most DIY tasks. Professional tools tend to be more durable and precise but can cost significantly more. For most home repairs, investing in quality beginner tools should help you avoid common mistakes without overspending.

Brian Brown

Could you elaborate a bit more on how to tell when a pipe fitting is tight enough? Sometimes ‘hand-tight plus a quarter-turn’ still feels a bit vague for beginners who might have different strength levels.

    Mario The Plumber

    You’re right, ‘hand-tight plus a quarter-turn’ can feel imprecise. A good rule is to tighten the fitting by hand until it’s snug, then use a wrench to turn it just enough to feel resistance—usually a quarter turn. Watch for the fitting to feel secure but not forced. If you feel strong resistance before a full quarter turn, stop there to avoid damaging threads or cracking the fitting. For plastic fittings, be extra gentle, as overtightening can easily cause leaks or breaks.

Patricia Garcia

I noticed the article mentions that over-tightening pipe connections is a common mistake for beginners. How can you tell the difference between a connection that’s tight enough and one that actually needs to be tightened more?

    Mario The Plumber

    It’s best to tighten pipe connections until they feel snug, then give an extra quarter turn. If you feel increasing resistance but the fitting still moves easily, stop to avoid over-tightening. For threaded connections, hand-tighten first, then use a wrench for that final turn, checking for leaks after turning on the water. If there’s a drip, tighten just a little more, but don’t force it.

Nathan Ramirez

How much extra time should a beginner set aside for basic plumbing repairs like replacing a section of pipe, especially if they want to avoid common mistakes covered here?

    Mario The Plumber

    For a beginner, it’s wise to set aside at least double the time it might take a professional. For replacing a section of pipe, plan for 3 to 4 hours, allowing extra time to read instructions, gather supplies, and carefully check for leaks. This buffer helps reduce stress and gives you time to avoid mistakes like over-tightening fittings or forgetting to shut off the water.

Rachel Smith

When doing minor plumbing fixes like fixing a dripping faucet, how much time should a beginner realistically expect to spend, including cleanup, if they’re following these tips carefully for the first time?

    Mario The Plumber

    For a beginner carefully following the tips in the article, fixing a dripping faucet—including setup, the actual repair, and cleanup—will likely take about 1 to 2 hours. This allows extra time to gather tools, read instructions, and work at a comfortable pace without rushing. As you gain experience, the process will get quicker.

Christopher Brown

You mention that overtightening can sometimes cause leaks days or weeks later. If a slow leak develops after a repair, what’s the best troubleshooting process to pinpoint whether it’s due to overtightening or some other mistake?

    Mario The Plumber

    If a slow leak appears after a repair, start by drying the area thoroughly and checking for new moisture to identify the exact source. Inspect the joint or fitting for visible cracks or deformations, which can indicate overtightening. If none are visible, carefully loosen and reassemble the joint, checking the condition of washers or seals. If they’re damaged or flattened, overtightening is likely the cause. Otherwise, check for misaligned parts or improperly seated fittings as other causes.

Anthony Perez

You mention the risk of over-tightening compression fittings, specifically deforming the ferrule. Are there certain brands or types of fittings that are more forgiving for beginners, or is the risk about the same across the board?

    Mario The Plumber

    The risk of over-tightening compression fittings is generally similar across most brands and types, since the basic design—using a ferrule to form a seal—remains the same. Some higher-quality fittings may use slightly better materials, which can help, but beginners should always tighten by hand first, then give just a small turn with a wrench. Always follow the manufacturer’s instructions for best results.

Joseph Martinez

The article mentions that using the wrong tools can cause problems, but which basic tools would you recommend a beginner absolutely needs to have before starting any plumbing project?

    Mario The Plumber

    A few essential tools for beginners are an adjustable wrench, a pair of channel-lock pliers, a pipe wrench, a basin wrench for hard-to-reach spots, a plumber’s tape (Teflon tape) for sealing threads, and a plunger. A pipe cutter and a hacksaw are also useful for cutting pipes, and having a bucket and some old towels handy can help keep your workspace tidy.

Nancy White

What’s the typical timeframe for a first-time DIYer to complete a task like replacing a pipe section if they follow these tips? I’d like to plan so I know how long my water will be shut off during the repair.

    Mario The Plumber

    For a first-time DIYer, replacing a pipe section usually takes about 2 to 4 hours if you follow the tips provided. This includes shutting off the water, cutting out the old pipe, fitting and securing the new section, and checking for leaks. Make sure to give yourself extra time in case you encounter any unexpected issues.

Charles Lewis

For minor emergencies like a dripping faucet or a loose valve, about how much time should I budget if I’m following your DIY guidelines carefully as a first-timer? I want to plan ahead in case something unexpected comes up.

    Mario The Plumber

    For a first-timer, fixing a dripping faucet usually takes about 1 to 2 hours if you follow the guidelines carefully and gather all needed tools ahead of time. Fixing a loose valve can take a similar amount of time. It’s wise to allow for an extra 30 minutes to an hour in case you encounter any surprises or need to review steps.

Nancy Lewis

The article mentions using the right tools, but I’m a bit lost on which tools are considered essential for someone starting out with DIY plumbing. What would you say are the top three beginner tools I should invest in?

    Mario The Plumber

    For starting out with DIY plumbing, the three most essential tools are an adjustable wrench, a pipe wrench, and a plumber’s plunger. The adjustable wrench is great for tightening or loosening nuts and bolts, the pipe wrench handles larger pipes and fittings, and a plunger is a must-have for clearing clogs in sinks or toilets. With these basics, you’ll be able to handle most simple plumbing tasks.

Nancy Perez

The article mentions that overtightening compression fittings can deform the ferrule and cause leaks. How can you tell when you’ve tightened a compression fitting just enough, especially as a beginner without much experience?

    Mario The Plumber

    A good rule of thumb is to finger-tighten the compression fitting first, then use a wrench to tighten it another half to one full turn. You should feel increased resistance, but don’t force it. If you notice leaks once you test the connection, try tightening it a small amount more. Avoid using excessive force, as this can deform the ferrule and lead to leaks.

Diane Perez

I’m new to DIY plumbing and not sure which specific tools are really necessary for beginner projects. Could you give a short list of must-have tools for someone starting out, especially for tasks like fixing a leaking faucet or replacing supply lines?

    Mario The Plumber

    For beginner plumbing projects like fixing a leaking faucet or replacing supply lines, you’ll want a few essential tools on hand. Start with an adjustable wrench, a pair of channel-lock pliers, plumber’s tape (Teflon tape), a basin wrench (especially for hard-to-reach nuts under sinks), and a set of screwdrivers. These basics will cover most simple repairs and make your DIY work much easier.

Mark White

You mention that over-tightening connections can actually cause leaks or breaks, sometimes even weeks after the repair. Are there any warning signs I should watch for in the days following a DIY plumbing fix to catch this problem before major damage happens?

    Mario The Plumber

    Yes, after any plumbing fix, keep an eye out for signs like small water droplets around the joints, a damp smell, or even slight discoloration or swelling in nearby materials. Also, check for any new drips, water stains, or unexplained changes in water pressure. It’s a good idea to inspect your repair daily for at least a week to catch leaks early and prevent bigger problems.

Megan Garcia

Is there a big difference in quality between budget and higher-end fittings when it comes to avoiding issues like stripped threads or cracked parts? The article got me wondering if brand makes much of a difference for beginners.

    Mario The Plumber

    Yes, there can be a noticeable difference. Budget fittings are more likely to use lower-quality materials or looser manufacturing tolerances, which can lead to issues like stripped threads or cracked parts, especially if you’re still learning proper technique. Higher-end or reputable brands usually offer sturdier construction and more reliable seals. For beginners, investing a bit more in fittings can help avoid frustrating problems and extra repairs down the line.

Rachel Ramirez

I’m working on a tight budget and want to avoid unnecessary expenses. Are there particular types of fittings or pipe materials that are more forgiving for beginners, especially when it comes to avoiding leaks from things like overtightening?

    Mario The Plumber

    For beginners on a budget, plastic push-fit fittings and PEX piping are good choices. Push-fit fittings don’t require special tools, are easy to install, and less likely to leak from overtightening compared to metal threaded fittings. PEX is flexible, which helps prevent accidental cracks or damage. Just be sure to follow the manufacturer’s instructions carefully during installation.

Thomas Johnson

You mention that over-tightening compression fittings can actually cause leaks because of deforming the ferrule. If someone suspects they’ve already overtightened, is there a way to check for damage or should the fitting just be replaced before testing with water?

    Mario The Plumber

    If you suspect you’ve overtightened a compression fitting, it’s a good idea to disassemble it and inspect the ferrule and pipe. Look for obvious distortions, cracks, or uneven surfaces. If the ferrule or pipe shows any damage, replacing the fitting is safer. If everything looks intact, reassemble and tighten more gently, then test with water while watching closely for leaks.

David Thompson

If I realize I used the wrong tool partway through a plumbing fix, what should I do next? Should I stop and get the correct tool, or is there a safe way to recover from mistakes like stripped fittings?

    Mario The Plumber

    If you notice you’re using the wrong tool, it’s best to stop right away to prevent further damage. Switching to the correct tool usually makes the repair much safer and easier. If you’ve already stripped a fitting or caused some damage, you may need to replace that part before continuing. Taking a pause now saves bigger headaches later, and in some cases, it’s wise to consult a professional if damage is significant.

Christopher Thompson

How much time should I realistically set aside to fix something simple like a dripping faucet if I’m new to plumbing, and what are the most common troubleshooting steps I should prepare for in case things don’t go as planned?

    Mario The Plumber

    If you’re new to plumbing, set aside 1 to 2 hours for fixing a dripping faucet, allowing extra time to gather tools and read instructions. Common troubleshooting steps include turning off the water supply, checking for worn washers or O-rings, making sure you reassemble the faucet correctly, and watching for leaks when you turn the water back on. Keep towels and a bucket nearby just in case.

Jessica Hernandez

The article points out that grabbing the wrong tool can make things worse, but for someone just starting out, what are the absolute must-have plumbing tools to keep on hand for small home repairs?

    Mario The Plumber

    For small home plumbing repairs, it’s helpful to have a few essential tools on hand. A good adjustable wrench, channel-lock pliers, a pipe wrench, a plunger, a pipe cutter, and a basic drain snake are great starters. Teflon tape and a small set of screwdrivers will also help with many quick fixes. Having these tools ready makes tackling minor issues much easier and prevents accidental damage from using the wrong equipment.

Joseph Miller

If I accidentally over-tighten a pipe fitting but only realize it a day or two later, what signs should I look for to catch leaks early before they cause major damage? Is there a quick way to tell if something was tightened too much?

    Mario The Plumber

    After over-tightening a pipe fitting, watch for dampness, water spots, or corrosion around the joints, which can signal slow leaks. Check for new drips, pooling water beneath the fitting, or a musty smell nearby. Running your fingers along the connection to feel for moisture can help. If you hear hissing or see any warping or cracks, that’s a sign the fitting may be damaged by over-tightening. Early detection is key, so inspect the area daily for a week or so.

Sean Wilson

The article warns about over-tightening pipe fittings, but how do you know when you’ve tightened something enough, especially if you’re a total beginner? Are there any signs I should watch for to stop before causing damage?

    Mario The Plumber

    When tightening pipe fittings, aim for snug, not strained. Hand-tighten first, then use a wrench for one or two additional turns. Stop if you feel strong resistance—forcing it further can crack fittings or strip threads. Watch for creaking sounds or visible stretching, which both suggest you’re going too far. If water leaks after turning on the supply, tighten slightly more, but in small increments.

Tyler Smith

The article mentions that overtightening compression fittings can deform the ferrule and cause leaks. If I’ve already tightened a fitting too much, is there a way to tell before it starts leaking, or do I need to just wait and see if it fails?

    Mario The Plumber

    You don’t have to wait until a leak appears to check for potential damage from overtightening. Signs include visible deformation of the ferrule or the pipe itself, and difficulty loosening the fitting after tightening. If you suspect overtightening, it’s a good idea to loosen the fitting, inspect the ferrule and pipe for grooves or distortion, and replace any damaged components before reassembling.

Jessica Hernandez

The article notes that using the wrong tool, or none at all, can cause issues. If I’m just starting out as a beginner, what are the absolute essential plumbing tools I should invest in first without spending too much on gear I might not use?

    Mario The Plumber

    For beginners, a few basic tools are often enough to handle most simple plumbing tasks. Start with an adjustable wrench, a pair of channel-lock pliers, a pipe wrench, a plunger, some Teflon tape, and a basic pipe cutter or hacksaw. These will cover common jobs like fixing leaks, tightening fittings, or unclogging drains. As you gain confidence, you can add more specialized tools if needed.

Nancy Ramirez

In situations where a minor leak appears days after I thought a fix was complete, how can I troubleshoot whether it’s due to overtightening or a different issue? Would the signs be obvious or subtle?

    Mario The Plumber

    When a minor leak shows up after a repair, check the fittings for cracks or deformed washers, as these can indicate overtightening. Overtightened joints may also feel unusually stiff or creak when loosened. If everything looks intact, the issue might be a loose connection or worn seal instead. Subtle clues like a slow drip or slight dampness are common, so inspect all joints closely and re-tighten gently if needed.

Susan Taylor

Could you recommend a basic set of tools for someone who wants to avoid the common problem of using the wrong tools, but doesn’t want to spend too much money right off the bat?

    Mario The Plumber

    A great starter plumbing toolkit can be assembled without breaking the bank. Consider picking up an adjustable wrench, channel-lock pliers, a pipe wrench, a plumber’s tape (Teflon tape), a pipe cutter, a cup plunger, and a basin wrench. These should cover most beginner-level fixes and help you avoid common tool-related mistakes. You can always expand your collection as your projects grow.

David Martin

If I only have basic tools at home and want to avoid damaging my pipes, which specific plumbing tools should beginners invest in first to minimize mistakes like stripped threads or overtightening?

    Mario The Plumber

    To minimize risks like stripped threads or overtightening, consider starting with an adjustable wrench (with smooth jaws), a quality pair of channel-lock pliers, and a pipe wrench for larger fittings. A pipe cutter is safer than a hacksaw for straight, clean cuts. A plumber’s tape (Teflon tape) can help properly seal threaded joints and prevent leaks. These basics help you work carefully without damaging pipes or fittings.

Joseph Garcia

If I made the mistake of overtightening and now have a slow leak under my sink, what should I check first? Would simply replacing the fitting or ferrule be enough, or is there additional damage I should look for?

    Mario The Plumber

    First, turn off the water supply and carefully inspect the area for any visible cracks on the pipe, fitting, or ferrule. Overtightening can deform or damage these parts, so look for misshapen threads or crushed ferrules. Replacing the fitting or ferrule often solves the issue, but if you see any cracks or stripped threads, those parts will need replacement too. Make sure connections are clean and properly aligned before reassembling to prevent future leaks.

Nancy Martin

What are some signs that you might have damaged a pipe or fitting from using the wrong tool, and what’s the best immediate step to take if you realize you made that mistake during your DIY project?

    Mario The Plumber

    If you notice leaks, dents, cracks, or loose fittings after using a tool, you might have damaged the pipe or fitting. Hissing sounds or water stains are also warning signs. If you realize you made a mistake, turn off the water supply right away to prevent further damage, then inspect the affected area and consider replacing the damaged section or contacting a professional if needed.

Megan Gonzalez

For beginners trying to avoid overtightening or using the wrong tools, are there specific starter tool kits you recommend that won’t break the bank? I want to be prepared, but my budget is pretty limited.

    Mario The Plumber

    Absolutely, you don’t need to spend a lot to get started with plumbing basics. A good beginner kit should include an adjustable wrench, slip-joint pliers, a pipe wrench, a basin wrench, Teflon tape, and a small hacksaw. Many hardware stores sell affordable starter tool kits with most of these essentials included. Look for brands that offer sets specifically labeled for plumbing, as they tend to focus on the tools you’ll actually need.

Andrew Lopez

You mention using the proper tools instead of just grabbing whatever’s handy. For someone starting out, which tools do you recommend as absolutely essential to keep on hand for most basic plumbing fixes?

    Mario The Plumber

    For basic plumbing fixes, it’s wise to have an adjustable wrench, a pair of channel-lock pliers, a pipe wrench, a plunger, and a plumber’s tape (Teflon tape) on hand. A basin wrench is also very useful for tightening nuts in hard-to-reach spots under sinks. With these essentials, you’ll be prepared for most minor repairs around the house.

Anthony Moore

You mentioned over-tightening is a common mistake with compression fittings. Are there specific types of plumbing (like copper vs. PEX) where this issue is more of a concern for beginners, or does it apply equally across all materials?

    Mario The Plumber

    Over-tightening compression fittings is a concern with all materials, but it’s especially important with copper pipes. Excess force on copper can deform the pipe or crush the fitting, leading to leaks. With PEX, compression fittings are less common, and the risk usually comes with metal components rather than the flexible tubing itself. In general, always follow the manufacturer’s tightening instructions, regardless of the material.

Sean Martin

The article suggests hand-tightening plus a quarter-turn with a wrench. Does this guidance apply to all types of fittings, such as both PVC and metal, or do different materials require special consideration?

    Mario The Plumber

    The hand-tight plus a quarter-turn method is a good general rule, but it’s best suited to metal threaded fittings. PVC fittings, especially threaded ones, can easily crack if overtightened, so they should usually be tightened by hand only or just slightly with a wrench if needed. Always check the manufacturer’s recommendations for your specific material to avoid leaks or damage.

Aaron Davis

You talk about avoiding catastrophic breaks from over-tightening. For someone on a tight budget who wants to avoid costly mistakes, are there affordable torque wrenches or other tools that help prevent overtightening?

    Mario The Plumber

    Yes, there are budget-friendly torque wrenches available that can help you avoid overtightening plumbing fittings. Look for basic beam or click-type torque wrenches, which are often less expensive than digital versions but still reliable for most DIY tasks. Adjustable wrenches with torque indicators are another low-cost option. Always check the recommended torque settings for your plumbing connections to use these tools effectively.

Robert Perez

The article talks about using the right tools rather than just grabbing pliers or an adjustable wrench. Could you suggest a basic toolkit for someone just starting out with DIY plumbing that keeps costs reasonable?

    Mario The Plumber

    A beginner’s plumbing toolkit doesn’t need to be expensive. Start with a pipe wrench, adjustable wrench, slip-joint pliers, a basin wrench, plumber’s tape (Teflon tape), a hacksaw, a plunger, and a set of screwdrivers. These basics cover most DIY jobs and help prevent the common mistakes caused by using the wrong tools.

Matthew Jones

Could you explain a bit more about how overtightening affects compression fittings specifically? I don’t really understand what happens to the ferrule and why that leads to leaks.

    Mario The Plumber

    When you overtighten compression fittings, the ferrule—which is a small metal ring—gets crushed too much between the pipe and the fitting. This can deform the ferrule, causing it not to seal evenly around the pipe. When this happens, small gaps can form, allowing water to leak past the fitting. Tighten the nut just enough to stop leaks, but avoid using excessive force.

Nathan Johnson

You mention over-tightening connections as a big issue for beginners, but how do I know if I’ve actually gone too far when tightening something like a faucet or a compression fitting? Is there a way to check before turning the water back on?

    Mario The Plumber

    When tightening a faucet or compression fitting, you want it snug, but not forced. Usually, hand-tighten first, then use a wrench to give it an extra quarter to half turn. If you feel strong resistance, stop—over-tightening can crack fittings or damage seals. After tightening, check the connection by gently wiggling it; it shouldn’t move but shouldn’t feel stressed. Finally, before turning the water fully on, open it slowly and watch for any drips. If you spot a small leak, try tightening just a bit more.

Matthew Garcia

For small plumbing fixes like a dripping faucet, how much time should a beginner budget for the job if they want to be careful and avoid common mistakes like overtightening?

    Mario The Plumber

    For a beginner tackling a dripping faucet, it’s wise to set aside about 1 to 2 hours. This gives you plenty of time to turn off the water, carefully disassemble the faucet, inspect and replace washers or cartridges, and reassemble everything without rushing. Take your time at each step, especially when tightening parts, to avoid overtightening and damaging components.

Nancy Robinson

After reading your advice on proper tightening techniques, I’m wondering how long a typical DIY repair should take if done correctly and without overtightening. Are there time estimates for common beginner projects like replacing a faucet or fixing a leak?

    Mario The Plumber

    For a beginner, replacing a faucet usually takes about 1 to 2 hours if you follow the steps carefully and avoid overtightening. Fixing a simple leak, such as swapping out a washer or tightening a connection, can take 30 minutes to an hour. Taking your time and double-checking your work is always better than rushing, especially if you’re new to plumbing tasks.

Anthony Martin

If I’ve already tightened a fitting a bit too much and I’m worried I might have damaged it, is there any way to check for issues before I put everything back together and turn on the water?

    Mario The Plumber

    If you think you may have overtightened a fitting, carefully inspect it for visible cracks or distortion, especially on plastic parts. You can also gently loosen and re-tighten the fitting to see if the threads still engage smoothly. If possible, do a dry fit with the washer or gasket in place, and once reassembled, turn on the water gently while watching closely for any drips or leaks before fully closing up your work area.

Donna Davis

Could you explain in a bit more detail how to recognize the right level of tightness when working with different types of fittings, especially if you’re not familiar with the feel of when to stop tightening? I worry about under-tightening too.

    Mario The Plumber

    A good rule of thumb with plumbing fittings is to tighten them until you feel resistance, then give about a quarter turn more. Metal fittings can usually handle a bit more torque than plastic ones, which can crack if overtightened. If you’re using compression fittings, tighten by hand and then use a wrench for a snug fit—don’t force it. If you see leaks after turning the water back on, gently tighten in small increments until the leak stops. With experience, you’ll develop a better feel for the right tightness.

Thomas Clark

I understand the dangers of over-tightening pipe fittings, but how can I tell if I’ve reached ‘hand-tight plus a quarter turn’ if I’m not very strong? Is there a trick or tool beginners can use to avoid going too far?

    Mario The Plumber

    If you’re not very strong, ‘hand-tight plus a quarter turn’ just means turning the fitting by hand until it’s snug, then using a wrench to turn it about 90 degrees more. You don’t need a lot of force. You might try marking the fitting with a pencil before using the wrench, so you can clearly see when you’ve completed that extra quarter turn. If it feels resistant but not strained, that’s usually enough.

Helen Clark

For safety, are there specific precautions I should always take before starting any plumbing repairs—even small ones like supply line fixes? The article mentions safety tips but I’d love a quick checklist for beginners.

    Mario The Plumber

    Absolutely, safety is key for any plumbing project. Before starting, always turn off the water supply to the area you’ll be working on. If electricity is nearby, switch off power to avoid shocks. Wear gloves and safety glasses to protect your hands and eyes. Keep a towel or bucket handy for unexpected leaks. Make sure your workspace is well-lit and free of clutter. Finally, double-check that you have the correct tools and know how to use them properly.

Michael Martinez

You mention that compression fittings can be prone to leaks if overtightened. Is there a way to tell if you’ve gone too far, or any techniques for checking the seal before turning the water fully back on?

    Mario The Plumber

    When tightening compression fittings, stop once you feel resistance and give a final quarter-turn with a wrench—avoid forcing it further. To check your seal, open the water supply slowly while watching for any drips at the fitting. Placing a dry tissue or paper towel around the connection can help spot tiny leaks. If you notice moisture, tighten the fitting slightly more until the leak stops.

David Martinez

You say to tighten until you feel resistance and not to force it further, but what should I do if a connection still seems a little loose after following that advice? Is it safer to leave it slightly loose or risk overtightening?

    Mario The Plumber

    If a connection feels loose after tightening until you feel resistance, it’s best to double-check that all parts are aligned correctly and any washers or sealants are in place. Never overtighten, as this can crack fittings or strip threads. If it still feels loose, disassemble and inspect the components rather than forcing it. A proper fit should be snug but not forced, ensuring a good seal without damage.

Christopher Jackson

The article says beginner mistakes can lead to leaks or bigger problems weeks later. Is there a way to double-check my work right after finishing a DIY plumbing job so I can catch any issues early?

    Mario The Plumber

    Yes, you can double-check your plumbing work right after finishing. Run water through the fixture for several minutes while watching all joints and connections closely for drips or moisture. Also, use a dry tissue or paper towel to dab around fittings—if it gets damp, there’s a leak. Checking again after a few hours and the next day helps catch slow leaks before they cause bigger issues.

Michelle Garcia

On the tip about over-tightening connections, how do I know for sure I’ve reached the right level of tightness, especially for things like sink fittings? Is there a noticeable feel or sign I should watch for to avoid going too far?

    Mario The Plumber

    With sink fittings, hand-tighten the connection first, then use a wrench to give an extra quarter or half turn. You’ll feel resistance increase—stop when it feels snug but not forced. If you hear creaking or feel the fitting deform, that’s too tight. After connecting, turn on the water and check for drips. If it leaks, tighten just a bit more. Avoid forcing it beyond this point to prevent damaging threads or washers.

Brian Gonzalez

How much extra time should a beginner budget for a typical repair, like fixing a dripping faucet, considering the potential for running into these common mistakes you listed?

    Mario The Plumber

    For a beginner, it’s wise to budget about 2 to 3 hours for fixing a dripping faucet. This allows extra time for common mistakes like struggling to shut off the water, finding the right tools, or needing to make an unexpected trip to the hardware store. Taking things slow reduces stress and helps you double-check each step as you go.

William White

If I’ve already overtightened a connection and suspect I may have stripped a thread or damaged a fitting, what would be the best way to check and fix this before a leak appears?

    Mario The Plumber

    To check for damage after overtightening, first turn off the water supply and carefully disconnect the fitting. Inspect the threads and fitting for signs like flattened or crossed threads, cracks, or visible distortion. If threads are stripped or damaged, replacing the fitting or using thread repair tools is best. Always use new plumber’s tape before reconnecting, and avoid overtightening to prevent future problems.

Sarah Garcia

For small repairs like a dripping faucet, how much time should a beginner typically set aside to minimize mistakes? I want to make sure I’m not rushing and overlooking details, especially since it sounds like mistakes can show up days later.

    Mario The Plumber

    For a beginner tackling a dripping faucet, it’s wise to set aside at least 1 to 2 hours. This allows time to carefully read instructions, gather tools, shut off the water, and work at a relaxed pace. After finishing, check your repair for leaks both immediately and again the next day, since some mistakes might not show right away.

Betty Ramirez

When tightening pipe fittings, is there a way to tell if I’m overtightening if I don’t have much plumbing experience? I worry I might not recognize the right amount of resistance you mentioned.

    Mario The Plumber

    It’s a common concern, especially for beginners. As a general rule, hand-tighten the fitting first, then use a wrench to give it an additional quarter turn—this is usually enough for a secure seal. If you feel strong resistance or the fitting starts to deform, stop tightening. Overtightening often makes it harder to undo later and can damage the pipe or fitting. If you notice leaks after turning on the water, you can carefully tighten a bit more, but always go slowly.

Anthony Gonzalez

Do your recommendations change if I’m working with older pipes, like galvanized or corroded ones? Are they more prone to cracking from overtightening, and should I take extra precautions?

    Mario The Plumber

    Yes, if you’re working with older pipes, especially galvanized or corroded ones, extra caution is needed. These pipes are definitely more prone to cracking or breaking if overtightened. It’s best to use gentle, steady pressure and avoid forcing fittings. Consider using penetrating oil on stuck joints and always check for signs of weakness or damage before starting. If the pipes seem very brittle or heavily rusted, it might be safer to replace sections rather than risk a break.

James Wilson

For parents like me who barely have time between kids’ activities, how long should I set aside to do a minor repair like replacing a supply line? Does being careful to avoid these common mistakes add a lot to the time needed?

    Mario The Plumber

    Replacing a supply line is usually a quick project, often taking about 30 to 45 minutes if you have the right tools and parts ready. Being careful and following the article’s tips to avoid common mistakes might add just a few extra minutes, but it can save you much more time and effort in the long run by preventing leaks or repeated work.

Diane Brown

You talked about avoiding the use of the wrong tools, but for absolute beginners, is there a basic set of plumbing tools you’d recommend buying up front, and can most small fixes be done with those, or will I keep needing to buy more specialized tools over time?

    Mario The Plumber

    A basic plumbing toolkit for beginners usually includes an adjustable wrench, a pipe wrench, a plunger, a pair of channel-lock pliers, a pipe cutter, plumber’s tape, and a basin wrench. With these, you can handle most small repairs like fixing leaks, tightening fittings, or replacing washers. As you take on more complex projects, you might occasionally need to add a specialized tool, but for most routine fixes, this starter set is enough.

Diane Jackson

Could you explain what the signs are that a fitting has been over-tightened? I’m always worried I’ll strip something but I’m not sure how to tell if I’ve already done it.

    Mario The Plumber

    When a fitting is over-tightened, you might notice the threads feel stripped or the fitting keeps spinning without tightening further. You could also see visible cracks in plastic fittings or flattened or deformed washers. If a metal fitting requires more force than expected, or leaks even after tightening, it may already be damaged. It’s best to tighten gently and stop as soon as you feel resistance.

Kevin Lewis

When it comes to overtightening valves or fittings, is it better to err on the side of too loose or too tight if you’re not sure? What’s the safest approach for beginners?

    Mario The Plumber

    If you’re unsure, it’s generally safer to err on the side of slightly loose rather than too tight. Overtightening can crack fittings, strip threads, or damage seals, leading to leaks or costly repairs. Tighten by hand first, then use a wrench for just a small additional turn until snug. If you notice any leaks, you can tighten a bit further as needed.

Joseph Ramirez

The article talks about preventative safety tips for plumbing projects. Are there specific safety recommendations for working with older pipes in older homes, since I’m not sure what materials I might be dealing with?

    Mario The Plumber

    When working with older pipes, it’s important to watch out for materials like lead, galvanized steel, or even asbestos insulation. Wear gloves and a mask to avoid direct contact and inhalation of dust. If you’re unsure about what the pipes are made of, consider having a professional inspect them before starting your project, as disturbing hazardous materials can pose health risks.

Tyler Perez

How long should a beginner expect a typical minor DIY repair, like fixing a dripping faucet, to take if they follow the guide’s safety and tool advice? Just trying to plan for how much time I’ll need for common fixes.

    Mario The Plumber

    For a beginner who carefully follows the safety tips and uses the recommended tools, fixing a dripping faucet usually takes about 45 minutes to 1.5 hours. This includes time for shutting off the water, disassembling the faucet, replacing the faulty part, and checking for leaks. As you gain experience, these common repairs will go even faster.

Elizabeth Sanchez

For someone who wants to tackle a small drip under the kitchen sink, which beginner mistake do you see most often in that specific situation, and is there a quick fix if the wrong tool was already used and the nut got stripped?

    Mario The Plumber

    One common mistake is over-tightening the compression nut or using the wrong size wrench, which often strips the nut. If the nut is already stripped, try gripping it with locking pliers to loosen or remove it gently. If it’s too damaged, you may need to replace the nut entirely, but make sure to use the correct size wrench next time and tighten only until snug to avoid future issues.

Barbara Lopez

You mention that overtightening compression fittings can lead to leaks due to a deformed ferrule. Is there a way to tell if a fitting has already been damaged like this, or would the leak always show up immediately?

    Mario The Plumber

    A leak from a deformed ferrule due to overtightening doesn’t always appear right away—it can take time for problems to show up. Signs of damage include difficulty getting a proper seal, water seepage even after tightening, or visible distortion of the ferrule or fitting. If you’re unsure, disassemble the joint and inspect the ferrule for cracks, flattening, or uneven surfaces before reusing it.

James Ramirez

About overtightening connections, how soon do slow leaks or breaks usually appear if you’ve made this mistake? Would it help to check the area daily for a while after repairs?

    Mario The Plumber

    If a connection has been overtightened, leaks or cracks can sometimes show up right away, but in many cases, the damage takes a few days or even weeks to become obvious. Checking the repaired area daily for at least the first week is a good idea. This way, you can catch any slow leaks early before they cause more damage.

David Smith

The guide talks about using hand-tightening plus a quarter turn with a wrench. Could you clarify how to recognize the point of resistance, especially if I’m working with older plumbing or corroded fittings?

    Mario The Plumber

    When tightening a fitting, you’ll first hand-tighten until it stops turning easily—this is the initial point of resistance. For older or corroded fittings, resistance may come sooner or feel uneven. Don’t force it past this point; instead, use the wrench for just a quarter turn after hand-tightening. If it feels unusually tight or starts creaking, stop to avoid damaging the fitting or threads. If corrosion is severe, consider cleaning the threads or replacing parts before tightening.

Julie Lewis

When you mention over-tightening fittings, does this advice apply equally to both metal and PVC pipes, or are there different tightening techniques depending on the material?

    Mario The Plumber

    Over-tightening fittings is a concern for both metal and PVC pipes but for different reasons. With metal pipes, over-tightening can strip threads or crack fittings, while with PVC pipes, it can actually cause the plastic to crack or distort, leading to leaks. For PVC, hand-tighten fittings and then give a slight additional turn—never force it. Metal fittings can handle a little more torque, but use caution and stop when you feel resistance.

Nathan Miller

You mentioned that using the wrong tools is a common beginner mistake. Are there a few essential tools you recommend every new DIY plumber should have before starting even a small project?

    Mario The Plumber

    Absolutely! Every new DIY plumber should have a few key tools before tackling any project. At a minimum, you’ll want an adjustable wrench, pipe wrench, plunger, pipe cutter, Teflon tape, and a good pair of channel-lock pliers. Having these basics handy can make most small jobs much easier and help you avoid damaging fittings or pipes.

Patricia Thomas

The article warns against using pliers or adjustable wrenches for certain jobs. Can you recommend a short list of essential plumbing tools for beginners that are affordable but won’t risk damaging pipes or fittings?

    Mario The Plumber

    Absolutely! For beginners, it’s best to have a pipe wrench for sturdy grip on pipes, a basin wrench for hard-to-reach nuts under sinks, a set of slip-joint pliers for general use, and a plumber’s tape (Teflon tape) to seal threaded connections. A plastic pipe cutter is also handy if you’re working with PVC pipes. These tools are affordable and designed to minimize damage to pipes and fittings.

Christopher Moore

I’m curious about compression fittings specifically—could you explain what signs indicate you’ve overtightened the ferrule, and what steps to take if you suspect you’ve gone too far during installation?

    Mario The Plumber

    If you’ve overtightened the ferrule on a compression fitting, you might notice that the nut feels extremely tight with little resistance left, or the pipe itself becomes deformed or dented near the fitting. Sometimes, overtightening can even cause leaks instead of preventing them, as the ferrule doesn’t seal properly. If you think you’ve overtightened, loosen the nut, inspect the pipe and ferrule for damage, and replace them if necessary before reinstalling. In the future, tighten by hand first, then use a wrench for just a quarter turn more.

Rachel Ramirez

You mention that overtightening compression fittings can deform the ferrule and cause leaks. How do you know if you’ve tightened it just enough, especially since it’s hard to gauge resistance for beginners?

    Mario The Plumber

    It’s a common concern for beginners. When tightening a compression fitting, use your fingers to get it snug, then use a wrench to turn the nut about half a turn more. You shouldn’t feel a lot of resistance or strain. If you notice the nut turning easily for several full turns, it’s too loose; if it gets very stiff quickly, stop tightening. After turning the water back on, check for leaks. If there are any, you can tighten the nut slightly more, a quarter turn at a time, until the leak stops.

Donna Jones

You brought up damaging seals or cracking fittings from overtightening, but what would be the best way to fix those issues if I accidentally make that mistake? Is it always a full replacement, or can some things be salvaged?

    Mario The Plumber

    If you’ve overtightened and damaged a seal or cracked a fitting, the safest fix is usually to replace the faulty part to prevent future leaks. For minor seal damage, you can sometimes reseat or replace just the washer or use plumber’s tape, but once a fitting is cracked, replacement is best. Always check for leaks after any repair to be sure the issue is fully resolved.

John Martinez

What are some common signs that I’ve made a beginner mistake in my plumbing work, like overtightening or using the wrong tool, and how soon should I expect issues to show up after finishing a repair?

    Mario The Plumber

    Some common signs of beginner mistakes in plumbing include dripping joints, leaks under sinks, or pipes making unusual noises. Overtightening can crack fittings, which might cause leaks within hours or days. Using the wrong tool may damage pipes or fittings, leading to immediate or gradual issues. Most problems show up soon after turning the water back on, but some, like slow leaks, may take a few days to become noticeable. Keep an eye on your repair for at least a week.

Ashley Williams

The guide says this is aimed at new DIYers, but what about projects like replacing a section of pipe? How do I know which repairs are truly safe for a beginner and when it’s time to call in a professional plumber?

    Mario The Plumber

    Replacing a section of pipe can be challenging for beginners, especially if it involves cutting, soldering, or dealing with older plumbing. Simple fixes like unclogging drains or changing washers are usually safe for DIYers. If the repair involves main water lines, major leaks, or anything you’re unsure about, it’s best to call a professional plumber. Always turn off your water supply before starting any repair and check local regulations, as some plumbing work requires a licensed pro.

Lisa Johnson

If a slow leak starts showing up days after a DIY fix, what are the best first steps to troubleshoot it before calling a plumber?

    Mario The Plumber

    If a slow leak appears days after a DIY fix, start by double-checking all connections for tightness—sometimes fittings loosen over time. Inspect washers and seals to see if they’re seated correctly or need replacing. Dry the area and look for the exact source of moisture. If you used plumber’s tape, make sure it’s applied properly. If you can’t pinpoint or stop the leak, then it’s wise to consult a professional.

Jennifer Miller

When you recommend using the right tools instead of just whatever is handy, what are the top two budget-friendly tools a beginner should definitely invest in for small plumbing repairs?

    Mario The Plumber

    For small plumbing repairs, two budget-friendly tools worth investing in are an adjustable wrench and a pair of channel-lock pliers. The adjustable wrench is great for tightening or loosening nuts and bolts on pipes, while channel-lock pliers help grip and turn pipes or fittings of different sizes. Both are versatile and will make most beginner-friendly repairs much easier and safer.

Donna Jones

When it comes to over-tightening connections, is there a specific type of wrench or torque tool you’d recommend for beginners to avoid damaging threads, or is hand-tightening usually enough for most DIY plumbing jobs?

    Mario The Plumber

    For most basic DIY plumbing jobs, hand-tightening is usually enough, especially for plastic fittings or flexible supply lines. Over-tightening with a wrench can easily damage threads or crack fittings. If you do need to use a wrench, an adjustable wrench is common, but just give it a gentle snug — never force it. Torque wrenches aren’t typically needed for home plumbing. If you’re unsure, always check the manufacturer’s recommendations for that fitting.

Barbara Johnson

You mentioned that overtightening compression fittings can deform the ferrule and cause leaks. If I suspect I’ve already overtightened one, is there a way to fix it without replacing the entire fitting?

    Mario The Plumber

    If you’ve overtightened a compression fitting and suspect the ferrule is deformed, you can try loosening the nut, removing the ferrule, and inspecting it. If the ferrule looks damaged or out of shape, you’ll need to replace just the ferrule and possibly the compression ring, not the entire fitting. Reassemble the parts and tighten the nut just enough to stop leaks—avoid overtightening. This should help restore a proper seal.

Margaret Anderson

You talked about the problems with over-tightening and how it can lead to leaks that show up days later. How soon after a repair should I check things to make sure nothing is leaking, and what’s the best way to spot a slow leak early?

    Mario The Plumber

    After making a plumbing repair, check for leaks right away by running water and feeling around connections for moisture. It’s wise to recheck a few hours later and then again the next day, since some slow leaks may take time to appear. To catch subtle leaks early, look for damp spots, drips, or water stains around fittings and joints, and place a dry paper towel or tissue under the area to help reveal any moisture.

Ashley Lee

You mentioned that overtightening fittings can sometimes lead to breaks days or weeks after the repair. What should I do if I see water stains or dampness near a recent DIY repair and how urgent is it to address that?

    Mario The Plumber

    If you notice water stains or dampness near a recent DIY plumbing repair, it’s important to act quickly. This could indicate a slow leak that might worsen over time and cause more damage. Turn off the water supply to that area if possible, then carefully inspect the fittings and joints for any signs of moisture. If you can’t identify or fix the source, contacting a professional plumber is recommended to prevent further issues.

Anthony Brown

In the section about over-tightening connections, you mention stopping when you feel resistance, but I’ve always been nervous that’s not tight enough. Are there any visual signs or specific ways to test if a fitting is sealed properly after tightening?

    Mario The Plumber

    Feeling resistance is a good stopping point, but to make sure your fitting is sealed, you can inspect for visible gaps and ensure the fitting sits snugly against the connection. After tightening, turn the water back on and watch closely for any leaks or drips. You can also run a dry tissue around the joint; if it stays dry, your connection is sealed properly.

Anthony Rodriguez

When you mention hand-tightening plus a quarter-turn for pipe fittings, does this apply to both metal and plastic connections, or should the technique vary depending on the material? I’m worried about accidentally cracking plastic parts since I’m new to this.

    Mario The Plumber

    The hand-tightening plus a quarter-turn guideline is generally safe for metal pipe fittings, which can handle more pressure. For plastic fittings, it’s best to stick with hand-tightening only to avoid cracking or damaging the material. Over-tightening is a common mistake with plastic, so be gentle and stop as soon as the connection feels snug.

William Miller

You mentioned using the right tools instead of just reaching for whatever is nearby. Are there a few basic, budget-friendly tools you’d recommend every beginner keep on hand for common plumbing fixes?

    Mario The Plumber

    Absolutely! For basic plumbing fixes, it’s smart to keep a few essentials around. A pair of adjustable wrenches and a set of channel-lock pliers are versatile and affordable. A pipe wrench is handy for tougher jobs. Also, have a plunger, plumber’s tape (PTFE/Teflon tape), and a basic pipe cutter for small repairs. These tools cover most minor leaks, clogs, and fitting replacements, making DIY plumbing much smoother.

Ashley Davis

The article says to use the right tools instead of just grabbing what’s around. For a complete beginner, what’s the minimum tool kit you’d recommend for tackling basic plumbing jobs like fixing a dripping faucet?

    Mario The Plumber

    For basic plumbing jobs like fixing a dripping faucet, start with a few essential tools: an adjustable wrench, a pair of channel-lock pliers, a basin wrench for hard-to-reach nuts, a flathead and Phillips screwdriver, plumber’s tape (Teflon tape), and a small bucket or towel for catching water. This basic kit will handle most simple repairs and help you avoid damaging fixtures.

Richard Taylor

If I want to prepare for common minor emergencies like dripping faucets or small leaks, about how much time does it usually take a newbie to fix these issues with the right approach?

    Mario The Plumber

    For a beginner, fixing a dripping faucet or a small leak typically takes anywhere from 30 minutes to 2 hours. The exact time depends on your comfort level and the tools you have. Set aside extra time to watch a tutorial or read the instructions, and make sure to turn off the water supply before starting any repairs.

Donna Smith

You mention using hand-tightening plus a quarter-turn for most fittings, but does this advice change depending on the type of pipe or material, like PVC versus copper?

    Mario The Plumber

    Yes, the advice can change depending on the material. For PVC fittings, hand-tightening plus a small extra turn is usually enough, as overtightening can crack the plastic. For copper pipes, if you’re using threaded brass fittings, a similar approach works, but always check manufacturer guidelines. With compression fittings or soldered joints on copper, tightening methods will differ. Always match your technique to the specific pipe and fitting type to avoid damage or leaks.

Richard Gonzalez

In the section about using the right tools, you bring up compression fittings. Are there any specific brands or features you recommend for beginners to help minimize mistakes, especially when I am on a tight budget?

    Mario The Plumber

    For beginners on a budget, look for compression fittings from brands like SharkBite, BrassCraft, or Apollo, which are widely available and known for their reliability. Choose fittings with clear markings and knurled nuts for better grip. Kits that include both the fitting and a compatible insert can also reduce errors. Always check the packaging to ensure the fittings are compatible with your pipe material.

Charles Clark

Can you elaborate on what causes a ferrule to deform when overtightening compression fittings? Is this something I would immediately notice while tightening, or will it only show up later as a leak?

    Mario The Plumber

    A ferrule deforms when overtightening because excessive force compresses and distorts its shape, making it unable to form a proper seal around the pipe. While you might feel increased resistance as you tighten, the damage isn’t always obvious right away. Often, leaks develop later as water finds a path around the deformed ferrule. It’s best to tighten just enough to seal, then check for leaks after turning the water on.

Joshua Martinez

The guide references online tutorials that might lead beginners astray. Are there any reliable resources you recommend for those new to plumbing, or key red flags in tutorials to avoid following bad advice?

    Mario The Plumber

    For beginners, manufacturer websites and official home improvement stores often provide trustworthy plumbing guides. Look for resources from established organizations like the Family Handyman or This Old House. As for red flags, avoid tutorials that skip safety steps, use vague terminology, or suggest shortcuts like mismatched pipe materials. Clear visuals, detailed explanations, and credentials or professional experience from the creator are good signs of a reliable tutorial.

Karen Moore

The article suggests using specific tools instead of whatever is handy. For someone just starting out and on a tight budget, what would be the top two or three essential plumbing tools to invest in?

    Mario The Plumber

    For beginners on a budget, the most essential plumbing tools are an adjustable wrench, a pipe wrench, and a plumber’s wrench (also called channel-lock pliers). These three tools can handle most basic plumbing tasks like tightening fittings or loosening nuts. Starting with these will help you avoid common mistakes and keep your DIY fixes safe and effective.

Karen Clark

You mentioned that over-tightening compression fittings can deform the ferrule and cause leaks. If I suspect I might have already overtightened a connection, is there a way to check for damage without taking everything apart?

    Mario The Plumber

    If you think you might have overtightened a compression fitting, you can check for signs of damage without disassembling it. After turning the water back on, look closely for any drips or moisture around the fitting. Also, gently feel the area to see if there’s dampness. If you notice persistent leaks or see water stains, that’s a strong sign the ferrule may be deformed and the connection compromised.

William Taylor

Does the advice about hand-tightening plus a quarter-turn apply to both metal and plastic plumbing connections, or are there differences in how you should tighten them to avoid damage?

    Mario The Plumber

    The hand-tightening plus a quarter-turn rule is mainly recommended for metal plumbing connections. With plastic fittings, it’s best to only hand-tighten and avoid using tools, since overtightening can easily crack or damage the plastic. Always check the manufacturer’s instructions for your specific fittings to ensure the right approach.

Barbara Brown

I noticed you said using the wrong tools can cause more harm than good. Can you recommend a few must-have tools for a basic plumbing kit for someone just starting out, especially on a tight budget?

    Mario The Plumber

    For a basic plumbing kit on a budget, consider starting with an adjustable wrench, a pair of slip-joint pliers, a pipe wrench, a plumber’s tape (Teflon tape), and a small hacksaw. Also, a plunger and a basin wrench can be really helpful for most household tasks. These essentials should cover most simple repairs and help you avoid common mistakes.

Donna Garcia

I noticed the guide touches on using the right tools for plumbing projects. Could you suggest what essential tools a beginner should invest in for small repairs without spending too much?

    Mario The Plumber

    For small plumbing repairs, you only need a few affordable essentials. A good adjustable wrench, a pair of slip-joint pliers, a pipe wrench, a plunger, plumber’s tape (Teflon tape), and a basic pipe cutter will cover most common tasks. A basin wrench is also handy for tightening or loosening faucet connections. These tools are budget-friendly and suitable for most beginner DIY projects.

Linda Anderson

In the section about over-tightening, you mention stopping when you feel resistance and only giving an extra quarter-turn with a wrench. If I’m working with older pipes that already show signs of wear, should I be even more cautious, or is the same rule of thumb safe to follow?

    Mario The Plumber

    When dealing with older pipes that show signs of wear, it’s smart to be even more cautious. Older pipes can be more fragile and prone to cracking if over-tightened. Instead of the usual quarter-turn after resistance, stop as soon as the joint feels snug. Test for leaks gently, and tighten a bit more only if necessary. Always avoid forcing it with extra pressure.

James Clark

Can you share any tips for telling the difference between a fitting that just needs to be snug versus one that’s truly under-tightened? I’m worried about ending up with leaks by not tightening enough.

    Mario The Plumber

    A fitting should usually be snug but not forced—hand-tighten first, then use a wrench for an extra quarter turn if needed. If it keeps turning easily, it may be under-tightened, but if you feel strong resistance, stop. Over-tightening can damage threads or crack fittings, while under-tightening may cause leaks. After assembly, run water and watch closely for drips to ensure a proper seal.

Barbara Lee

The article mentions compression fittings and the risk of deforming the ferrule by overtightening. Do you suggest using any type of torque tool or just relying on the ‘snug plus quarter-turn’ advice for beginners?

    Mario The Plumber

    For most beginners, sticking to the ‘snug plus a quarter-turn’ rule is usually the safest approach because it helps prevent overtightening and damaging the ferrule. Torque tools aren’t typically necessary for standard plumbing tasks at home unless a manufacturer specifically recommends one. If you feel resistance after the quarter-turn, that’s usually enough for a leak-free seal.

Emily Sanchez

I noticed the article talks about overtightening compression fittings. Is there a difference in how you should tighten PVC versus metal piping, or are the guidelines basically the same for all materials?

    Mario The Plumber

    There is a difference between tightening PVC and metal piping. PVC fittings should only be hand-tightened, and then given a small turn with a wrench—just enough to seal—since overtightening can crack the plastic. Metal compression fittings are a bit more forgiving but can still be damaged by overtightening, which can deform the ferrule or fitting. It’s best to follow manufacturer instructions for each material to avoid leaks or damage.

Anthony Harris

You mentioned avoiding pliers or the wrong kind of wrench for plumbing jobs—could you give an example of the specific tools a beginner should invest in first? I don’t want to overbuy but I want to be prepared for common fixes.

    Mario The Plumber

    For most basic plumbing repairs, start with an adjustable wrench, a pair of channel-lock pliers, and a pipe wrench. These will help with tasks like tightening fittings or loosening nuts without damaging pipes. Also, consider a basin wrench for hard-to-reach spots under sinks and a plumber’s tape for leak-proof seals. This small set covers most beginner jobs without unnecessary extras.

Joshua Thompson

The article talks about using the wrong tools being a common DIY problem. If I’m just starting out, what are the absolute must-have tools to keep at home for basic plumbing fixes? I want to avoid buying unnecessary items.

    Mario The Plumber

    For basic plumbing fixes, a few essential tools are all you really need. A good adjustable wrench, a pair of tongue-and-groove pliers, and a pipe wrench handle most tightening and loosening jobs. Add plumber’s tape (Teflon tape) for sealing threads, a plunger for unclogging drains, and a small hand auger for simple blockages. These basics should cover common repairs without cluttering your toolbox.

Mary Robinson

The article talks about using the proper tools instead of just grabbing pliers. For someone starting out, what are the must-have tools for basic plumbing repairs, and are there any budget-friendly alternatives that still get the job done safely?

    Mario The Plumber

    For basic plumbing repairs, it’s helpful to have an adjustable wrench, a pipe wrench, a plunger, a basin wrench, plumber’s tape, and a set of screwdrivers. Slip-joint pliers can work in a pinch, but adjustable wrenches are safer and cause less damage. Budget-friendly brands at hardware stores often offer starter tool sets that will cover most beginner needs without a big investment.

Michelle White

For small DIY fixes like a dripping faucet, how long should a beginner expect the job to realistically take, including setup and cleanup? I’m trying to plan projects around a busy schedule.

    Mario The Plumber

    For a beginner, fixing a dripping faucet will usually take about 1 to 2 hours total. This includes gathering your tools, shutting off the water, doing the repair, testing it, and cleaning up afterward. With good preparation and access to all needed parts, you might finish a bit faster, but setting aside up to 2 hours is realistic for your first attempt.

Mark Johnson

If a slow leak develops days after I finish a DIY job, is there a way to figure out if overtightening was the cause, or should I look for other mistakes first?

    Mario The Plumber

    If you notice a slow leak days after your DIY plumbing job, it’s possible that overtightening caused damage to washers or threads, but it’s not the only potential cause. Check for cracked fittings or deformed washers first, which are signs of overtightening. Also look for loose connections, misaligned parts, or debris in seals. Inspect each area step by step to narrow down the issue.

Robert Davis

I have a question about over-tightening connections. How can you tell if you’ve tightened a fitting enough, especially if you don’t have a lot of experience? The article says to stop when you feel resistance, but is there a clearer way to judge this for beginners?

    Mario The Plumber

    A good rule of thumb is to hand-tighten the fitting first, then use a wrench to give it an additional quarter to half turn. You should feel the connection become snug without forcing it. If you notice the fitting starts to deform or it becomes very difficult to turn, you’ve likely gone too far. It’s better to check for leaks after turning the water on and tighten a little more only if needed.

Michael Wilson

The article talks about the importance of the right tools for DIY plumbing jobs. For a beginner, which basic tools should I buy to avoid damaging fittings or making things worse, and do you have any budget-friendly suggestions?

    Mario The Plumber

    For beginner DIY plumbing, start with adjustable wrenches, a pipe wrench, plumber’s tape (Teflon tape), a plunger, and a pipe cutter. These let you tighten or loosen fittings and deal with leaks without causing damage. Budget-friendly brands like Stanley or Husky offer solid tools at reasonable prices. Avoid using regular pliers or makeshift tools—they can slip and damage fittings. Investing in the basics will help you work safely and avoid common mistakes.

Charles Ramirez

The article notes using the right tools, but for someone on a budget, which essential plumbing tools offer the best balance between cost and function for basic home repairs?

    Mario The Plumber

    For basic home plumbing repairs on a budget, consider starting with an adjustable wrench, a pair of channel-lock pliers, a pipe wrench, a plumber’s tape (Teflon tape), and a basic plunger. These are affordable, versatile tools that handle most simple jobs like fixing leaks, tightening fittings, and clearing clogs. Investing in these essentials allows you to tackle common issues without overspending.

Sarah Lee

With kids in the house and a busy schedule, I have to fix small plumbing issues quickly. Roughly how long should I set aside for a basic DIY repair like stopping a dripping faucet, assuming I follow your advice in the article?

    Mario The Plumber

    For a basic DIY repair like stopping a dripping faucet, you should generally set aside about 30 to 60 minutes. This includes turning off the water, disassembling the faucet, replacing the worn washer or cartridge, and reassembling everything. Since you have kids and a busy schedule, it’s smart to gather all needed tools and parts beforehand to keep things efficient.

Mark Wilson

I’m new to plumbing, and getting the right tools always confuses me. Are there a few essential beginner tools you’d recommend investing in for DIY jobs, and are there any that can double up for multiple purposes?

    Mario The Plumber

    For beginner plumbing, a few essential tools will really help: an adjustable wrench, a pair of tongue-and-groove pliers, and a plumber’s wrench. A basic pipe wrench often doubles up for tightening and loosening fittings and even opening stubborn taps. Also, a utility knife and a good-quality plunger are useful and versatile for different jobs. Investing in these basics will cover most simple DIY plumbing tasks.

Tyler White

The article touches on the dangers of overtightening and damaging pipes, but what should I do if I suspect I’ve already stripped a thread during a DIY project? Is there an easy way to fix or identify that before a leak happens?

    Mario The Plumber

    If you think you’ve stripped a thread, carefully inspect the joint for wobbling or difficulty tightening. A stripped thread often feels loose and won’t seal properly. To fix it, you might need to replace the damaged fitting or use a thread repair kit. Always test the connection gently with water before full use to check for leaks.

Diane Harris

I sometimes find that even after hand-tightening and a bit more with a wrench, small leaks still show up days later. What’s the best troubleshooting step if a new fitting starts leaking after I thought I did it right?

    Mario The Plumber

    If a new fitting starts leaking after being tightened, it’s a good idea to first turn off the water and carefully disassemble the joint. Check if the threads are clean and if the washer or O-ring is in good shape. Reapply thread sealant or plumber’s tape if needed, making sure to wrap it correctly, then reassemble and tighten—not too much, just enough to be snug. Test for leaks again after a few hours.

Barbara Robinson

In the section about using the wrong tools, can you recommend a basic set of tools that would be enough for most beginner plumbing repairs without breaking the bank?

    Mario The Plumber

    A basic plumbing toolkit for beginners doesn’t need to be expensive but should cover common tasks. Start with an adjustable wrench, a pair of slip-joint pliers, a pipe wrench, a plumber’s tape (Teflon tape), a plunger, a basin wrench for hard-to-reach nuts, and a set of screwdrivers. These essentials will handle most minor repairs like tightening fittings, unclogging drains, or fixing leaks.

Anthony Robinson

You mentioned that using the wrong tool can lead to problems, but if I’m just starting out, what are the absolute must-have tools for basic plumbing projects, and which should I avoid as a beginner?

    Mario The Plumber

    For basic plumbing tasks, start with an adjustable wrench, a pipe wrench, a plumber’s tape (Teflon tape), a plunger, and a pipe cutter. These cover most simple jobs like fixing leaks or replacing fixtures. Avoid power tools or specialty tools like pipe threading kits until you’re more confident, as they require experience and can cause damage if used incorrectly.

Helen Harris

When you talk about not over-tightening compression fittings, is there a good way to check for leaks right after installation, or should I just watch for them over a few days? How long does it usually take for problems from overtightening to show up?

    Mario The Plumber

    After installing compression fittings, it’s a good idea to immediately check for leaks by running water through the joint and closely inspecting for any drips or moisture. Wipe the area dry first so any new leaks are easy to spot. Most issues from over-tightening, like cracked fittings or deformed pipes, can show up right away, but sometimes small leaks may only appear after a day or two, especially under higher pressure. It’s wise to check again after 24 hours and periodically for a few days.

Charles Harris

In your section about using the wrong tools, you mentioned that grabbing whatever’s handy can cause more harm than good. Could you recommend a basic set of tools every beginner should have on hand for minor plumbing repairs?

    Mario The Plumber

    Absolutely, having the right basic tools can make a big difference for small plumbing jobs. A good starter kit should include an adjustable wrench, a pair of channel lock pliers, a pipe wrench, a plumber’s tape (Teflon tape), a plunger, a basin wrench, and a set of screwdrivers. These tools will help you handle most minor leaks, loose fittings, or clogged drains without causing accidental damage.

James Lee

The article talks about compression fittings and the risk of deforming the ferrule if overtightened. For a first-timer, is there a good way to practice getting the snugness right before working on an actual plumbing line in my house?

    Mario The Plumber

    Practicing on a spare piece of pipe and an extra compression fitting is a great way to build confidence. Assemble the fitting and tighten it slowly, feeling for resistance. Stop once it’s snug and give it an extra quarter turn—this is usually enough. You can then disassemble the joint to inspect the ferrule and see if it’s properly compressed without being squashed. This hands-on practice helps you get a sense of the right snugness before working on your home plumbing.

David Jackson

Could you offer advice on cost-effective options for beginners who want to build a basic plumbing toolkit without overspending? Are there specific brands or types of tools that balance quality and affordability for DIY repairs?

    Mario The Plumber

    For a beginner’s plumbing toolkit, start with essentials like an adjustable wrench, pipe wrench, pliers, a pipe cutter, Teflon tape, and a plunger. Look for multipurpose tools, as they offer flexibility for various tasks. Brands like Stanley, Irwin, and Kobalt generally provide good quality at reasonable prices. Consider buying tools individually rather than in sets to avoid extras you won’t use, and check local hardware stores for sales or lightly used items to save more.

Richard Hernandez

The article mentions that over-tightening compression fittings can deform the ferrule and cause leaks. How do I know if I’ve already tightened it too much, and is there a way to fix the ferrule if I think I’ve messed it up?

    Mario The Plumber

    If you’ve already tightened the compression fitting and notice visible deformation of the ferrule, leaking, or difficulty loosening the nut, it may be over-tightened. Once a ferrule is deformed, it usually can’t be reused or fixed effectively. It’s best to remove the fitting, replace the old ferrule with a new one, and reinstall the fitting, tightening it snugly but not forcefully. This should restore a proper seal.

Kevin Wilson

I’m new to plumbing repairs, and the article mentions over-tightening as a common mistake. Is there a way to tell before a leak happens if I’ve tightened a fitting too much, or do problems usually only show up later?

    Mario The Plumber

    It’s often hard to tell right away if you’ve over-tightened a fitting, since issues like cracked pipes or damaged threads might not cause leaks immediately. Signs to watch for while tightening include a sudden resistance or creaking noise—both can indicate you’ve gone too far. It’s best to tighten fittings until snug, then give a small extra turn if needed, rather than forcing them. If you’re unsure, hand-tighten and then use a wrench for just a quarter turn more.

Charles Lewis

The article talks about using the right tools, especially for things like compression fittings. Do you have a list of must-have tools for basic plumbing fixes, and are there affordable options for someone just starting out?

    Mario The Plumber

    For basic plumbing fixes, some essential tools include an adjustable wrench, pipe wrench, pliers, a pipe cutter, plumber’s tape (Teflon tape), a plunger, and a basin wrench. Many hardware stores offer affordable starter sets for beginners. Brands like Irwin or Stanley often have quality tools at reasonable prices. Focus on building your kit gradually, starting with the most-used items first, and you can upgrade over time as needed.

Matthew Moore

Your guide talks about beginners causing slow leaks from overtightening. How long does it usually take for a leak like that to show up, and what’s the best way to check for leaks after finishing a repair?

    Mario The Plumber

    A slow leak from overtightening can appear within minutes or might take several hours or even days to become noticeable, depending on water pressure and how much the fitting was overtightened. To check for leaks after a repair, dry the area thoroughly, turn the water back on, and closely inspect your work. Running a dry paper towel or tissue around joints can reveal even tiny leaks. It’s a good idea to check again after a few hours and the next day to catch any slow drips.

Mark Brown

Can you elaborate on the potential safety hazards you mentioned? Aside from water damage, are there specific risks (like exposure to certain materials or accidental flooding) that beginners should be especially aware of when doing their own plumbing?

    Mario The Plumber

    Absolutely, aside from water damage, beginners should watch for several safety hazards when tackling plumbing. Exposure to mold in damp areas, accidental contact with old pipes that might contain lead, and the risk of slipping on wet surfaces are all concerns. Be careful with hot water lines to avoid burns, and always shut off the water supply before starting any work to prevent accidental flooding. Using tools improperly can also cause injuries, so using the right equipment and protective gear is important.

Tyler Lopez

After installing pipe fittings as suggested, how long should I wait or what should I look for to ensure there isn’t a slow leak developing that I might have missed immediately after the repair?

    Mario The Plumber

    After installing your pipe fittings, it’s wise to check for leaks immediately and then again several hours later. Run water through the system for a few minutes, then dry all the joints and fittings. Revisit the area after an hour and again after 24 hours to look for any dampness or water drops. Even a small bead of water means there’s a slow leak that needs attention.

Joshua Robinson

The article mentions that over-tightening can cause leaks days or weeks later. What signs should I look out for that might indicate I made this mistake, even if everything looks good immediately after the repair?

    Mario The Plumber

    Watch for slow-developing symptoms like water stains around joints, musty smells, or dampness near the area you worked on. Sometimes you might notice a very slow drip or a small puddle forming after a few days. Also, check for swelling or warping of materials around pipes, which can indicate moisture from a hidden leak.

Rachel Hernandez

For beginner plumbers on a tight budget, are there any affordable tool brands or specific items that offer good quality without breaking the bank? I want to avoid using makeshift tools but can’t invest in top-tier equipment right now.

    Mario The Plumber

    Absolutely, you can find reliable tools without spending a fortune. Brands like Stanley, Irwin, and Kobalt often offer good value for basic plumbing tools such as pipe wrenches, pliers, and adjustable spanners. Look for multi-piece starter sets, which are usually more budget-friendly than buying items individually. Local hardware stores sometimes have their own house brands with quality comparable to name brands, too.

Betty Davis

The article mentions using an extra quarter-turn with a wrench after hand-tightening connections. Is that guideline the same for all types of fittings, like compression versus threaded, or do some require a different approach?

    Mario The Plumber

    The extra quarter-turn guideline generally applies to threaded fittings, where over-tightening can cause damage or leaks. Compression fittings, on the other hand, are different—they usually just need to be snug, and over-tightening can deform the components or cause leaks. Always check the instructions for the specific fitting you’re using, as requirements can vary depending on type and material.

James Brown

When you mention to stop tightening when you feel resistance, does this guideline apply to all types of pipe materials, like PVC, copper, and PEX, or are there different recommendations depending on the material?

    Mario The Plumber

    The advice to stop tightening when you feel resistance is especially important for PVC, which can crack if overtightened. For copper connections, you should tighten until snug, then give a partial turn more, but don’t force it. With PEX fittings, usually you just tighten as specified by the manufacturer—often until the crimp or clamp feels secure. Always check the instructions for your specific material to avoid damaging the connection.

Elizabeth Williams

If I suspect I’ve already overtightened a compression fitting and possibly deformed the ferrule, is the only solution to replace the whole fitting, or is there a way to salvage it without starting over?

    Mario The Plumber

    If the ferrule on your compression fitting has been deformed from overtightening, it usually won’t seal correctly anymore. In most cases, you’ll need to cut off the damaged section of pipe and install a new ferrule and nut. Salvaging a deformed ferrule often leads to leaks, so starting fresh is the safest bet. Unfortunately, reusing the old fitting is rarely reliable.

Joseph Sanchez

You mention compression fittings in the context of overtightening. Could you provide more detail on how to install these properly, especially for someone with very little experience? Are there particular mistakes to watch for when working with compression joints specifically?

    Mario The Plumber

    When installing compression fittings, slide the nut and ring onto the pipe, then push the pipe fully into the fitting. Hand-tighten the nut, then use a wrench to tighten it just another half to one full turn—avoid overtightening, as this can crack the fitting or distort the ring, causing leaks. Make sure pipes are cut square and free of burrs. Also, never use sealant or tape on compression threads, as they seal by compressing the ring, not by sealing the threads.