Plumber Las Vegas News

Your trusted source for plumbing updates, DIY fixes, and industry insights in Las Vegas. Stay informed with practical tips, local trends, and expert advice for homeowners and professionals alike.

Avoiding Common DIY Plumbing Mistakes: Pro Tips for First-Time Fixers

Introduction: Why DIY Plumbing Mistakes Matter

Taking plumbing repairs into your own hands can be empowering, cost-effective, and even enjoyable. However, plumbing is one area of home maintenance where a simple mistake can quickly become a costly disaster. Many first-time fixers jump into repairs with enthusiasm but little background knowledge, leading to leaks, water damage, and even code violations. Understanding the most common DIY plumbing mistakes—and knowing how to avoid them—is essential for anyone looking to tackle household plumbing projects safely and successfully.

This guide is designed specifically for the first-time fixer. We’ll cover the most frequent pitfalls that catch beginners off guard, explain why these mistakes happen, and provide step-by-step advice to help you avoid them. With the right preparation, tools, and know-how, you can handle many plumbing repairs confidently—and know when it’s time to call in a professional. Whether you’re fixing a leaky faucet or attempting your first drain replacement, this practical guide will help you steer clear of costly errors and set you up for DIY success.

Understanding Your Home’s Plumbing System

The Basics: Supply and Drainage

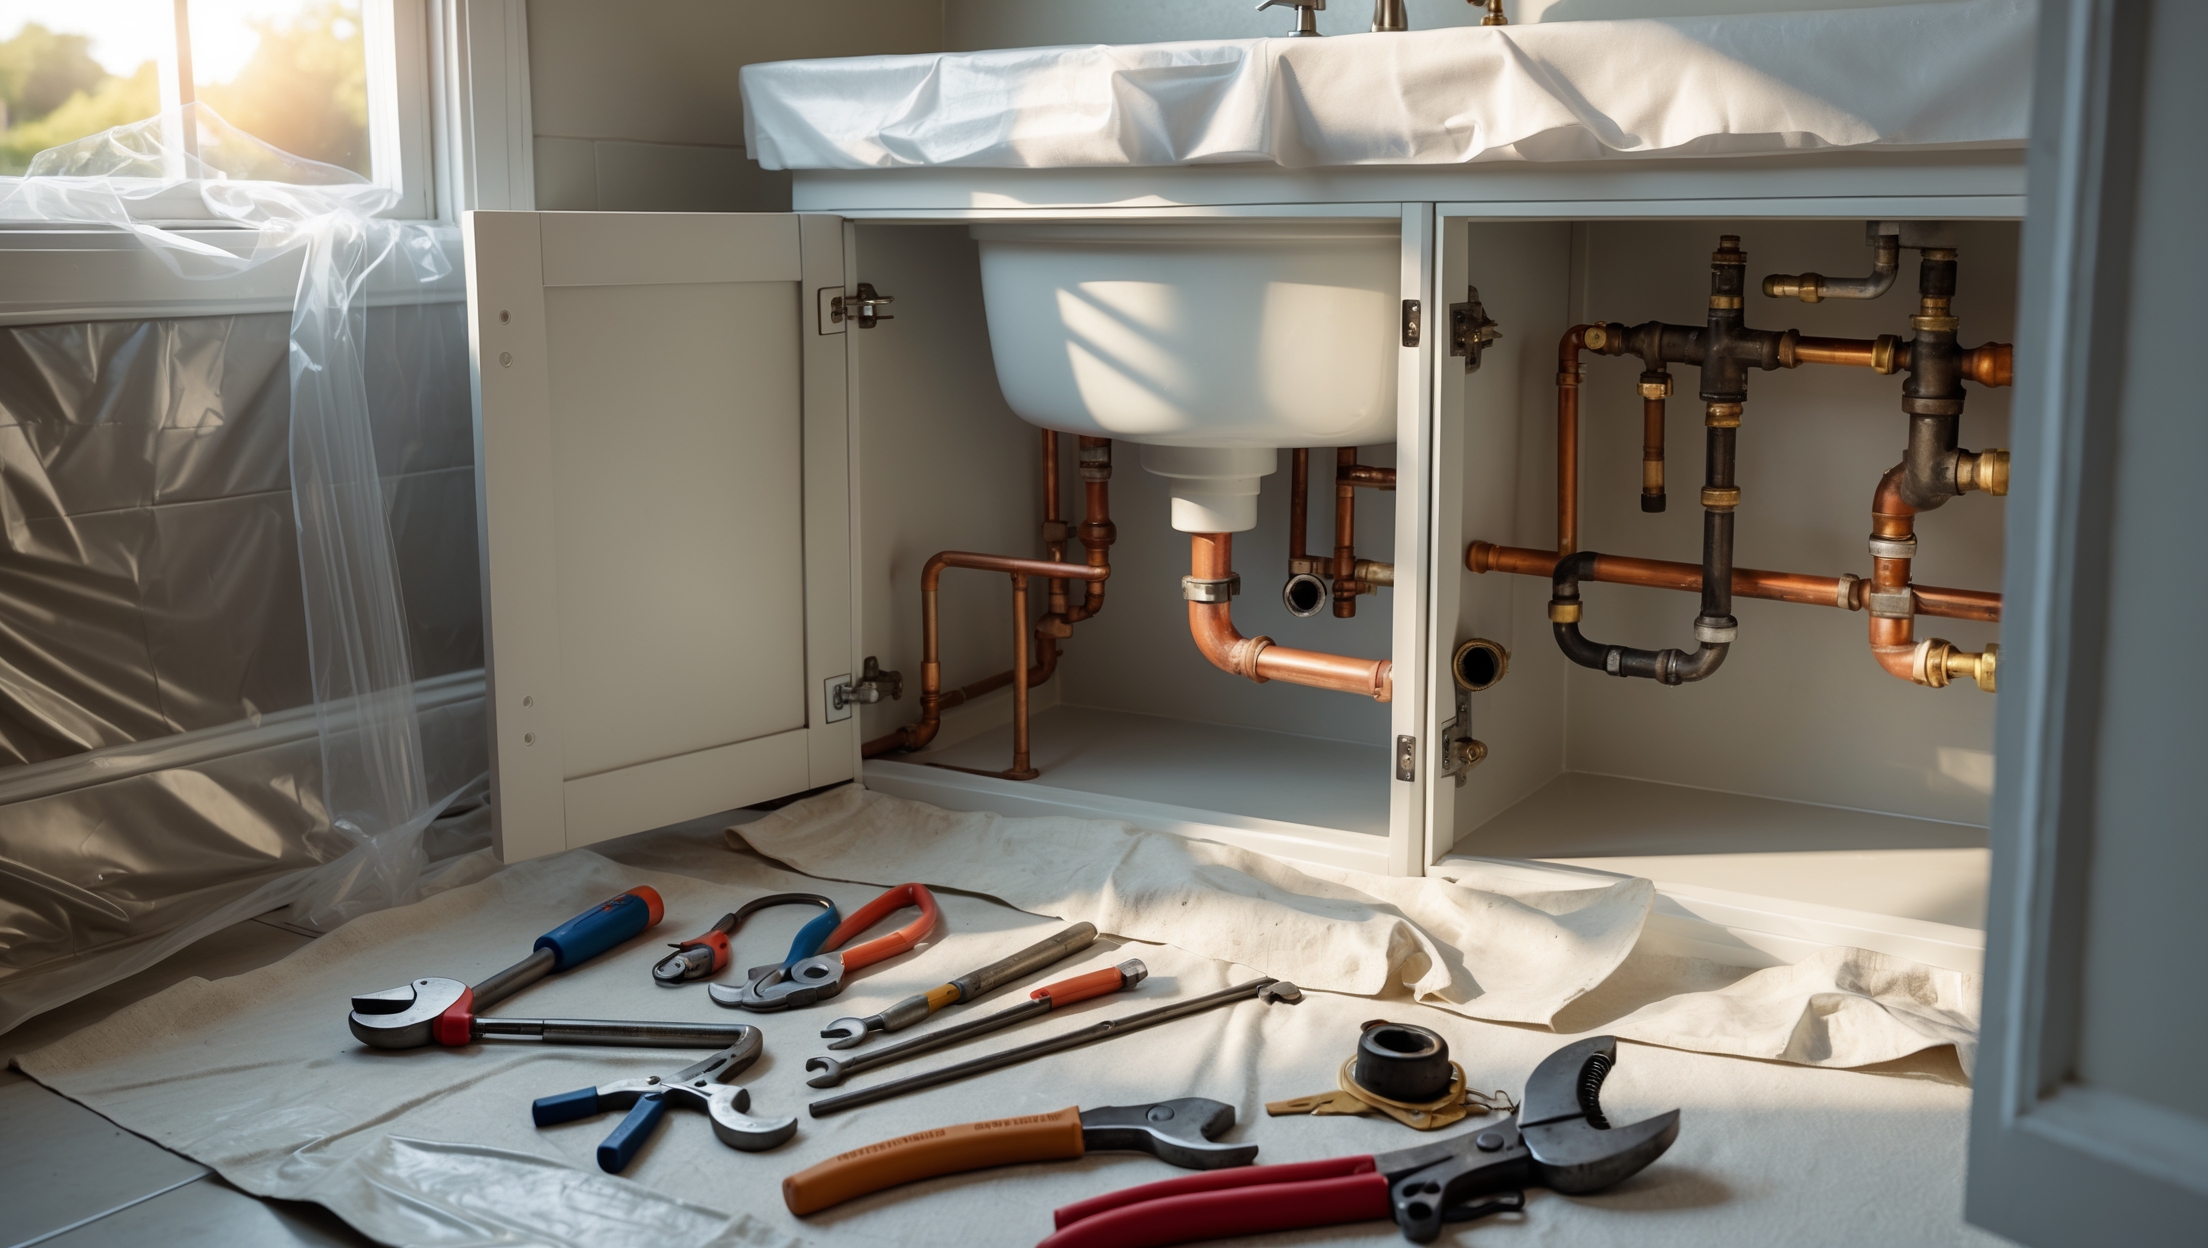
Before you pick up a wrench, it’s crucial to understand the two primary systems in your home’s plumbing: supply lines (bringing clean water in) and drainage (removing wastewater). Each system uses different pipes, fittings, and materials, and mixing them up is a common beginner’s mistake.

  • Supply lines: Typically use copper, PEX, or CPVC. These lines are under pressure.
  • Drainage pipes: Usually ABS or PVC. These lines rely on gravity and are not pressurized.

Know the Shutoff Valves

Before starting any repair, locate and test all relevant shutoff valves—both fixture-specific and the main water supply. Accidentally leaving water on is one of the quickest routes to a flooded room.

Top DIY Plumbing Mistakes and How to Avoid Them

1. Forgetting to Turn Off the Water

This is the classic beginner error. Even a simple repair can unleash a torrent if the water isn’t shut off first. Always turn off water at the nearest shutoff valve—or the main valve for major repairs—before loosening any fittings.

  • Test that water is off by turning on the tap after shutting the valve.
  • Keep towels and a bucket handy to catch any residual water in the lines.

2. Over-tightening Connections

It’s tempting to torque fittings as tight as possible, thinking it will stop leaks. In reality, overtightening can crack plastic fittings, strip threads, or warp rubber washers, all of which will cause leaks and require further repairs.

  • Hand-tighten, then use a wrench for one additional quarter-turn—unless the manufacturer specifies otherwise.
  • Stop if you feel increased resistance or hear cracking sounds.

3. Using the Wrong Tools

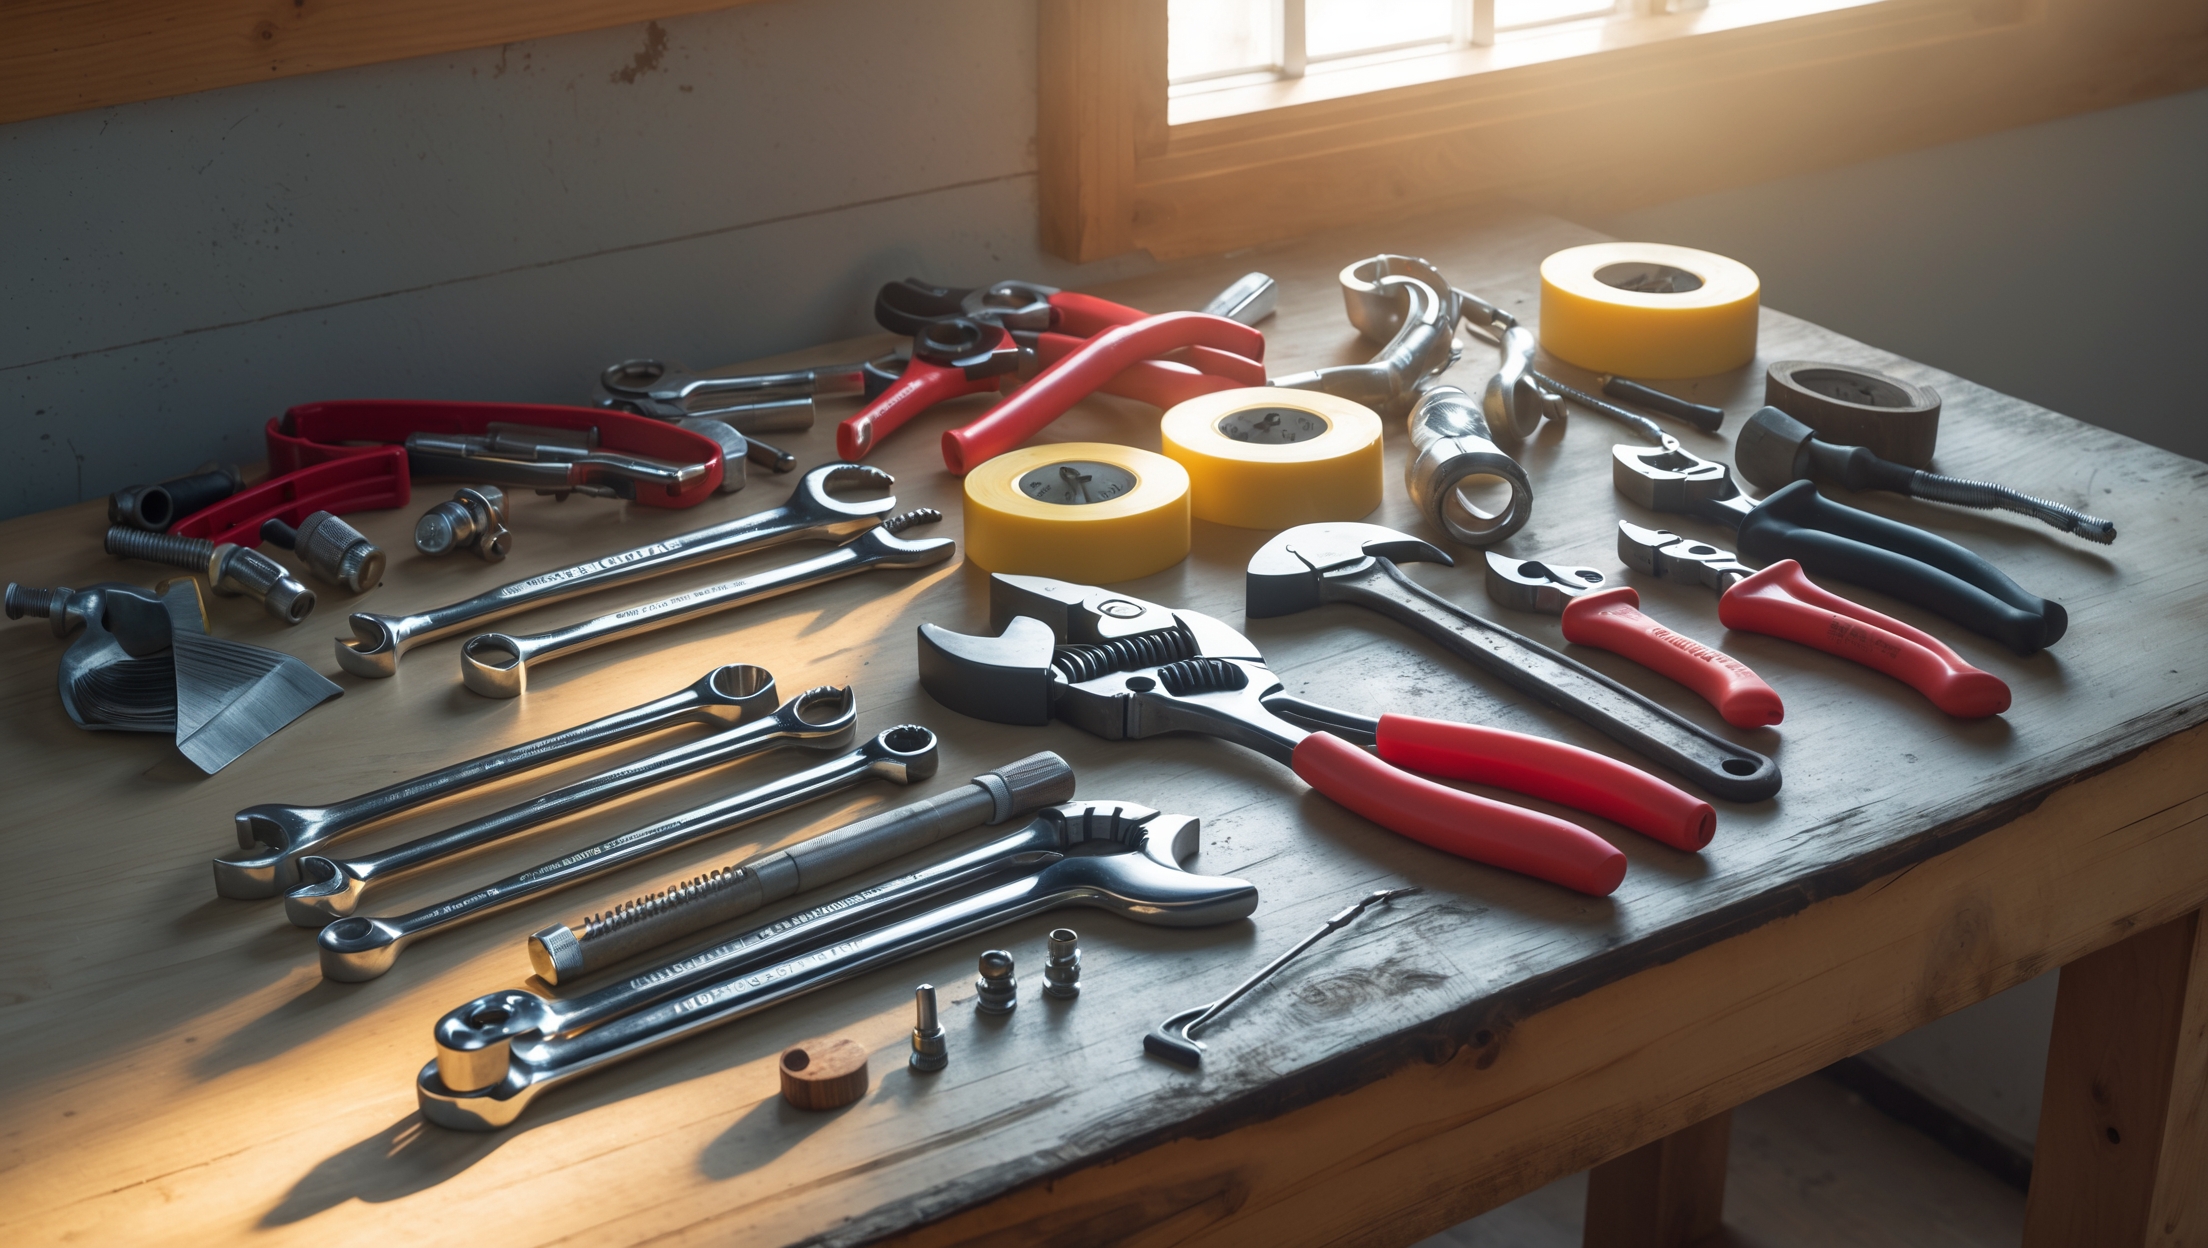
Improvising with pliers in place of a basin wrench, or using the wrong size pipe cutter, can damage fittings and pipes. Invest in basic plumber’s tools: pipe wrench, adjustable wrench, basin wrench, and a quality pipe cutter for copper or plastic pipes.

  • Never use household tools not designed for plumbing (like channel locks on delicate supply lines).
  • Rent specialty tools from a hardware store if you don’t want to buy them outright.

4. Skipping Proper Sealing Methods

Threads on pipe fittings require either plumber’s tape (Teflon) or pipe joint compound—sometimes both. Using the wrong sealant, or none at all, is a surefire way to cause leaks.

  • Apply Teflon tape clockwise to male threads only.
  • Never use Teflon tape on compression fittings—these seal via the ferrule, not threads.
  • Check manufacturer instructions for recommended sealant types.

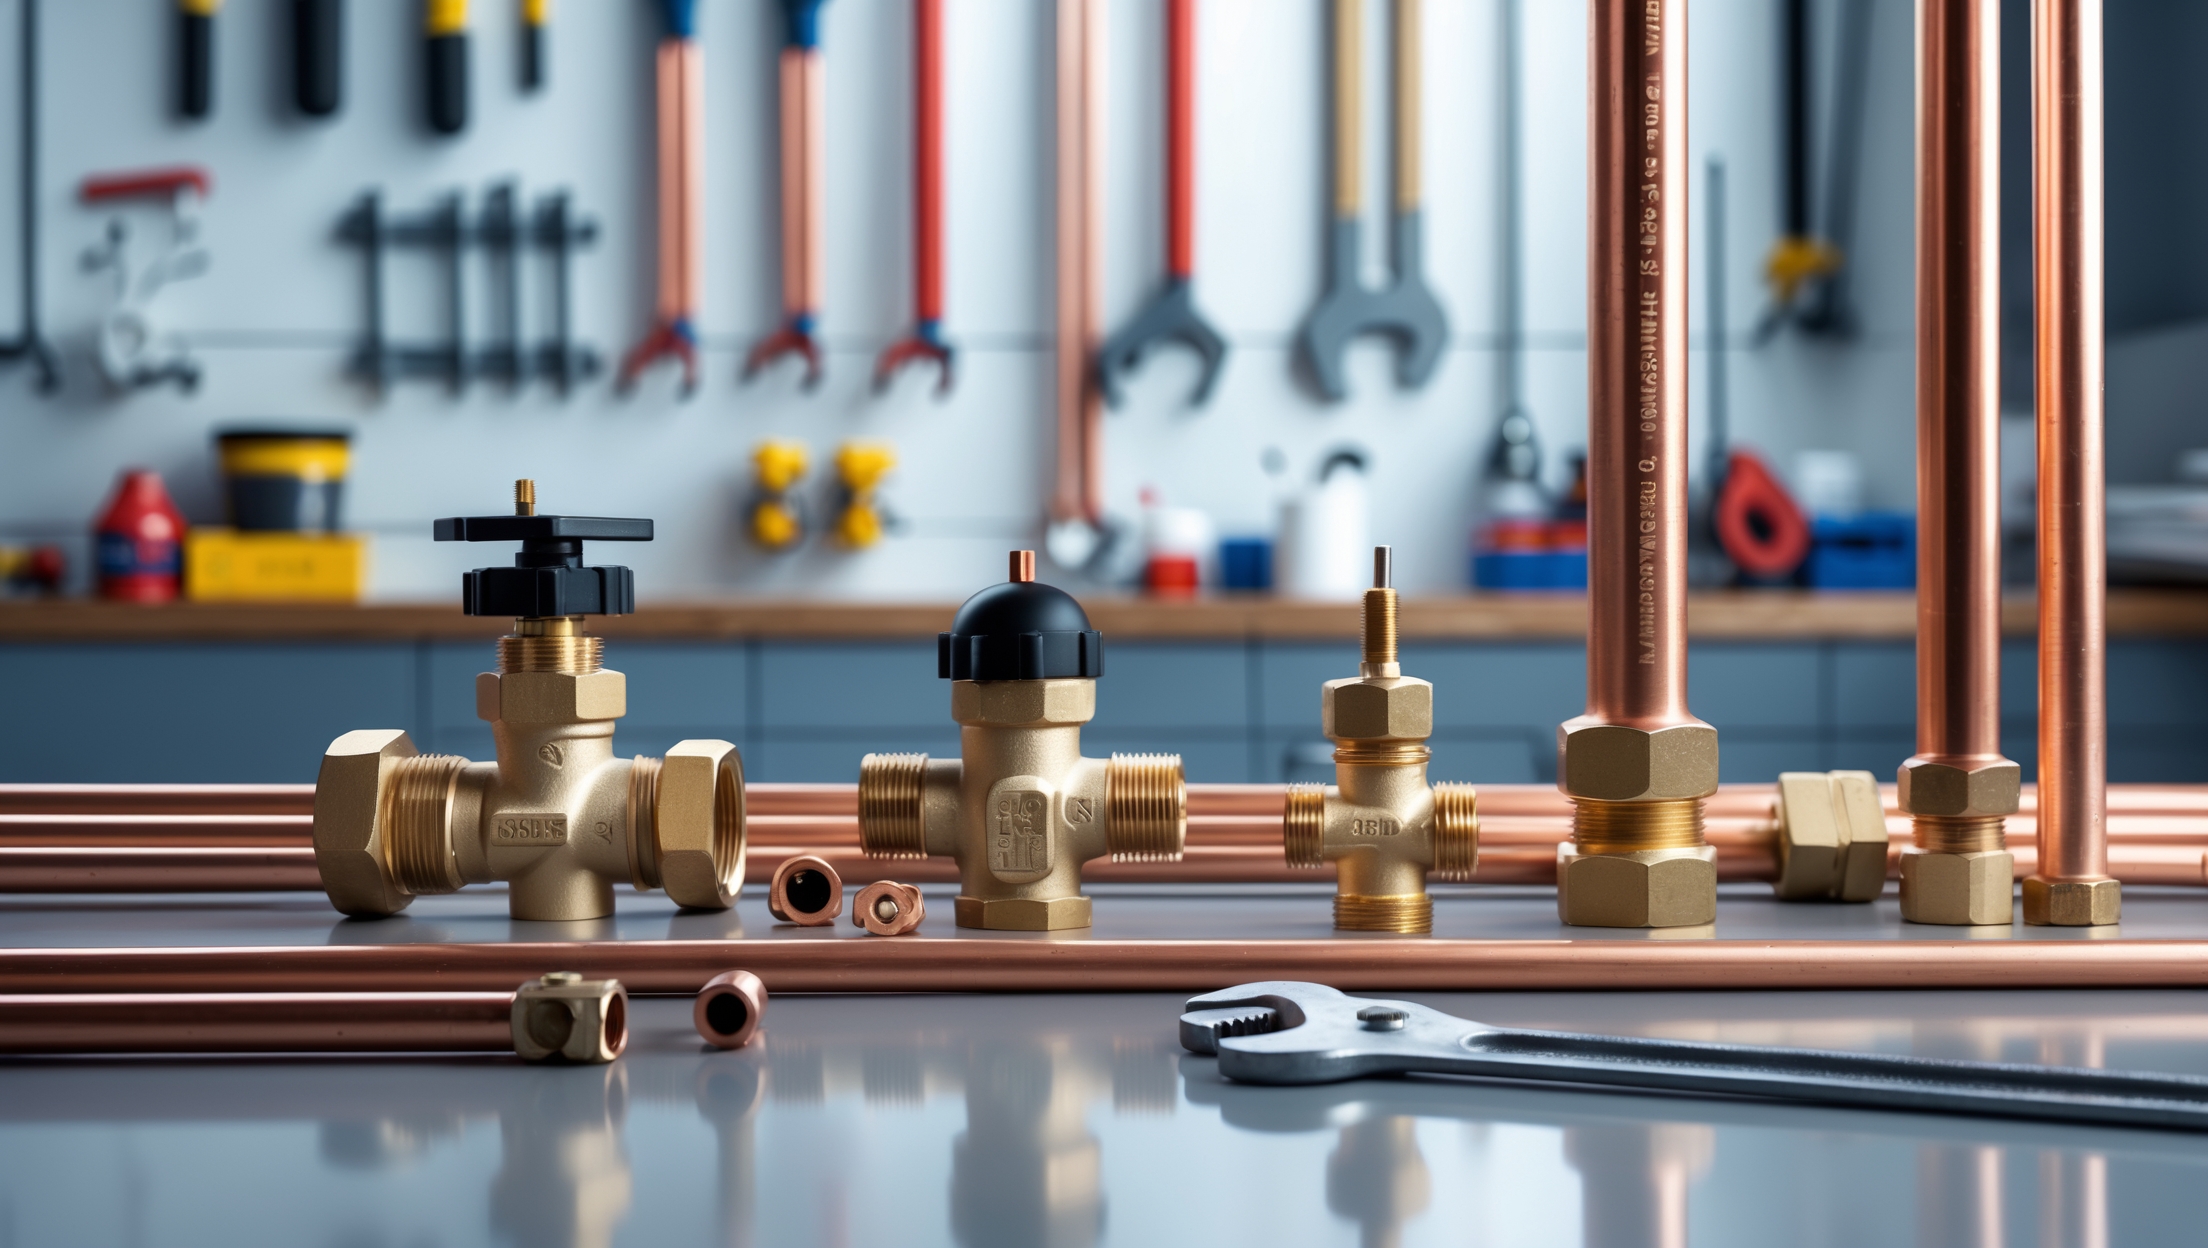
5. Mixing Incompatible Pipe Materials

Joining copper to galvanized steel, or connecting different plastics without the right transition fittings, leads to corrosion, leaks, and code violations.

  • Always use approved transition fittings (such as dielectric unions between copper and steel).
  • Check compatibility before making any connections.

6. Not Checking for Local Code Compliance

Every municipality has its own plumbing codes regarding pipe materials, venting, and fixture installation. Ignoring codes can lead to failed inspections and expensive rework.

  • Check local codes before beginning any substantial repair.
  • Pull permits for larger jobs (like moving supply lines or adding fixtures).

7. Improper Slope on Drain Pipes

Drain pipes require a minimum slope—typically 1/4 inch per foot—to ensure waste flows away from your home. Too little slope causes clogs, while too much can allow water to outrun solids, also leading to clogs.

  • Use a level to check slope when installing or repairing drains.
  • Follow code requirements for your pipe diameter and material.

8. Reusing Old, Worn-Out Parts

Trying to save a few dollars by reusing corroded washers, gaskets, or supply lines is a false economy. These parts degrade over time and can fail soon after a repair.

  • Replace washers, O-rings, and supply lines with every repair.
  • If a fitting looks corroded or brittle, replace it.

9. Poor Fixture Alignment and Mounting

Misaligned faucets, loose toilets, and wobbly sinks are not just unsightly—they can cause leaks and damage over time. Take the time to measure, dry-fit, and secure all fixtures properly.

  • Check fixture instructions for mounting and alignment requirements.
  • Use a level and double-check before tightening final connections.

10. Neglecting to Test for Leaks

After every repair, test for leaks by running water at normal pressure. Inspect all joints, supply lines, and newly installed parts for drips or weeping connections.

  • Wipe joints with a dry tissue to check for moisture.
  • Retighten or reseal as needed before closing up cabinets or walls.

Step-by-Step: How to Avoid DIY Plumbing Pitfalls

Plan Your Repair

Research your specific repair. Watch reputable video tutorials, read manufacturer instructions, and make a list of required tools and materials. Double-check compatibility of all parts before purchase.

Prepare Your Workspace

  • Clear the area of personal items and cleaning products.
  • Place towels or a drip tray under the repair zone.
  • Organize tools and keep a flashlight handy for dark spaces.

Shut Off Water and Power

  • Turn off water at the nearest shutoff or main valve.
  • For repairs involving water heaters or garbage disposals, switch off power at the breaker panel.

Disassemble Carefully

  • Take photos before you start to guide reassembly.
  • Keep small parts organized in a tray or cup.

Replace Parts and Reassemble

  • Install new washers, supply lines, and fittings as needed.
  • Follow instructions for applying sealants or tape.
  • Hand-tighten first; use tools for a final snug fit.

Test Thoroughly

  • Turn water on slowly while monitoring for leaks.
  • Test function (run faucet, flush toilet, etc.).
  • Check all connections with a dry tissue for hidden drips.

Essential Tools for DIY Plumbing Success

Having the right tools makes every repair safer and more effective. Here are the must-haves for most beginner-friendly plumbing jobs:

  • Adjustable wrench: For supply lines and compression fittings.
  • Basin wrench: Reaching faucet nuts under sinks.
  • Pipe wrench: For iron pipes and stubborn fittings.
  • Pipe cutter: Clean cuts on copper or plastic pipes.
  • Plumber’s tape (Teflon tape): Sealing threaded connections.
  • Plunger and auger: For clearing clogs safely.
  • Bucket, towels, and flashlight: For cleanup and visibility.

When to Call a Professional

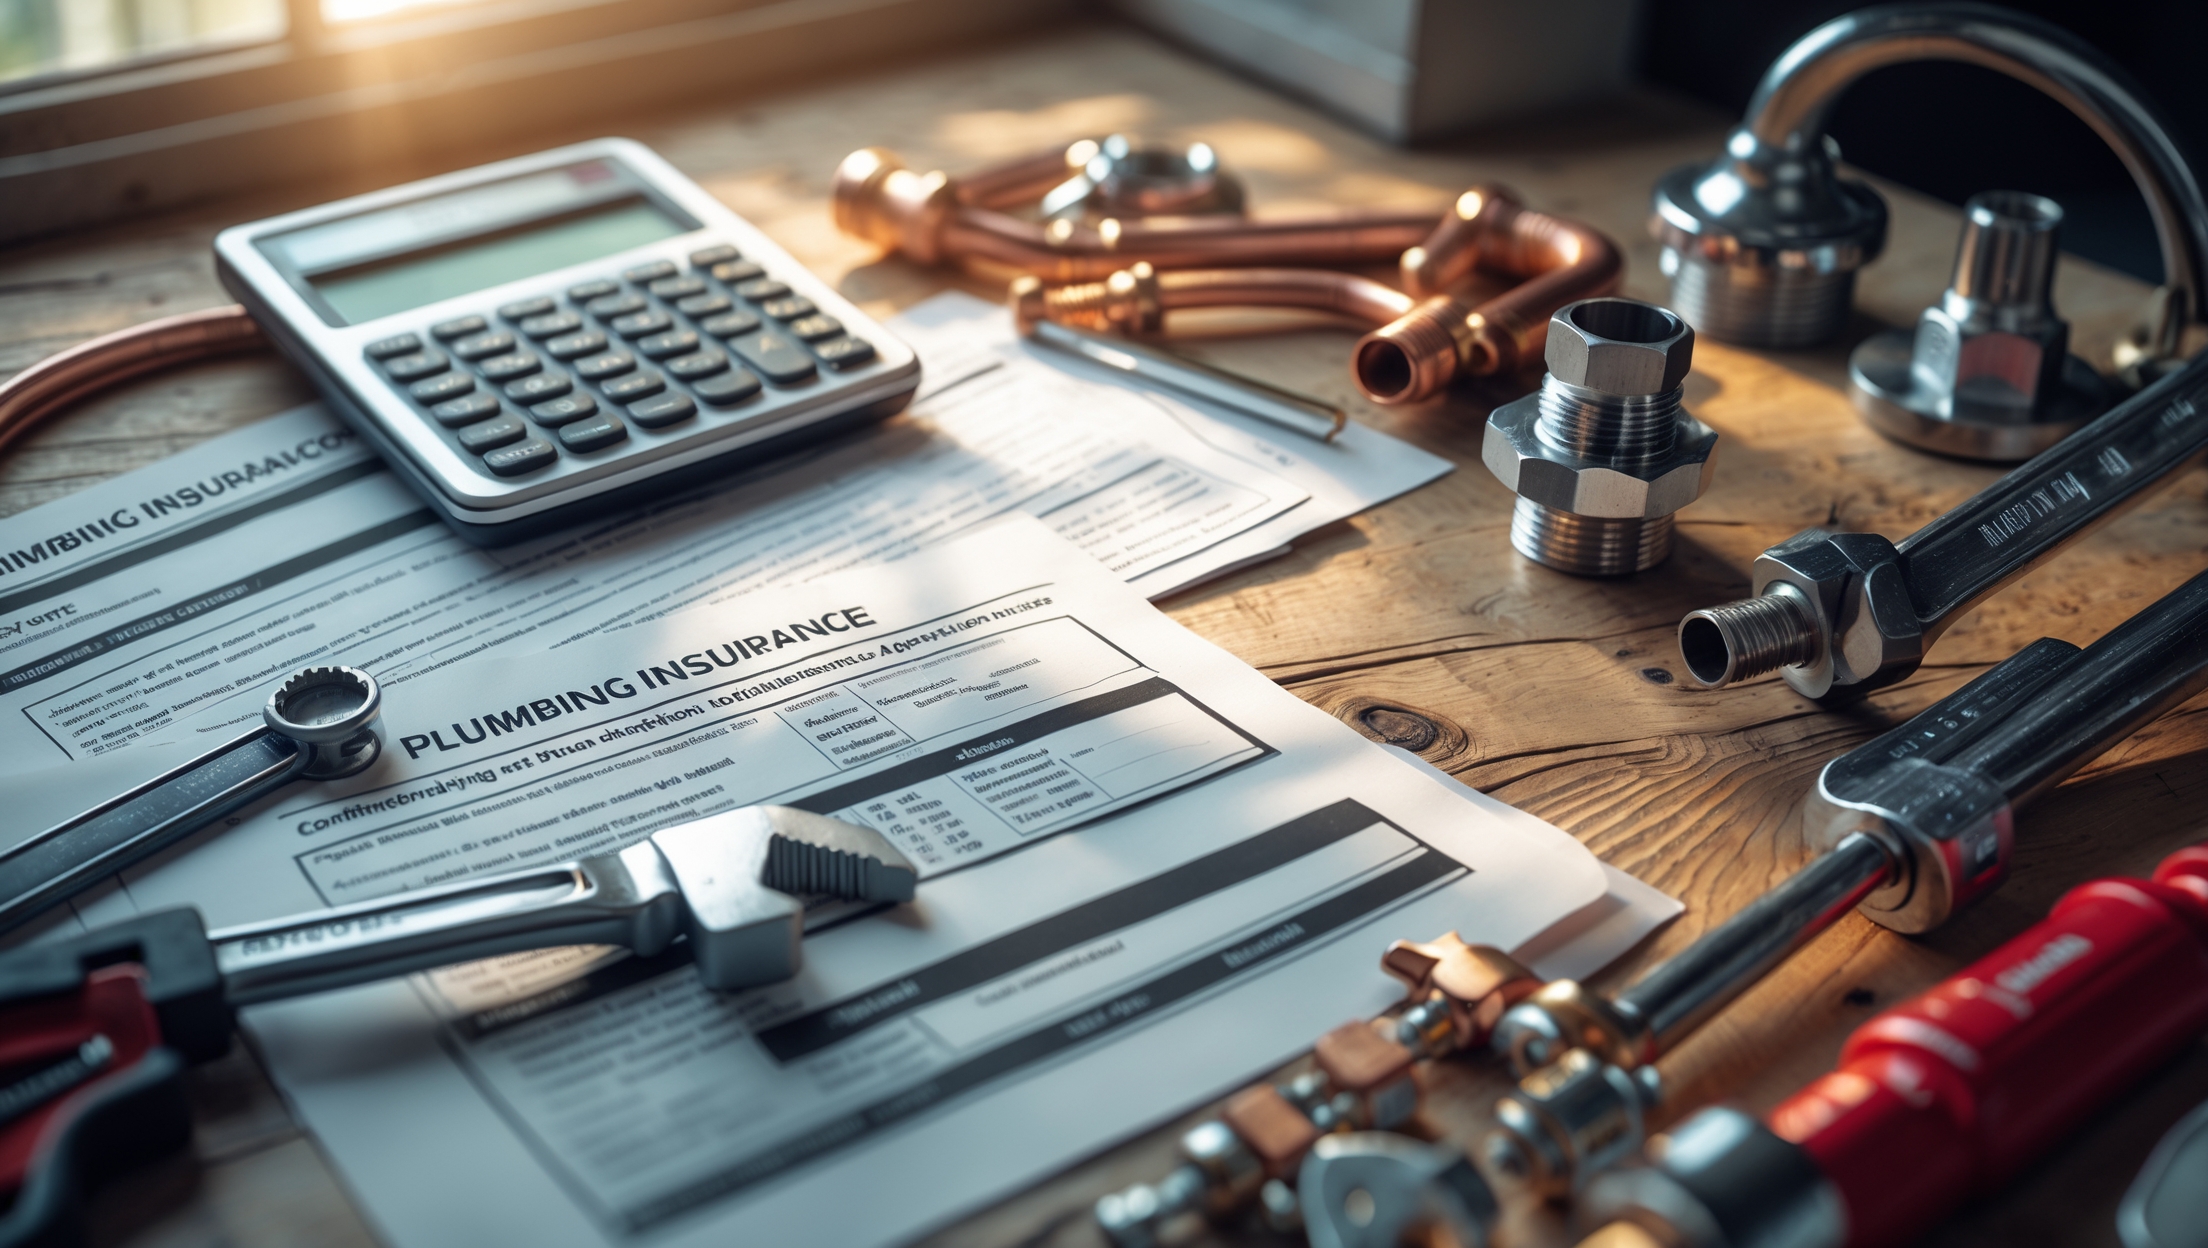
Even skilled DIYers should know their limits. If a job involves main supply lines, serious leaks inside walls, sewer lines, or gas-powered water heaters, it’s time to call a licensed plumber. Attempting repairs beyond your expertise can result in expensive property damage, voided insurance, or hazardous conditions.

  • Major leaks that persist after basic troubleshooting
  • Complete loss of water pressure to your home
  • Gas line or gas appliance repairs
  • Unexplained water pooling under floors or in walls
  • Any work requiring a permit you’re not qualified to obtain

Real-World Case Study: Averted Disaster

Consider the case of a first-time homeowner who attempted a faucet replacement. Forgetting to turn off the water led to a flooded cabinet and damaged flooring, resulting in a $1,200 repair bill. By contrast, a neighbor who took the time to prepare, gather the right tools, and follow best practices completed the same repair in under an hour with no mess and a leak-free result. The difference? Attention to detail and respect for the process.

Conclusion: DIY Plumbing the Smart Way

Embarking on DIY plumbing projects can save you money, boost your confidence, and help you better understand your home. But it’s vital to recognize that plumbing is unforgiving of shortcuts and inattention. The most common mistakes—from not shutting off the water to mixing incompatible materials—can lead to leaks, water damage, and expensive callouts. By learning from the pitfalls of others, preparing carefully, and using the right tools and techniques, you can avoid the errors that turn a simple repair into a nightmare.

Above all, know your limits. There’s no shame in calling a professional for complex or high-stakes plumbing work. But for everyday repairs and maintenance, a bit of research, attention to detail, and respect for the basics will go a long way. Armed with the knowledge from this guide, you’ll be ready to tackle your next plumbing fix with confidence—and avoid the costly mistakes that trip up so many first-time fixers. Happy plumbing!

96 comments
Michelle Thomas

When you mention knowing the difference between supply lines and drainage pipes, is there an easy way to physically tell them apart if you’re working under a sink? Sometimes it’s tough to figure out what’s what for a first-timer.

    Mario The Plumber

    Absolutely, it can be confusing at first. Under a sink, supply lines are usually thinner, made of flexible metal or braided hose, and connect directly to the shut-off valves and faucet—they carry clean water in. Drainage pipes are typically larger, made of white or black plastic (PVC or ABS), and have a trap (like a ‘U’ or ‘P’ shaped bend)—they carry wastewater away. If you trace each pipe from where it goes, this can also help clarify its purpose.

Megan Anderson

How long should a typical first-time drain replacement take if all the research and preparation from this guide are followed? I’m trying to plan around my schedule and want to avoid leaving the job unfinished overnight.

    Mario The Plumber

    If you’ve done all the research and preparation recommended in the guide, a typical first-time drain replacement usually takes about 2 to 3 hours. This includes time for careful removal, fitting the new drain, and checking for leaks. Barring unexpected issues like stubborn old fittings or hidden damage, you should be able to finish it in one afternoon or evening.

Julie Smith

Given that code violations are a risk, are there particular local plumbing codes or permits I should be aware of as a small business owner before attempting DIY repairs on my shop’s plumbing?

    Mario The Plumber

    Yes, as a small business owner, it’s important to check your city’s or county’s plumbing codes before starting any DIY repairs. Many localities require permits for certain plumbing work, especially anything that involves moving pipes, backflow prevention, or working on gas lines. Be sure to consult your local building department—they can specify which repairs are allowed without a permit and which require a licensed plumber.

James Brown

How long should I realistically expect basic DIY plumbing fixes like a faucet or drain replacement to take for a first-timer? I want to make sure I set aside enough time and avoid rushing into mistakes.

    Mario The Plumber

    For a first-timer, replacing a faucet typically takes 2 to 4 hours, depending on the setup and any issues you encounter, like stubborn fittings. A basic drain replacement can take 1 to 2 hours. Be sure to gather all tools and parts before starting, and allow a little extra time in case you run into unexpected snags. Taking it slow helps prevent mistakes.

Kimberly Martinez

If I accidentally mix up drainage and supply pipes while repairing something, what could go wrong? Would that cause water damage, or is it just a code violation issue?

    Mario The Plumber

    Mixing up drainage and supply pipes can cause serious problems. If a drain line is connected to the supply, contaminated water could enter your clean water system, posing health risks and potentially causing water damage. It’s not just a code violation—this mistake can lead to backflow issues, leaks, and even major flooding. Double-check all connections to ensure supply and drainage pipes are never accidentally switched.

Elizabeth Robinson

For a first project, like replacing a sink drain, how long does the whole process usually take for someone who’s never done it before? Should I plan for a single afternoon, or is it more realistic to spread it out over a weekend?

    Mario The Plumber

    For someone new to plumbing, replacing a sink drain typically takes about 2 to 4 hours if you have all the necessary tools and parts ready. It’s reasonable to plan for a single afternoon, but give yourself extra time in case you run into stubborn fittings or unexpected issues. If things go smoothly, you’ll likely finish in a few hours, but there’s no harm in keeping your schedule flexible just in case.

Donna White

For a first-timer, about how much time should I budget for a standard drain replacement, assuming everything goes smoothly and I follow the steps you outlined?

    Mario The Plumber

    For a first-timer, you should budget about one to two hours to replace a standard drain if everything goes smoothly and you follow the steps in the article. This allows time for careful removal, cleaning, fitting the new drain, and testing for leaks. If any parts are tricky to loosen or fit, allow a little extra time just in case.

Mark Taylor

If I accidentally start a repair without fully shutting off the water and there’s a minor flood, what immediate steps should I take to minimize water damage to both the property and inventory?

    Mario The Plumber

    If water starts flooding, quickly locate and close your main water shutoff valve to stop more water from entering. Use towels or mops to soak up standing water right away and move any valuable items or inventory to a dry area. Set up fans or open windows to help with drying. If water reached electrical outlets or appliances, turn off your electricity at the breaker before touching anything.

James Miller

How long should a typical first-time faucet leak repair actually take, assuming you have the basic tools and have turned off the right valves? Just trying to estimate how much time to set aside as a beginner.

    Mario The Plumber

    For a first-time faucet leak repair, you should set aside about 1 to 2 hours. This includes time for removing the old faucet parts, checking for worn washers or O-rings, replacing them, and reassembling everything. If you run into any unexpected issues, it might take a bit longer, but most beginners can finish within this timeframe with basic tools.

Jessica Martin

How long does it typically take for a beginner to learn enough about their home’s plumbing system to confidently tackle a basic repair like a leaky faucet, assuming they follow the advice in your article?

    Mario The Plumber

    With the guidance provided in the article, most beginners can feel confident enough to attempt a basic repair like fixing a leaky faucet after a few hours of research and preparation. This usually means spending some time reading, watching how-to videos, and gathering the right tools, so within a day or a weekend, you should be ready to handle simple plumbing fixes.

Elizabeth Davis

In the troubleshooting section, does the guide discuss what to do if you accidentally open a pressurized supply line and cause a leak? I’m curious about the immediate steps to minimize water damage if this happens during a repair.

    Mario The Plumber

    Yes, the troubleshooting section covers what to do if a pressurized supply line is accidentally opened. The guide recommends immediately shutting off the nearest water supply valve to stop the flow, then using towels or a bucket to contain and soak up any spilled water. After containing the leak, you should inspect the area for water damage and let everything dry thoroughly before continuing repairs.

Joseph Brown

If I accidentally use a regular PVC pipe for a section of my supply line, what sort of issues might come up later? Would it just cause leaks, or are there bigger safety concerns to watch out for?

    Mario The Plumber

    Using regular PVC pipe for water supply lines can lead to more than just leaks. Regular PVC isn’t rated for hot water or pressure and may crack, burst, or break down over time, especially with hot water. This can cause water damage or even flooding. Also, some regular PVC pipes may leach unsafe chemicals into your drinking water, so it’s important to use pipes marked as safe for potable water, like CPVC or PEX, for supply lines.

Jessica White

The article mentions testing shutoff valves before starting repairs. What’s the best way to check if a shutoff valve is actually working, and are there warning signs it might fail during a project?

    Mario The Plumber

    To check if a shutoff valve works, turn it off and then run the faucet it controls—water should stop flowing completely. If water keeps dripping or doesn’t stop, the valve may not be sealing properly. Warning signs of a failing valve include stiffness when turning, leaks around the handle, or corrosion. If you notice these, it’s safer to replace the valve before starting any plumbing repairs.

Sandra Perez

For a first-timer, how much time should I budget for a basic project like replacing a leaky faucet if I follow the steps you suggest? Curious how long these projects usually take in real-world situations.

    Mario The Plumber

    If you’re replacing a leaky faucet for the first time and carefully following the steps in the article, it’s a good idea to set aside about two to three hours. This allows time for turning off the water, removing the old faucet, installing the new one, and checking for leaks. More experienced DIYers might do it faster, but taking your time helps avoid mistakes.

Thomas Gonzalez

The article mentions avoiding code violations during DIY plumbing. Are there common plumbing tasks that usually require permits, or guidelines for when you need to check local codes before you start?

    Mario The Plumber

    Yes, certain plumbing tasks often require permits or code checks, especially those involving major changes. This includes work like moving or adding pipes, installing new water heaters, or significant bathroom remodels. Even replacing fixtures may need a check if it alters existing plumbing. It’s a good idea to contact your local building department before starting any project beyond simple repairs to ensure you’re meeting all requirements.

Daniel Garcia

When replacing a leaky faucet, what are some signs during the process that indicate I might be making one of the beginner mistakes described here, like a potential leak or code violation?

    Mario The Plumber

    If you notice water still dripping after you’ve shut off the supply, or if the connections feel loose when tightening them, these are signs you might be making a common DIY error. Also, if you see any mismatched pipe sizes or use too much force on fittings, you could risk leaks or even code violations. Double-check that all parts are compatible and that seals are secure before turning the water back on.

Patricia Thompson

For first-timers on a tight budget, which basic plumbing tools are absolutely necessary to avoid the most common mistakes described here?

    Mario The Plumber

    For beginners working with a limited budget, the essential plumbing tools to have are an adjustable wrench, a pair of channel-lock pliers, a plunger, a pipe wrench, and plumber’s tape (Teflon tape). These basics will help you handle leaks, tighten fittings, clear clogs, and avoid the most frequent DIY mishaps mentioned in the article without overspending.

Joshua Williams

Could you elaborate on the potential code violations mentioned when doing DIY plumbing? What are some common mistakes small business owners like me should watch out for to avoid running afoul of local regulations?

    Mario The Plumber

    When tackling DIY plumbing, common code violations include using the wrong pipe materials, improper venting, and failing to install backflow prevention devices. Small business owners should be careful not to connect potable water lines directly to appliances or drains without air gaps. Skipping permits or inspections is another frequent mistake. Always check your local plumbing codes before starting, and consider consulting a licensed plumber for guidance on compliance.

David Lewis

For someone on a tight budget, what essential plumbing tools would you recommend buying to avoid the most common beginner mistakes? Are there lower-cost alternatives that are still effective?

    Mario The Plumber

    For basic plumbing fixes on a budget, start with a plunger, an adjustable wrench, a pair of channel-lock pliers, and plumber’s tape. These cover most small repairs and can prevent common mistakes like overtightening. Lower-cost tool sets at hardware stores often include these basics and work well for beginners. You don’t need top brands—reliable generic tools are usually sufficient for home use.

William Martinez

If I accidentally forget to turn off the water supply before starting a repair, what steps should I take as soon as I realize the mistake to minimize possible water damage?

    Mario The Plumber

    As soon as you notice you forgot to turn off the water supply, immediately locate and shut off the main water valve or the nearest local shutoff valve to the area you’re working on. Quickly use towels or a mop to soak up any spilled water and, if needed, set out buckets to catch drips. Once the water is off and the area is dry, you can continue the repair safely.

David Jones

The article talks about code violations as a risk for DIY plumbers. How can a first-time fixer make sure their repairs are compliant without hiring a professional inspector each time?

    Mario The Plumber

    To ensure your DIY plumbing repairs are code-compliant, start by checking your local building department’s website for plumbing codes and guidelines. Many municipalities provide helpful guides or checklists. You can also consult reputable plumbing books or online resources that reference your local codes. If you’re unsure, consider contacting your local building inspector’s office—they often answer basic questions informally, even if you’re not hiring them for an inspection.

Daniel Lopez

Could you share tips for how to tell the difference between a fixture-specific shutoff valve and the main supply if you’re in an older home where labeling might be inconsistent? I’m worried about turning off the wrong line and making things worse.

    Mario The Plumber

    In older homes, fixture-specific shutoff valves are usually found directly beneath sinks or behind toilets and typically have smaller handles. The main supply shutoff is often larger, located near where the water line enters your home, such as in a basement or utility room. If you’re unsure, turn off a suspected fixture valve and check if only that faucet or toilet loses water. If everything loses water, you’ve found the main supply.

Joshua Miller

For first-time fixers on a tight budget, are there affordable tools that cover most basic plumbing repairs, or is it necessary to invest in specialized equipment right away?

    Mario The Plumber

    You don’t need to invest in expensive, specialized tools when starting out with basic plumbing repairs. A few affordable essentials—like an adjustable wrench, a pair of pliers, a pipe wrench, a plunger, and plumbers’ tape—will handle most common issues. As you take on more complex projects, you can gradually add specialized tools if needed.

Aaron Lewis

For a beginner, how do I know when a plumbing issue is simple enough to handle on my own versus needing to call a professional? Are there certain warning signs during a project that mean I should stop?

    Mario The Plumber

    If a plumbing problem is limited to a minor clog, a dripping faucet, or replacing a showerhead, it’s usually safe for beginners. However, if you notice water not shutting off, leaks getting worse, strange smells, or signs of mold, it’s best to call a professional. Also, if you’re unsure about turning off the water supply or feel out of your depth at any stage, stop and seek help to avoid bigger issues.

Rachel Miller

Can you explain a bit more about mixing up supply line and drainage materials? What are the consequences if I accidentally use the wrong type of pipe for a quick fix?

    Mario The Plumber

    Mixing up supply line and drainage materials can cause problems because they serve different purposes. Supply lines carry pressurized water and require pipes that can handle that pressure, usually copper, PEX, or CPVC. Drainage pipes, like PVC, aren’t made for pressure and could burst or leak if used for supply lines. Using the wrong material can lead to leaks, water damage, or even health risks if contaminated water gets into your supply. Always check your pipe type before making repairs.

Michael Lopez

When trying to do a simple fix like swapping out a faucet, how do I know if I’m dealing with plumbing that’s up to code or risk running into code violations as mentioned in your article?

    Mario The Plumber

    To check if your plumbing is up to code before swapping a faucet, look for signs like visible shutoff valves, proper pipe materials (such as copper or PEX), and secure connections without old, corroded or mismatched fittings. If your home is older or DIY work was done before, local plumbing codes may have changed. If you notice anything unusual or are unsure, it’s a good idea to consult your city’s building department or a licensed plumber before starting the project.

George Clark

You talked about the importance of finding and testing all shutoff valves before starting repairs. Sometimes my home’s shutoff valves are really old and hard to turn. Are there any tips for loosening stuck valves safely, or does that usually mean they need to be replaced?

    Mario The Plumber

    If your shutoff valves are tough to turn, try gently applying penetrating oil to the valve stem and letting it sit for a few minutes. Use a wrench with caution, avoiding excessive force that could damage the valve or pipes. If the valve still won’t budge, is leaking, or feels brittle, it’s best to replace it—old, stuck valves can fail unexpectedly during repairs.

Tyler Perez

When it comes to choosing between copper, PEX, and CPVC for supply lines as a first-timer, is one type more forgiving for DIY mistakes or easier to work with on a budget?

    Mario The Plumber

    PEX is generally the most forgiving and beginner-friendly option for DIY plumbing. It’s flexible, easy to cut, and connects with simple fittings, which reduces the chance of leaks from improper installation. PEX also tends to be more budget-friendly compared to copper, and it requires fewer tools. CPVC is also easier than copper but needs careful gluing. Copper requires soldering skills and special tools, making it less ideal for first-timers.

Betty Lopez

I want to repair a leaky faucet myself, but I’m nervous about causing water damage or violating codes. Are there simple plumbing tasks you’d recommend for total beginners that don’t carry much risk, or should I call a professional right away?

    Mario The Plumber

    Tightening a loose faucet handle or replacing a worn-out washer are beginner-friendly plumbing tasks with low risk. Make sure to turn off the water supply before starting any repairs. If you’re unsure or the leak persists after basic steps, it’s wise to call a professional to avoid accidental damage or code violations.

Matthew Lopez

For someone on a tight student budget, what are the essential plumbing tools you’d recommend buying first to avoid making those common beginner mistakes you list?

    Mario The Plumber

    For a student budget, start with a basic adjustable wrench, a pair of channel lock pliers, a plunger, and some plumber’s tape. These tools will help you handle most beginner fixes like tightening connections, dealing with minor clogs, and stopping small leaks. Also, having a bucket and an old towel handy can prevent messes during repairs.

Julie Sanchez

The article talks about common mistakes like mixing up supply and drainage pipes. For a complete beginner, is there a simple trick to avoid confusing the two when buying parts at the hardware store?

    Mario The Plumber

    When shopping for plumbing parts, remember that supply pipes are usually narrower (often made of copper, PEX, or flexible braided lines) and are designed to carry clean water under pressure. Drainage pipes are wider (commonly white PVC or black ABS plastic) and carry wastewater away. If you’re unsure, check the labels—they often specify ‘supply’ or ‘drain/waste/vent.’ Don’t hesitate to ask store staff for clarification, and bring a photo of your setup for reference.

Andrew Moore

I’m curious about the shutoff valves you mention. Are there common problems when trying to locate or close older valves, and do you recommend replacing them as a precaution when starting DIY plumbing repairs?

    Mario The Plumber

    Older shutoff valves can sometimes be tricky—they may be hidden behind fixtures, stuck due to corrosion, or even leak when turned. It’s smart to test them before starting any repair. If a valve is hard to operate or shows signs of leaking, replacing it is a good precaution. This helps avoid unexpected water damage during your DIY project.

Patricia Johnson

The article mentions knowing when to call a professional. Are there specific signs during a repair that mean I should stop and reach out for professional help instead of continuing myself?

    Mario The Plumber

    Absolutely, there are clear signs that it’s time to pause DIY work and call a professional. If you notice water leaking uncontrollably, find mold or a strong sewage odor, discover rusted or corroded pipes, or realize you’re unsure about local plumbing codes or main shut-off valves, it’s safer to seek expert help. Also, if your fix isn’t working or the problem gets worse, don’t hesitate to contact a licensed plumber.

Mary Smith

If I realize partway through a repair that a mistake has caused a small leak behind a wall, is there a safe temporary fix I can use until a professional arrives, or should I always stop and call for help immediately?

    Mario The Plumber

    If you discover a small leak behind a wall, turn off the main water supply right away to prevent further damage. You can use towels or buckets to contain any visible water, but avoid making further repairs or opening the wall yourself, as this could worsen the issue. It’s safest to call a professional immediately so they can address both the leak and any hidden damage properly.

Karen Thomas

If a first-time DIYer attempts a drain replacement and encounters unexpected water leaking even after turning off what they think is the right valve, what troubleshooting steps should they follow to locate the source of the water?

    Mario The Plumber

    First, double-check that you’ve turned off the main water supply, not just a local shutoff valve, since some fixtures have multiple water sources. After shutting it off, open a nearby faucet to drain any remaining water in the pipes. Inspect all pipe joints and connections for residual leaks. If water is still present, check if another fixture or appliance shares the same line and ensure those valves are also closed. Finally, confirm the drain itself isn’t backflowing from elsewhere in the plumbing system.

Aaron Brown

If I make a mistake and accidentally mix up supply and drainage pipes, what signs should I look out for and is it possible to fix this without calling a professional right away?

    Mario The Plumber

    If supply and drainage pipes are mixed up, you might notice issues like unusual leaks, water coming out where it shouldn’t, or drains not working properly. You may also see cross-contamination or odd smells. If you’re comfortable, double-check your connections with diagrams and shut off the water before making any changes. Correcting the pipe placements can be done with basic tools, but if you have any doubts or notice persistent issues, it’s safest to call a professional.

Tyler Johnson

If I accidentally mix up supply and drainage pipes while working on a repair, what kind of problems could I run into, and how serious could those mistakes be for my home’s plumbing?

    Mario The Plumber

    Mixing up supply and drainage pipes can cause serious problems. If a drain is connected to a supply line, you risk contaminating your clean water, which poses health hazards. Swapping their roles could also lead to leaks, flooding, or water backing up in the wrong places. These mistakes can be expensive to fix and might even violate plumbing codes. If you suspect a mix-up, stop work and consult a professional immediately to prevent further issues.

Emily Davis

When figuring out the supply and drainage systems, how can you tell if you’re working with copper, PEX, or CPVC pipes versus ABS or PVC pipes? Are there visual cues or labeling that beginners should look for before starting a plumbing project?

    Mario The Plumber

    Yes, there are clear visual cues to help you identify pipe types. Copper pipes are metallic and have a reddish-brown color. PEX pipes are flexible and often red, blue, or white. CPVC is rigid and usually off-white or light yellow. ABS pipes are rigid and black, while PVC pipes are rigid and white or light gray. Most pipes also have manufacturer labeling stamped along them, which can confirm the type. Always double-check before starting work to ensure you use compatible fittings and tools.

Margaret Clark

You talk about the importance of knowing where all the shutoff valves are. In an older home where valves might be stuck or hard to find, what’s the best way to test or replace them before starting a DIY plumbing project?

    Mario The Plumber

    For older homes, start by locating each shutoff valve and gently turning them off and on to check if they work or are stuck. If a valve won’t budge, don’t force it; use penetrating oil and try again after a few minutes. If it’s still stuck or leaks, consider replacing it. Turn off the main water supply before removal, and take the old valve to a hardware store to find a matching replacement.

John Lopez

The article explains that mixing up supply and drainage materials is a common mistake. Are there specific brands or labeling codes you recommend looking for when buying replacement pipes to make sure I’m picking the right ones for each system?

    Mario The Plumber

    When shopping for plumbing pipes, look for clear labeling: supply lines are often marked as CTS (Copper Tube Size), PEX, or CPVC, and are typically labeled for potable water. Drainage pipes like PVC or ABS are usually marked with DWV (Drain, Waste, Vent). Brands such as Charlotte Pipe and SharkBite are widely used and reliable, but always check for these labels and codes to match the intended use.

James Thomas

For a first-timer on a tight budget, are there certain plumbing tools that are absolutely essential, or can some steps be managed with basic household tools when handling small repairs?

    Mario The Plumber

    For small plumbing repairs, you can often get by with basic household tools like an adjustable wrench, pliers, and a screwdriver. However, a plumber’s tape (Teflon tape) and a pipe wrench are affordable essentials worth picking up. Many minor jobs don’t require a full set of professional tools, but having these basics makes most first-time fixes much easier and helps prevent further issues.

Kevin Taylor

Assuming I’ve never attempted plumbing repairs before, about how long should I expect simple projects like fixing a leaky faucet or replacing a drain to take if I follow your step-by-step advice?

    Mario The Plumber

    For someone new to plumbing, fixing a leaky faucet usually takes about 1 to 2 hours, especially if you’re following clear step-by-step instructions. Replacing a drain might take 1 to 3 hours, depending on the type of drain and your comfort with tools. Take your time and don’t rush—being thorough helps prevent mistakes.

Richard Perez

You mention that supply and drainage pipes use different materials and fittings. How do I quickly tell them apart if I’m looking at exposed pipes under my sink, and what happens if I accidentally use the wrong type for a repair?

    Mario The Plumber

    Supply pipes are usually made of copper, PEX, or sometimes flexible braided tubing—they’re smaller in diameter and connect directly to your faucet valves. Drainage pipes are larger, often made of white or black plastic (PVC or ABS), and carry wastewater away. Using the wrong type can cause leaks or even contamination; for example, supply lines must handle pressure, while drain lines aren’t pressurized. Always match materials and fittings to the job to avoid costly problems.

Emily Moore

For those attempting their first drain replacement, what’s a reasonable budget for basic tools and materials, assuming you don’t have anything on hand yet? Are there any expensive tools that are truly necessary for beginners?

    Mario The Plumber

    If you’re starting from scratch, you can expect to spend around $40 to $80 on basic tools and materials for a first drain replacement. Essentials include a pipe wrench, adjustable pliers, plumber’s putty, Teflon tape, and the replacement drain parts. Most of these items are affordable and easy to find. Expensive specialty tools are usually not necessary for beginners—just stick to the basic hand tools and you’ll be well equipped for this project.

Julie Ramirez

If I’m working on a leaky faucet and I turn off just the fixture’s shutoff valve, is it always safe, or should I be turning off the main water supply too in certain situations?

    Mario The Plumber

    Turning off the fixture’s shutoff valve is usually safe and convenient for fixing a leaky faucet. However, if the shutoff valve is old, corroded, or doesn’t fully stop the water, it’s best to turn off the main water supply. Also, for major repairs or if you’re unsure about the valve’s reliability, shutting off the main supply adds an extra layer of safety.

Nathan Clark

You mention that drainage and supply lines are made from different materials. How can I quickly tell what type of pipes I have before I start a project, and does it matter if I use the wrong fitting by accident?

    Mario The Plumber

    To identify your pipes, look at their appearance and markings. Drainage pipes are often larger and may be made of PVC (white plastic), ABS (black plastic), or cast iron. Supply lines are usually smaller, made from copper, PEX (flexible plastic), or galvanized steel. Using the wrong fitting can cause leaks or water damage, so always match fittings to the pipe material and size. If unsure, take a photo to your hardware store for guidance.

Nathan Lopez

In the section about supply and drainage systems, you mention the importance of not mixing up materials like PEX, CPVC, PVC, and ABS. Could you elaborate on what could happen if someone accidentally connects a supply line to drainage pipe material, or vice versa?

    Mario The Plumber

    Mixing up supply and drainage pipe materials can lead to serious issues. Supply lines, like PEX or CPVC, are designed to handle pressurized water and are safe for drinking water. Drainage pipes (PVC or ABS) aren’t made for pressure or potable water—they can leak, crack, or even leach chemicals if used for supply. Using the wrong material could cause water contamination, pipe failure, and expensive repairs. Always match the material to its intended use to ensure safety and durability.

James Harris

Could you give more detail about when it’s better to call a professional instead of trying to fix something myself? I’m worried about running into code violations or making leaks worse.

    Mario The Plumber

    It’s wise to call a professional if you’re dealing with major leaks, sewer line issues, or problems inside walls and ceilings. Also, if any repair involves moving pipes, altering gas lines, or requires a permit, a licensed plumber ensures everything meets code. When in doubt—especially if you’re unsure about local regulations or the repair feels over your head—it’s safer and often cheaper in the long run to hire an expert.