Plumber Las Vegas News

Your trusted source for plumbing updates, DIY fixes, and industry insights in Las Vegas. Stay informed with practical tips, local trends, and expert advice for homeowners and professionals alike.

Top Plumbing Tools Every DIYer Needs: Selection, Use, and Maintenance

Introduction: Why the Right Plumbing Tools Matter

Plumbing repairs and improvements are among the most approachable DIY projects for homeowners and enthusiastic hobbyists. However, success in plumbing isn’t just about skill or knowledge—it heavily depends on having the right tools for the job. Using the improper equipment can lead to leaks, damage, and frustration, while a well-chosen toolkit empowers you to tackle repairs confidently and safely. This comprehensive guide walks you through the essential plumbing tools every DIYer should own, how to select the best options for your needs, safe and effective usage techniques, and proven maintenance practices to extend the life of your investment. Whether you’re fixing a leaky faucet, unclogging a drain, or upgrading fixtures, the right tool makes all the difference—reducing stress, saving money, and ensuring lasting results.

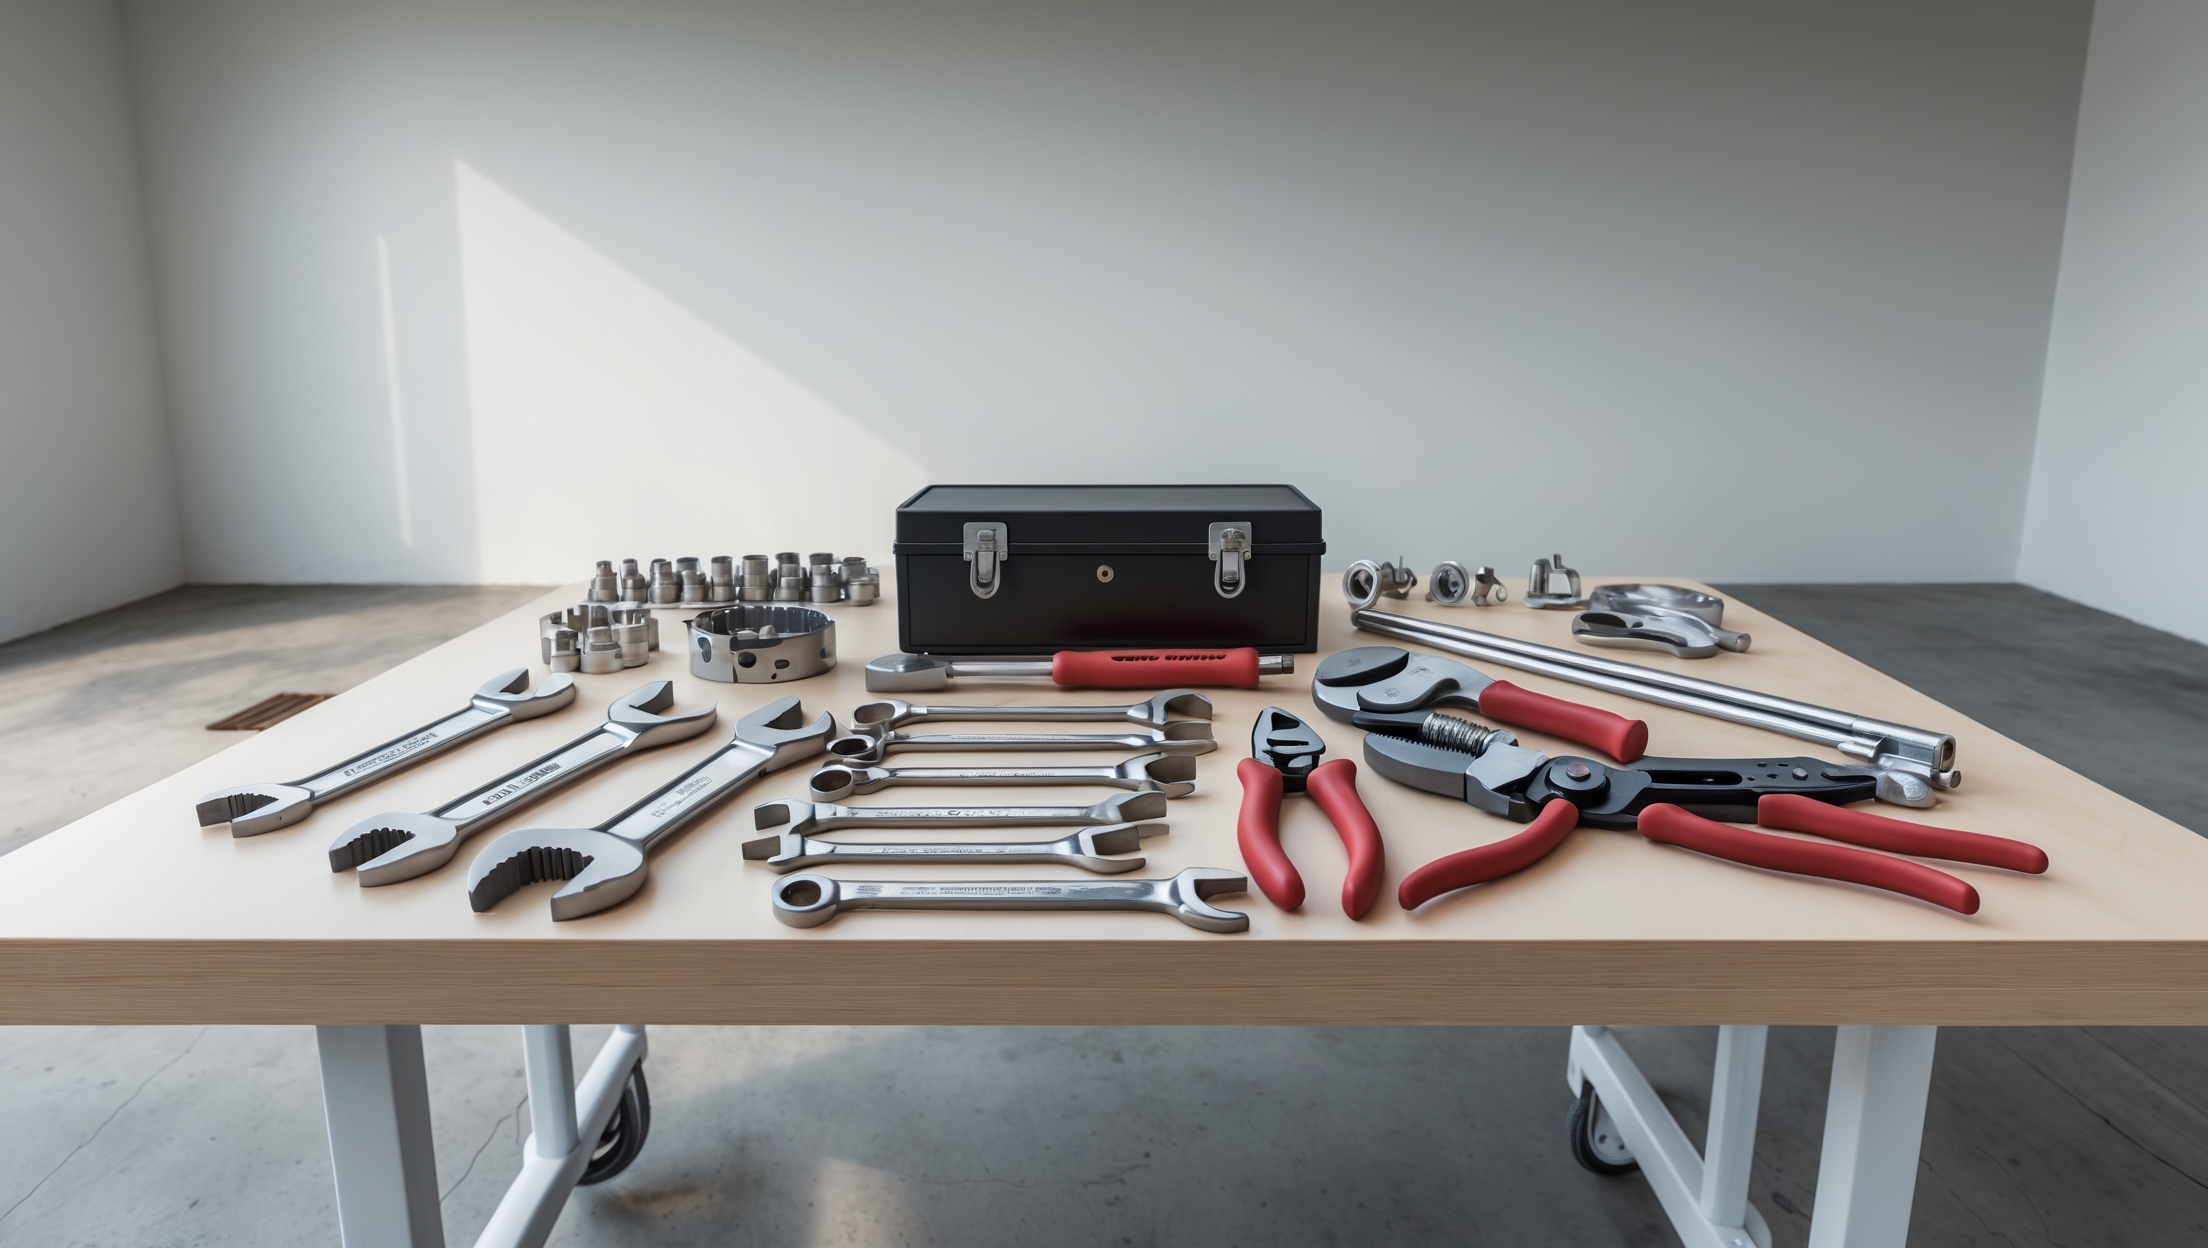
Core Plumbing Tools for Every DIYer

Adjustable Wrenches

These versatile wrenches are indispensable for gripping, turning, and holding nuts and fittings of various sizes. A quality adjustable wrench with a smooth jaw adjustment will prevent damage to chrome or brass fixtures. Keep at least two sizes (6-inch and 10-inch) in your toolbox to accommodate different tasks.

Pipe Wrenches

Pipe wrenches are designed specifically for gripping round objects like pipes and pipe fittings. Their serrated jaws provide the leverage needed to loosen or tighten threaded pipes. For most residential work, an 18-inch pipe wrench covers a wide range of needs, but a smaller 10-inch version is helpful in tight spaces.

Slip-Joint and Tongue-and-Groove Pliers

Slip-joint pliers are great for general gripping and bending, while tongue-and-groove pliers (often called “Channel-Locks”) excel at turning larger nuts and pipes. Their adjustable jaws allow you to tackle a variety of tasks, from removing supply line nuts to holding pipes steady.

Plumber’s Tape (Teflon Tape)

This thin, non-adhesive tape is wrapped around threaded pipe joints to create a watertight seal and prevent leaks. Always keep a roll or two in your toolbox; it’s essential for any threaded plumbing connection.

Pipe Cutters

Cutting pipes to precise lengths is a common task. Tube cutters (for copper or plastic) provide clean, burr-free cuts, while hacksaws are useful for cutting through metal or plastic piping in tight spots. Invest in a pipe cutter suited to the materials you’ll most often encounter.

Plunger

The humble plunger remains the first line of defense against clogged sinks, toilets, and tubs. Have both a cup plunger (for sinks and tubs) and a flange plunger (for toilets) on hand for best results.

Drain Auger (Plumber’s Snake)

When a plunger isn’t enough, a hand-crank drain auger can break up or retrieve clogs deep within pipes. For most homeowners, a 25-foot hand auger will resolve common sink and tub blockages.

Basin Wrench

This specialty tool is designed to reach and turn the nuts securing faucets to sinks—often located in tight, hard-to-access spots. Its long handle and pivoting jaw make faucet installation and removal much easier.

Pipe Deburring Tool

After cutting copper or plastic pipes, use a deburring tool to smooth rough edges. This prevents leaks and ensures a better fit when joining pipes.

Other Handy Additions

  • Plumber’s putty for sealing drains and fixtures
  • Measuring tape for accurate cuts and alignment
  • Flashlight or headlamp for illuminating dark spaces
  • Bucket and rags for managing spills and cleanup
  • Safety gloves and protective eyewear

How to Choose Quality Plumbing Tools

Material and Build Quality

Look for tools constructed from high-grade materials such as hardened steel, which resists bending and rusting. Chrome-plated finishes add corrosion resistance, especially for wrenches and pliers. Avoid bargain-bin tools made from thin, soft metals—they may slip or break under pressure, causing injury or damage.

Comfort and Ergonomics

Plumbing projects often require prolonged grip strength and awkward angles. Tools with cushioned, non-slip handles reduce hand fatigue and provide better control. Test the grip and balance of a tool in person whenever possible.

Size and Application Fit

Choose tool sizes appropriate for your home’s plumbing system. Oversized wrenches won’t fit under sinks, and undersized ones won’t provide enough leverage. If you’re unsure, start with medium sizes; you can expand your kit as you encounter new tasks.

Brand Reputation and Warranties

Trusted brands typically offer better durability and customer support. Many reputable manufacturers back their tools with lifetime warranties, reflecting confidence in their products.

Tool Use: Practical Tips for DIY Plumbing Success

Proper Handling Techniques

  • Always use the correct tool for the job—using pliers on a nut meant for a wrench increases the risk of rounding edges and causing leaks.
  • Apply steady, even pressure. Jerking or over-tightening can crack fittings or strip threads.
  • Secure pipes with one tool while turning fittings with another to prevent stress on soldered or glued joints.
  • Keep threads clean and use plumber’s tape or pipe dope where required for a reliable seal.

Safety Precautions

  • Wear safety goggles when cutting, sawing, or working under sinks to protect against flying debris.
  • Turn off the water supply before disassembling pipes or fixtures.
  • Use gloves when handling sharp-edged pipes or chemicals.
  • Keep your workspace dry to avoid slips and electrical hazards.

Common DIY Mistakes to Avoid

  • Over-tightening fittings: This can damage threads and cause leaks. Tighten firmly, but never force.
  • Using the wrong type of pipe cutter: Tube cutters are for copper and plastic, not steel.
  • Skipping deburring: This leads to poor pipe connections and leaks.
  • Improper use of plumber’s tape: Always wrap in the direction of the threads for a proper seal.

Maintenance: Keeping Your Tools in Top Shape

Cleaning After Use

Wipe down tools with a clean, dry cloth after each project to remove debris, moisture, and corrosive residues. For stubborn grime, use a mild soap solution and dry thoroughly.

Lubrication

Apply a light machine oil to moving parts (like wrench threads and pliers’ joints) every few months to prevent rust and ensure smooth operation. Avoid over-oiling, which can attract grit and cause wear.
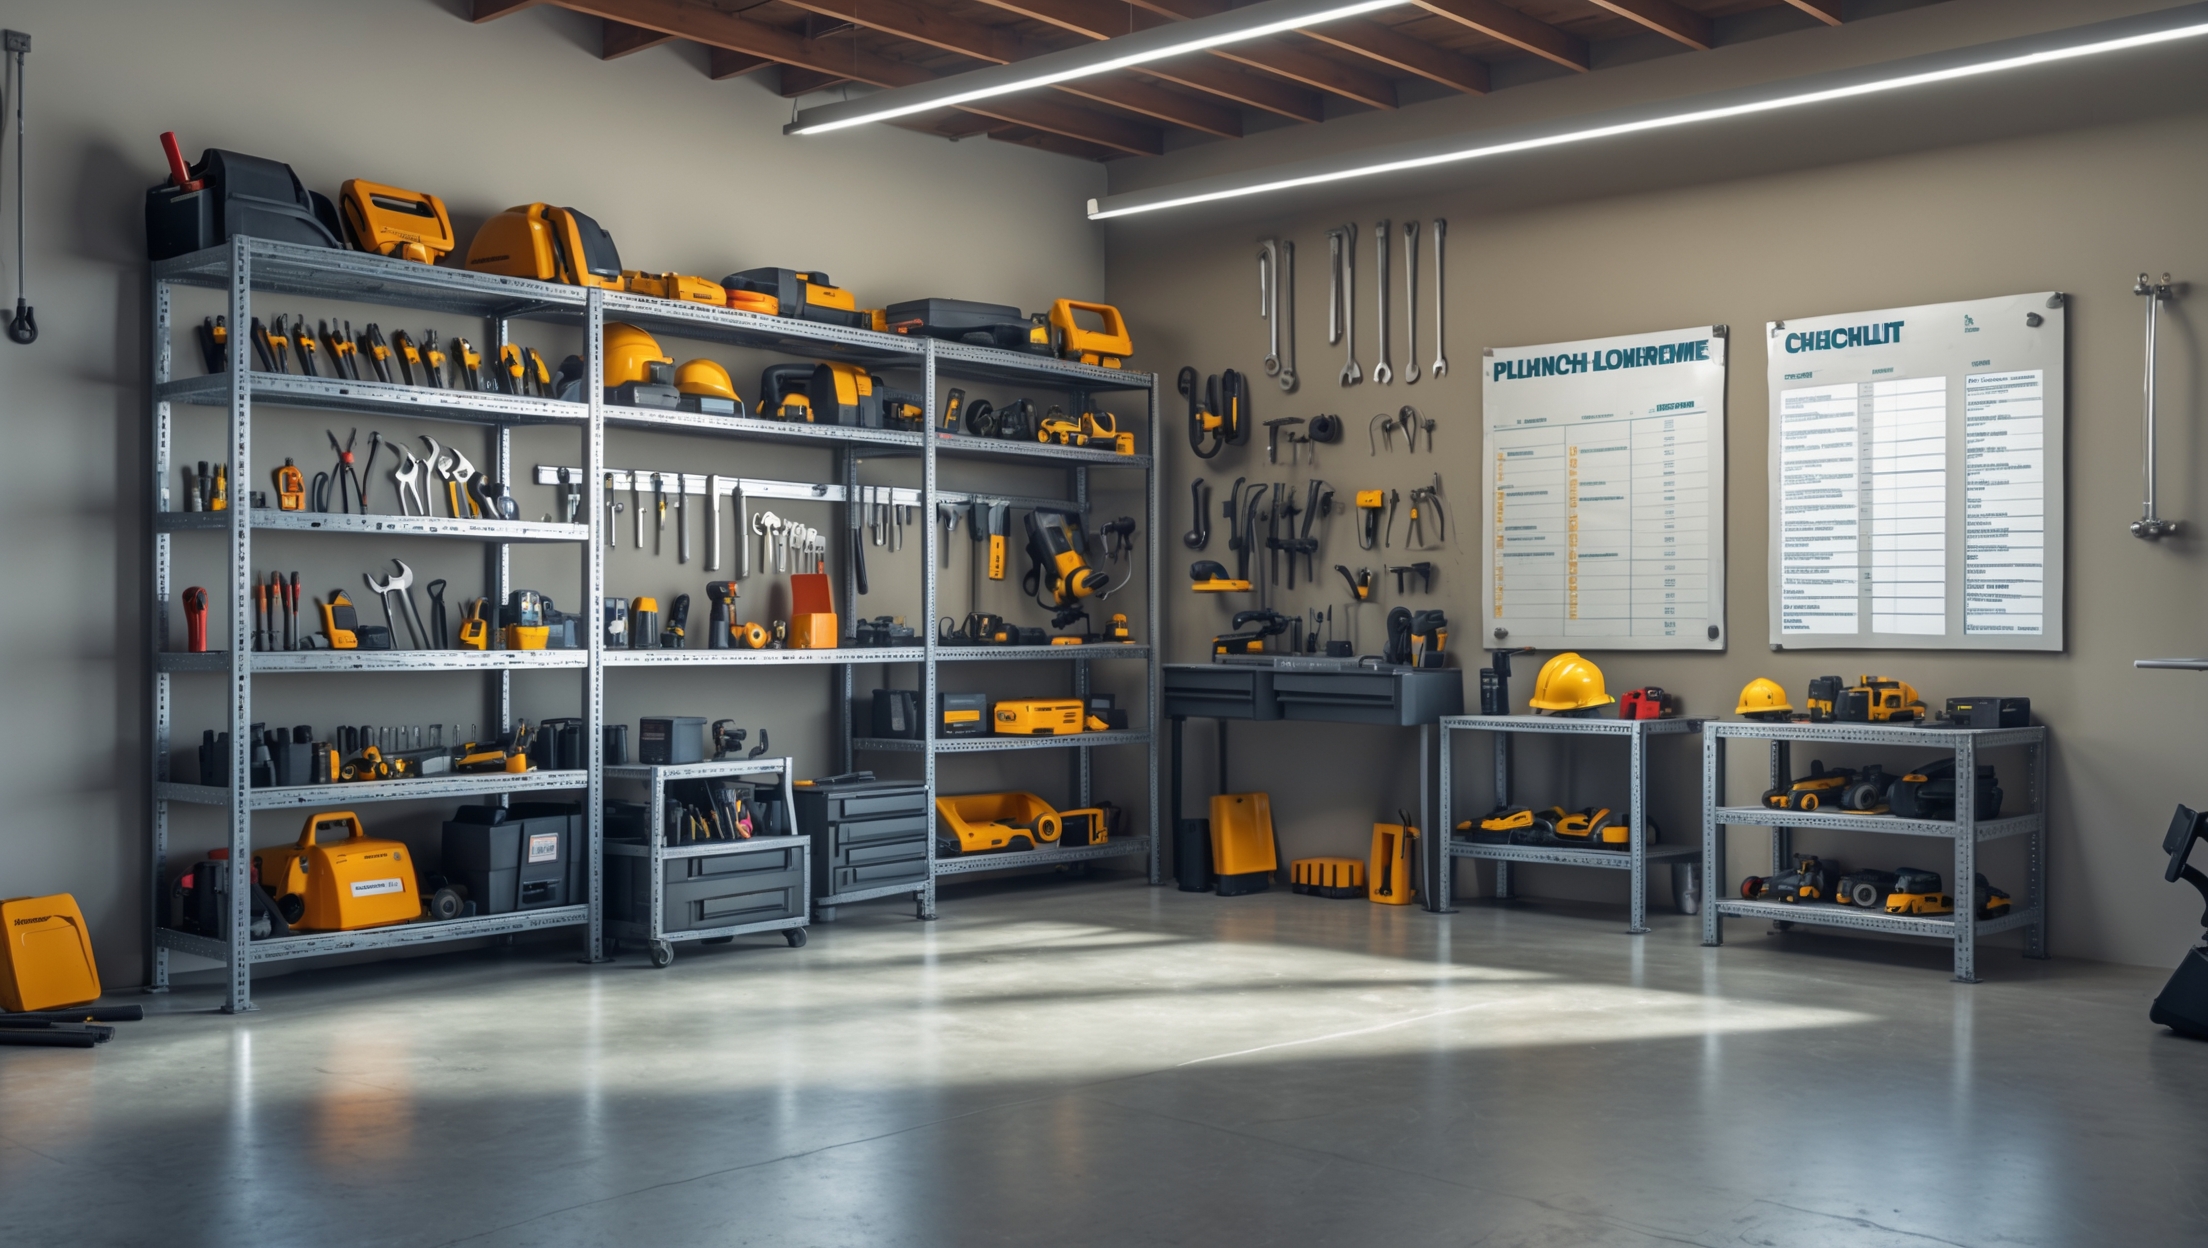
Storage Solutions

  • Store tools in a dry, climate-controlled space. Moisture accelerates rust and deterioration.
  • Use a toolbox or tool bag with designated pockets to prevent tools from banging together and dulling cutting edges.
  • Hang larger tools on a pegboard for easy access and to keep surfaces clear.

Inspecting for Wear and Damage

  • Check cutting tools for nicks or dull blades—replace or sharpen as needed.
  • Inspect handles for cracks and grips for slippage. Replace damaged tools immediately to avoid injury.
  • Examine jaws and adjustment mechanisms on wrenches and pliers for smooth operation.

Expanding Your Toolkit: When and What to Add

Assessing Project Needs

As you gain experience and tackle more complex plumbing projects, you may find certain specialty tools invaluable. For example, a faucet seat wrench for repairing leaks in older fixtures, a closet auger for stubborn toilet clogs, or a propane torch for soldering copper pipes. Evaluate each project and invest in new tools only as required—quality is more important than quantity.

Budgeting for Expansion

Set aside a portion of your home maintenance budget for tool upgrades. Prioritize tools that will be used often or that significantly improve efficiency and safety.

Frequently Asked Questions About Plumbing Tools

Can I use standard tools for plumbing jobs?

While some household tools can be adapted for minor plumbing tasks, most plumbing projects require dedicated tools to ensure safety and effectiveness. Using improper tools increases the risk of leaks, damage, or injury.

Should I buy or rent specialized plumbing tools?

For one-off tasks, renting is cost-effective. However, for recurring repairs or ongoing DIY projects, investing in quality tools pays off long-term in convenience and performance.

What’s the best way to learn proper tool use?

Manufacturer guides, reputable online tutorials, and hands-on practice are excellent resources. Always read instructions carefully and start with small, manageable repairs to build confidence.

Conclusion: Building Your DIY Plumbing Confidence

Equipping yourself with the right plumbing tools is a crucial step toward becoming a capable and self-reliant DIYer. By investing in quality essentials—like adjustable and pipe wrenches, reliable pliers, a good pipe cutter, and effective plunging and drain-clearing tools—you lay the groundwork for safe, efficient, and lasting repairs. Remember, tool selection is only the beginning: learning proper techniques, prioritizing safety, and maintaining your equipment will ensure your toolkit serves you for years to come. As your experience grows, so will your understanding of which specialty tools add the most value for your unique projects. Start with the basics, care for your tools, and build your confidence with each successful job. With the right preparation and a commitment to continuous learning, you’ll find that plumbing challenges become opportunities to expand your skills and protect your home investment—one repair at a time.

114 comments
Andrew Miller

How much time should I set aside for maintaining these tools to keep them in good shape? Are there any quick cleaning or storage routines you suggest after using things like adjustable wrenches or pipe wrenches?

    Mario The Plumber

    Setting aside about 10 to 15 minutes after each use is usually enough to keep your plumbing tools in good condition. Wipe down adjustable and pipe wrenches with a clean cloth to remove any grime or moisture. If needed, use a little light oil on moving parts to prevent rust. Always store tools in a dry place, ideally in a toolbox or on a rack, to avoid damage and keep them organized for next time.

Diane Smith

I noticed you recommend Teflon tape for threaded pipe connections. Are there situations where pipe dope or another thread sealant is a better choice, or is Teflon tape usually sufficient for DIY plumbing jobs?

    Mario The Plumber

    Teflon tape is suitable for most household threaded pipe connections, especially for water lines. However, pipe dope (thread sealant paste) can be better for larger threads, gas lines, or situations where vibration might loosen a tape seal. For DIY water plumbing, Teflon tape is usually enough, but always check local codes and the manufacturer’s recommendations for specific applications.

Daniel Harris

Could you share some tips on how to maintain tongue-and-groove pliers properly? Mine tend to get stiff after a while and I’m not sure if I’m cleaning or storing them wrong.

    Mario The Plumber

    To keep your tongue-and-groove pliers working smoothly, wipe them clean after each use to remove dirt and moisture, which can cause rust. Apply a light machine oil to the joint and moving parts regularly. If they get stiff, work a drop of oil into the joint and open and close them several times. Store them in a dry place, ideally in a toolbox or on a pegboard, rather than leaving them exposed to damp air.

Brian Sanchez

Since space can be tight when working under sinks, do you have tips for choosing between slip-joint pliers and tongue-and-groove pliers for those situations, or would one be a better investment than the other for a beginner?

    Mario The Plumber

    When working under sinks where space is limited, tongue-and-groove pliers (often called channel locks) tend to offer more versatility because their adjustable jaws can grip different sizes of nuts and pipes. They also have thinner handles, making them easier to maneuver in tight spots. Slip-joint pliers are more basic but less adaptable in terms of jaw size. If you’re starting out, investing in tongue-and-groove pliers is usually more practical for most plumbing tasks.

Helen Williams

I often struggle with tight spaces under sinks. Do you have any tips or tool recommendations from your list that work especially well in cramped areas for someone doing solo repairs?

    Mario The Plumber

    Working under sinks can be tricky due to limited space. A basin wrench from the recommended tools list is especially useful for reaching nuts in tight spots behind sinks. Its long handle and swiveling jaw help you loosen or tighten fittings without needing much room. Also, a compact adjustable wrench and a headlamp can make solo repairs much easier when space and visibility are limited.

Susan Clark

You mention both adjustable wrenches and pipe wrenches as essentials, but for someone just starting out, is it necessary to buy both right away? Can one substitute for the other in basic household plumbing repairs?

    Mario The Plumber

    While adjustable wrenches and pipe wrenches may look similar, they serve different purposes. Adjustable wrenches work well for nuts and bolts with flat sides, while pipe wrenches are designed to grip round pipes securely. For very basic plumbing repairs, you might get by with just an adjustable wrench, but as soon as you encounter stuck or round pipes, a pipe wrench is essential. If you can, start with an adjustable wrench and add a pipe wrench as you take on more projects.

Mark Rodriguez

If I want to replace a bathroom faucet, would these core tools be enough, or are there additional specialty tools I should pick up to avoid running into trouble during installation?

    Mario The Plumber

    The core tools listed in the article, such as an adjustable wrench, basin wrench, plumber’s tape, and a bucket, will cover most faucet replacements. However, depending on your faucet and sink setup, you might also need a flashlight for visibility, a putty knife to remove old sealant, and possibly a small hacksaw if old bolts are rusted. Having these on hand can make the job smoother.

Michelle Davis

You mentioned maintenance practices for extending the life of plumbing tools. What are some simple steps I can take after each DIY project to keep my tools in good condition, especially if I only use them occasionally?

    Mario The Plumber

    After each DIY project, wipe your tools clean to remove dirt and moisture. Dry them thoroughly to prevent rust, especially on metal parts. If any tools have moving joints, add a drop of light oil to keep them smooth. Store your tools in a dry, organized place—ideally in a toolbox or on a shelf—to protect them from humidity and damage. These simple habits will help your tools last longer, even if you only use them occasionally.

Brian Gonzalez

What’s the most common mistake that beginners make when using slip-joint or tongue-and-groove pliers? I want to make sure I handle these tools properly and avoid damaging pipes or fittings.

    Mario The Plumber

    One common mistake beginners make with slip-joint or tongue-and-groove pliers is using too much force, which can crush or damage pipes and fittings, especially if they’re made of softer materials like copper or plastic. It’s also important to adjust the pliers to fit snugly around the object and to grip it firmly without over-tightening. Always make sure your grip is controlled to avoid slipping and causing accidental damage.

Jennifer Lee

You mention keeping both a 6-inch and a 10-inch adjustable wrench on hand. I often see sets with even larger sizes included—are there specific residential situations where a bigger adjustable wrench is really needed, or are these two sizes enough for most DIY plumbing jobs?

    Mario The Plumber

    For most residential plumbing tasks, a 6-inch and 10-inch adjustable wrench will cover the majority of situations, such as tightening or loosening supply lines and smaller fittings. Larger adjustable wrenches (like 12-inch or bigger) are rarely needed for typical home plumbing, unless you’re dealing with unusually large pipes or old, stubborn fittings found in older homes. For most DIYers, sticking with the two mentioned sizes is sufficient.

Matthew Johnson

For a beginner trying to put together a basic plumbing toolkit, what are the most important factors to consider to avoid overspending but still get reliable tools that will last?

    Mario The Plumber

    Focus on buying essential tools first, like an adjustable wrench, pipe wrench, plunger, pipe cutter, and a quality measuring tape. Look for mid-range brands with good reviews rather than the cheapest options, as they tend to last longer. Avoid large kit bundles with lots of unnecessary extras. Prioritize sturdy materials like steel and check for solid grips. This approach will help you build a reliable toolkit without spending more than necessary.

Linda Jones

The article suggests an 18-inch pipe wrench as the main size for residential work, but would a smaller or larger pipe wrench be necessary for any common plumbing jobs, or is the 18-inch usually enough for most situations?

    Mario The Plumber

    An 18-inch pipe wrench is very versatile and handles most residential plumbing tasks well. However, for tight spots or small pipes (like under sinks), a 10- or 12-inch wrench is more practical. For larger pipes or jobs where extra leverage is needed (such as water heater connections or old, stuck fittings), a 24-inch wrench can be helpful. Having a smaller and a larger wrench alongside your 18-inch one covers almost any situation you’ll encounter.

Helen Rodriguez

If a DIYer wants to upgrade their fixtures rather than just repair them, are there additional tools beyond what’s listed here that you’d recommend picking up before starting the project?

    Mario The Plumber

    For fixture upgrades, you might want to add a basin wrench for hard-to-reach nuts under sinks, a tubing cutter if you’re working with copper pipes, and possibly a set of adjustable wrenches for different sizes. Plumber’s putty and Teflon tape are also handy for sealing. Make sure you have the right supply lines and connectors for your new fixtures, as compatibility is key for a smooth installation.

Megan Ramirez

How do you know when you need to use plumber’s tape versus other sealing methods like pipe dope? Are there certain situations when one is better than the other for DIY projects?

    Mario The Plumber

    Plumber’s tape, or Teflon tape, works best for sealing threaded pipe joints, especially on water and air lines, since it prevents leaks and is easy to apply. Pipe dope, or pipe joint compound, is better for metal-to-metal threaded connections and can handle higher pressures or temperatures. For most DIY home repairs, use plumber’s tape on standard threaded fittings and pipe dope for heavy-duty or metal gas lines. Always check the manufacturer’s recommendations for your specific project.

Joseph Lewis

For someone starting out and looking to save money, which of the core tools you listed is absolutely essential to buy first, and which could you potentially borrow or delay purchasing for most basic plumbing tasks?

    Mario The Plumber

    For beginners, a good adjustable wrench and a quality plunger are truly essential—they cover most simple plumbing fixes and are worth owning right away. Other tools like a pipe wrench, basin wrench, or plumber’s tape can often be borrowed or purchased later as you encounter more specific projects. This way, you can tackle most basic plumbing tasks upfront without spending too much.

Michael Robinson

If I plan on tackling a few plumbing projects over a single weekend, how much time should I set aside for cleaning and maintaining my tools afterward to keep them in good working order?

    Mario The Plumber

    For a weekend of plumbing projects, you should set aside about 20 to 30 minutes at the end to clean and maintain your tools. This includes wiping them down, drying them thoroughly, and checking for any signs of wear or rust. Regular upkeep like this ensures your tools last longer and work properly the next time you need them.

Kimberly Lee

You note that 18-inch pipe wrenches are versatile for most residential jobs, but also recommend a smaller 10-inch one for tight spaces. Is there a significant difference in leverage or safety between the two when working on stubborn fittings?

    Mario The Plumber

    Yes, there is a noticeable difference between the 18-inch and 10-inch pipe wrenches. The 18-inch wrench provides much more leverage, making it easier and safer to loosen stubborn or rusted fittings without straining yourself. The 10-inch wrench is handy for tight spots but requires more effort and may slip if used on tough fittings. For stubborn jobs, stick with the larger wrench whenever space allows.

James Lee

Can you share some maintenance tips for keeping plumber’s tape effective over time? I sometimes find mine getting brittle or tearing when I try to use it after storing it for a while.

    Mario The Plumber

    To keep plumber’s tape in good condition, store it in a cool, dry place away from direct sunlight and heat, as exposure can make it brittle over time. Make sure the tape stays in its original container or a sealed plastic bag to protect it from dust and moisture. Avoid heavy pressure or squishing the roll, which can cause creases and weak spots.

Joshua Clark

I noticed you recommend having both 6-inch and 10-inch adjustable wrenches. Is there ever a situation where one wrench alone would suffice, or do most plumbing tasks usually require having both sizes on hand?

    Mario The Plumber

    While you can handle some basic plumbing jobs with just one adjustable wrench—like tightening a single nut or bolt—the two sizes serve different purposes. The 6-inch wrench is ideal for tight spaces and small fittings, while the 10-inch wrench offers more leverage for larger connections. For most DIY plumbing tasks, having both gives you better flexibility and makes it easier to grip and turn fittings of different sizes.

Ashley Martinez

You mention having both 6-inch and 10-inch adjustable wrenches in your toolkit. For a beginner tackling mostly small plumbing jobs like leaky faucets, is it really necessary to have both sizes, or could I get by with just one to start?

    Mario The Plumber

    For most small plumbing jobs like fixing leaky faucets, a single adjustable wrench—preferably the 10-inch size—should be enough to start with. The larger size offers more versatility and leverage for slightly bigger fittings, while still being manageable for smaller tasks. You can always add a 6-inch wrench later if you find you need something more compact for tight spaces.

William Lewis

After assembling the core plumbing tools, what’s the best way to practice using them safely before an actual emergency or repair comes up? Are there simple DIY projects you’d recommend starting with for beginners?

    Mario The Plumber

    Once you have your basic plumbing tools, you can practice using them by tackling low-risk projects around the house. Try fixing a leaky faucet, replacing a showerhead, or changing out a toilet flapper—these are simple tasks that let you get comfortable with tools like wrenches and pliers. Always shut off the water supply before starting, and wear protective gloves and goggles for safety. This hands-on experience will boost your confidence for more urgent repairs later on.

Joshua Lee

I noticed you recommend having both 6-inch and 10-inch adjustable wrenches in a basic plumbing toolkit. Is there a certain type of plumbing task where the size difference really matters, or could I get by with just one size to save space?

    Mario The Plumber

    The size difference between 6-inch and 10-inch adjustable wrenches can matter when working in tight spaces or with different fitting sizes. The 6-inch wrench is great for small, confined areas, while the 10-inch offers more leverage for larger nuts and fittings. If you often work in cramped spots or on a variety of fixtures, having both is helpful. However, for occasional or basic tasks, you could get by with just the 10-inch, as it’s more versatile overall.

Joseph Lopez

If I only have the budget to buy one size of pipe wrench to start, would you suggest going with the 18-inch for broader use, or is it better to get the 10-inch for common smaller repairs?

    Mario The Plumber

    If you’re just starting out and will mostly be handling tasks like fixing faucets or under-sink pipes, a 10-inch pipe wrench is more manageable and works well for common household repairs. However, if you anticipate working with larger pipes or want something more versatile, the 18-inch offers greater reach and leverage, though it’s heavier. For most DIY homeowners, starting with the 10-inch is usually sufficient.

Betty Smith

For someone interested in tackling their first plumbing project this weekend, approximately how long would it take to assemble a basic toolkit with all the core items you listed, assuming local availability?

    Mario The Plumber

    If your local hardware store is well stocked, you can generally assemble a basic plumbing toolkit with the core items in about 1 to 2 hours. This includes time for browsing, comparing brands or prices, and asking for advice if needed. Make a checklist before you go to help the process go smoothly and avoid missing anything important.

Linda Perez

If you run into a stubborn, corroded pipe that won’t budge even with an 18-inch pipe wrench, what would you suggest as the next step for a DIYer before calling a professional?

    Mario The Plumber

    If the pipe won’t budge with your 18-inch wrench, try applying penetrating oil to the joint and let it soak in for at least 15–30 minutes. You can also gently tap the fitting with a hammer to help break up corrosion. If that still doesn’t work, using a longer wrench for extra leverage could help, but be cautious not to damage the pipe. If there’s still no movement, it’s safer to consult a professional.

Donna Harris

For someone on a tight budget trying to assemble their first plumbing toolkit, which of these core tools would you prioritize purchasing first, and are there any safe alternatives for less frequently used tools?

    Mario The Plumber

    If you’re starting out on a budget, focus on the essentials like an adjustable wrench, a pipe wrench, a plunger, and a pipe cutter. These will handle most basic plumbing tasks. For tools you’ll use less often, consider borrowing from friends or renting from a hardware store instead of buying right away. This way, you get what you need without overspending.

Emily Anderson

When using tongue-and-groove pliers in tight spaces, I sometimes struggle with slipping or not getting a good grip. Do you have advice for ensuring a secure hold without damaging the pipe or fitting?

    Mario The Plumber

    To get a better grip with tongue-and-groove pliers in tight spaces, make sure the jaws are adjusted to fit the pipe snugly before applying pressure. Try wrapping a thin layer of cloth or rubber around the pipe to protect it from scratches and help prevent slipping. Applying slow, steady pressure rather than quick force can also improve control and reduce the risk of damaging the fitting.

Thomas Brown

How much time should a complete novice expect to spend learning to properly use each of these tools before attempting their first plumbing repair project?

    Mario The Plumber

    For a complete novice, it usually takes about 1 to 2 hours to become comfortable with each basic plumbing tool like a pipe wrench, plunger, or adjustable spanner. Watching short tutorials and practicing on scrap materials helps a lot. Altogether, expect to spend a few evenings learning and practicing before tackling your first plumbing repair project with confidence.

Lisa Johnson

If someone is new to DIY plumbing and working with a limited budget, which of these core tools would you say are absolutely essential to buy first, and which ones can wait until later projects?

    Mario The Plumber

    For beginners on a budget, start with a quality adjustable wrench, pliers (like tongue-and-groove pliers), a pipe wrench, a plumber’s tape (Teflon tape), and a plunger. These cover most basic repairs. Tools like pipe cutters, basin wrenches, and drain snakes are useful, but you can wait to buy them until you tackle more advanced projects or specific issues.

Michael Wilson

After assembling the basic toolkit recommended here, which additional plumbing tool would you suggest purchasing next for someone planning to tackle bigger projects, like replacing sections of pipe or upgrading bathroom fixtures?

    Mario The Plumber

    Once you have the basic toolkit, a pipe cutter would be a valuable next purchase, especially for projects involving replacing sections of pipe. It allows you to make clean, precise cuts in copper, PVC, or PEX pipes, which is essential for fitting new sections or fixtures securely. For larger bathroom upgrades, consider adding a basin wrench and an adjustable tubing bender to make installation and adjustments easier.

Mary Johnson

You highlighted tongue-and-groove pliers for working with larger nuts and pipes. How do these compare to regular slip-joint pliers in terms of versatility for someone just starting with DIY repairs?

    Mario The Plumber

    Tongue-and-groove pliers, often called channel locks, provide a wider jaw adjustment than regular slip-joint pliers. This makes them ideal for gripping larger pipes and irregular shapes, which slip-joint pliers can’t handle as easily. For general home plumbing tasks, tongue-and-groove pliers are usually more versatile and can tackle a broader range of jobs for beginners.

Elizabeth Rodriguez

If I accidentally use the wrong size wrench and slightly strip a pipe fitting, is there a way to fix it, or do I need to replace the fitting completely?

    Mario The Plumber

    If the pipe fitting is only slightly stripped, you may be able to repair it by gently reshaping the threads using a thread file or a tap and die set, making sure the threads are clean and undamaged. However, if the damage is severe and the fitting cannot be tightened securely, it’s safer to replace it to avoid future leaks. Always use the correct size wrench to prevent this issue.

Barbara Martinez

You mention having both 6-inch and 10-inch adjustable wrenches on hand for different tasks. For someone just starting a basic plumbing toolkit, is it truly necessary to get both sizes upfront, or can most beginner repairs get by with just one?

    Mario The Plumber

    For most beginner plumbing repairs, starting with just one adjustable wrench—typically the 10-inch size—should cover most basic needs. The 10-inch wrench offers good leverage and fits a wider range of nuts and fittings. As you tackle more varied projects or work in tighter spaces, you can consider adding a 6-inch wrench later for better access and convenience.

Charles Miller

For someone trying to assemble a basic toolkit on a budget, which tools from your list are absolutely essential, and which can be picked up later as needed?

    Mario The Plumber

    For a basic and budget-friendly plumbing toolkit, start with a pipe wrench, adjustable wrench, plunger, plumber’s tape, and a set of screwdrivers. These cover most minor repairs and emergencies. Tools like a basin wrench, pipe cutter, and drain snake are great additions but can usually be purchased later if specific projects require them.

William Sanchez

I noticed you recommend having both 6-inch and 10-inch adjustable wrenches. Is it really necessary to invest in multiple sizes right away, or can I get by with just one for most basic plumbing tasks when starting out?

    Mario The Plumber

    Having both 6-inch and 10-inch adjustable wrenches is helpful because they handle different sizes of nuts and fittings, but you don’t need both right away. For most basic plumbing tasks, a single 10-inch adjustable wrench should cover almost everything you’ll encounter as a beginner. You can always add the smaller size later if you find you need it for tight spaces.

Daniel Lopez

If I’m on a tight budget and need to prioritize, which three tools from your essential list would you say are absolutely critical to get started with simple plumbing DIY projects?

    Mario The Plumber

    If you’re working with a limited budget, I’d recommend starting with an adjustable wrench, a pipe wrench, and a plumber’s tape (Teflon tape). These three tools will let you handle most basic plumbing tasks like tightening or loosening fittings and ensuring leak-free joints. As you tackle more projects, you can gradually add other tools to your kit.

Nancy Gonzalez

I noticed you recommend using plumber’s tape for threaded connections, but is there a specific brand or type that holds up best for DIYers, especially if we’re working on older pipes that might have some corrosion?

    Mario The Plumber

    For most DIY projects, standard PTFE (Teflon) plumber’s tape works well, even on older pipes. Look for a thicker, high-density tape, as it provides better sealing, especially if threads are worn or slightly corroded. Brands like RectorSeal or Blue Monster are popular among DIYers for their durability. Be sure to clean the threads as much as possible before applying the tape for the best results.

Sarah Brown

You mentioned plumber’s tape as an essential tool, but what are some common mistakes DIYers make when applying it, and how can I avoid leaks when using it on threaded fittings?

    Mario The Plumber

    A common mistake with plumber’s tape is wrapping it in the wrong direction—always wrap clockwise, in the same direction as the threads, so it doesn’t unravel when tightening the fitting. Another error is using too little or too much tape; 2–3 layers are usually enough. Also, make sure to start wrapping a thread or two back from the end, so tape doesn’t get into the pipe and cause blockages. Following these steps helps ensure a proper seal and prevents leaks.

Robert Garcia

In the section about adjustable wrenches, you mention keeping at least two sizes on hand for different tasks. Are there particular brands or materials you recommend to ensure durability and prevent the jaws from loosening over time?

    Mario The Plumber

    For long-lasting adjustable wrenches, look for brands like Channellock, Crescent, or Bahco, as they have strong reputations for durability. Opt for wrenches made from forged alloy steel or chrome vanadium steel, which resist wear and minimize jaw loosening. Also, check that the adjustment mechanism feels smooth and solid—cheaper options can develop play over time, so investing in a quality brand pays off in the long run.

Kimberly Jackson

You mention both 10-inch and 18-inch pipe wrenches for residential work. Are there particular tasks where the larger wrench is essential, or could most jobs be handled with the 10-inch size alone for those trying to minimize their toolkit?

    Mario The Plumber

    The 10-inch pipe wrench is great for most common plumbing tasks like tightening or loosening small to medium pipes and fittings. However, the 18-inch wrench becomes essential when dealing with larger pipes, stubborn fittings, or jobs that require extra leverage. If most of your work is on typical household plumbing (up to about 1.5-inch pipes), the 10-inch should suffice, but for older homes or larger projects, having the 18-inch can save a lot of effort.

Kimberly Ramirez

Can you explain the best maintenance routines for pipe wrenches? I’d like to keep mine in good working order, but I’m not sure if I need to lubricate or clean them after each use.

    Mario The Plumber

    To keep your pipe wrenches in great shape, wipe them down after each use to remove dirt and moisture. Lubricate the moving parts, especially the adjustment nut and jaw threads, every few uses or when they start to feel stiff. Store your wrench in a dry place to prevent rust. Occasional inspections for wear or damage will also help extend its life.

Sarah Jackson

What would you recommend as a good entry-level brand for adjustable wrenches that won’t damage chrome fixtures? I want something affordable but don’t want to risk scratching up the bathroom hardware.

    Mario The Plumber

    For an entry-level adjustable wrench that’s gentle on chrome fixtures, consider brands like Stanley or Irwin. They’re affordable, widely available, and have smooth jaw surfaces to reduce scratching. To be extra safe, always wipe the jaws clean before use and consider wrapping the jaws with a thin layer of electrical tape to protect delicate finishes.

James Gonzalez

If I’m just starting out and on a tight budget, which three plumbing tools from your list should I absolutely invest in first to cover most common DIY plumbing problems?

    Mario The Plumber

    If you’re just beginning and want to cover the most common plumbing issues, I recommend starting with an adjustable wrench, a pipe wrench, and a plunger. The adjustable wrench is versatile for tightening or loosening fittings, the pipe wrench is essential for gripping and turning pipes, and the plunger will help you deal with basic clogs. These three tools should handle most basic repairs and maintenance jobs.

Michelle Martin

I’m on a tight budget and just starting out with DIY plumbing. Out of the core tools listed, which ones should I prioritize first to handle the most common issues, and which can I potentially wait to buy later?

    Mario The Plumber

    To get started with DIY plumbing on a budget, prioritize buying a pipe wrench, adjustable wrench, plunger, and a basic pipe cutter—these will help you tackle the most common plumbing issues like leaks and clogs. Tools like a basin wrench or plumber’s snake are useful but can usually wait until you encounter more specific problems.

Aaron Smith

I’m trying to build a basic plumbing toolkit on a budget. Which tools from your list would you say are absolutely necessary to start with, and which ones could I add later as I take on more complex DIY plumbing projects?

    Mario The Plumber

    To start a basic plumbing toolkit on a budget, focus on essentials like an adjustable wrench, a pipe wrench, a plunger, a pipe cutter, and a pair of channel-lock pliers. These will handle most common repairs and maintenance. As you move to more advanced projects, you can add tools like a basin wrench, a hacksaw, a pipe threader, and a plumber’s torch. Starting with the basics lets you tackle simple fixes without overspending.

Nathan Sanchez

Could you explain how to tell when plumber’s tape (Teflon tape) is necessary versus when you can skip it? I sometimes wonder if I’m overusing it or not using enough on threaded fittings.

    Mario The Plumber

    Plumber’s tape (Teflon tape) is essential whenever you’re connecting threaded metal or plastic pipes that carry water, air, or gas, as it helps seal the threads and prevents leaks. You can usually skip it if you’re working with compression fittings or fittings that have a rubber washer or gasket, since those already provide a seal. For threaded fittings, wrap the tape 2–3 times around the threads, keeping it snug but not bulky.

Robert Jones

For someone completely new to DIY plumbing, how much time should I expect to spend learning to use these core tools safely before attempting basic repairs like fixing a leaky faucet?

    Mario The Plumber

    For someone new to DIY plumbing, you should plan to spend at least a couple of hours learning how to use core tools safely before tackling basic repairs like fixing a leaky faucet. Take time to read the instructions, watch tutorials, and practice handling tools like adjustable wrenches and pipe wrenches. This initial investment helps you work safely and builds confidence for simple repairs.

Jennifer Sanchez

For someone on a tight budget just starting with DIY plumbing, which three tools from your list should be prioritized first, and are there any affordable but reliable brands you’d recommend?

    Mario The Plumber

    For beginners on a tight budget, the top three plumbing tools to prioritize are an adjustable wrench, a pipe wrench, and a plunger. These cover most basic repairs and emergencies. For affordable yet reliable brands, consider Stanley or Irwin for wrenches, and Korky or simple heavy-duty rubber plungers. These brands generally offer good quality without being expensive.

Sarah Martinez

The excerpt talks about the importance of using Teflon tape on threaded pipes, but I’ve always been unsure exactly how much to wrap and in which direction. Could you explain the best technique for applying plumber’s tape properly?

    Mario The Plumber

    When applying Teflon (plumber’s) tape, start by wrapping the tape on clean, dry threads of the male pipe end. Hold the tape tight and wrap it clockwise—the same direction the fitting will turn when assembling—so it doesn’t unravel. Typically, 2 to 3 full wraps are enough to create a proper seal. Smooth the tape down to ensure it sits flat and doesn’t bunch up before connecting the parts.

Kevin Harris

For a beginner like me, how do I know when to use an adjustable wrench versus a pipe wrench? Are there any situations where using the wrong one could actually damage the fixtures or pipes?

    Mario The Plumber

    An adjustable wrench is best for hex-shaped nuts and fittings, like those on faucets, because its smooth jaws help avoid scratching or deforming surfaces. Pipe wrenches, with their serrated jaws, are designed for gripping and turning round pipes, especially metal ones. Using a pipe wrench on delicate or finished nuts can leave marks or damage them, while using an adjustable wrench on round pipes may cause slipping. Matching the tool to the job helps prevent damage and makes your work safer.

Barbara Smith

When selecting plumber’s tape, is there a difference between standard Teflon tape and specialized versions for gas or water? If so, how can a beginner tell which type of tape is best for each type of job around the house?

    Mario The Plumber

    Yes, there is a difference. Standard white Teflon tape is typically used for water pipe threads. For gas lines, you should use yellow Teflon tape, which is specifically rated for gas applications. To choose the right tape, check the packaging: white for water, yellow for gas. Avoid using the wrong type, as it can lead to leaks or safety issues.

James Miller

The article talks about using plumber’s tape for threaded pipe repairs. Are there any situations where plumber’s tape isn’t suitable, and another sealant would be better?

    Mario The Plumber

    Plumber’s tape, or Teflon tape, works well for most threaded pipe joints to prevent leaks. However, it’s not ideal for gas lines (where a special gas-rated tape or pipe dope is required), plastic threads that can crack from over-tightening, or compression fittings, which don’t need tape. For damaged threads or high-pressure applications, a pipe joint compound (pipe dope) often provides a better seal.

Jason Rodriguez

I noticed the article highlights both adjustable wrenches and pipe wrenches for plumbing work. If I’m only buying one to start with, which would cover more common repairs around the house, like leaky faucets and loose fittings?

    Mario The Plumber

    If you’re choosing between an adjustable wrench and a pipe wrench for general household plumbing repairs, an adjustable wrench is usually the better starting point. It’s versatile for tasks like tightening or loosening faucet fittings, supply lines, and other standard plumbing nuts. Pipe wrenches are more specialized for gripping and turning pipes, so you can add one later if your projects require it.

Sarah Rodriguez

You talk about the importance of using plumber’s tape for threaded pipes. I’ve seen several types of sealing tapes at the hardware store. Is Teflon tape the best for all plumbing situations, or are there cases where something else is better?

    Mario The Plumber

    Teflon tape, also known as PTFE tape, is great for most threaded water pipe connections because it helps prevent leaks. However, for gas lines, you should use a yellow gas-rated tape specifically designed for that purpose. For sealing large gaps or for pressurized systems, pipe dope (pipe joint compound) can sometimes provide a better seal. Always check the tape’s packaging to ensure it’s rated for your intended use.

Helen Johnson

You mentioned having both 6-inch and 10-inch adjustable wrenches in the toolkit—do I really need both sizes for most home plumbing tasks, or could I get by with just one to keep costs down?

    Mario The Plumber

    Having both 6-inch and 10-inch adjustable wrenches gives you flexibility for different plumbing tasks. The 6-inch wrench is great for tight spaces and smaller fittings, while the 10-inch wrench handles larger nuts and provides more leverage. If you’re only doing occasional, simple repairs, you could start with just a 10-inch wrench, as it’s more versatile. You can always add the smaller one later if you find you need it.

Susan Perez

For someone on a tight budget, which of the core plumbing tools listed would you consider truly essential for handling common household issues like leaks or clogs, and which ones could I skip or borrow at first?

    Mario The Plumber

    For common household plumbing tasks on a budget, start with an adjustable wrench, a pipe wrench, a plunger, and a basic pipe cutter. These cover most leaks and clogs. Tools like specialty pipe benders, basin wrenches, or pipe inspection cameras can be skipped or borrowed until you face a job that truly needs them. Focus on essentials that you’ll use most often.

David Martin

When selecting an 18-inch pipe wrench as suggested, are there specific brands or features I should look for to ensure durability and safe usage, especially for someone new to DIY plumbing?

    Mario The Plumber

    When choosing an 18-inch pipe wrench, look for brands known for quality such as RIDGID or Milwaukee. Key features to consider include a sturdy cast iron or aluminum body, non-slip handle grips, and smooth jaw adjustment. For beginners, a lighter aluminum model can make handling easier, while a well-machined jaw ensures a firm grip on pipes and reduces slipping, helping keep your work safe and efficient.