Plumber Las Vegas News

Your trusted source for plumbing updates, DIY fixes, and industry insights in Las Vegas. Stay informed with practical tips, local trends, and expert advice for homeowners and professionals alike.

Seasonal Plumbing Prep: Your Essential Fall Checklist for Homeowners

Introduction: Why Fall Plumbing Prep Matters

As summer fades and the crisp air of autumn arrives, it’s easy to overlook your home’s plumbing system. Yet, fall is a critical time to make sure your pipes, fixtures, and water systems are ready for colder temperatures ahead. Frozen pipes, blocked drains, and malfunctioning outdoor faucets are just a few of the common headaches homeowners face when they neglect seasonal maintenance. Proactive plumbing care in the fall doesn’t just prevent expensive emergency repairs—it extends the life of your system and ensures your home is comfortable and safe as temperatures drop. In this comprehensive guide, we’ll walk you through a practical, step-by-step fall plumbing checklist. You’ll learn exactly what to inspect, clean, insulate, and test, plus insider tips for spotting small problems before they turn into major disasters. Whether you’re a hands-on DIYer or just want to be informed before hiring a pro, these targeted actions will help you avoid winter plumbing woes and keep your home running smoothly all season long.

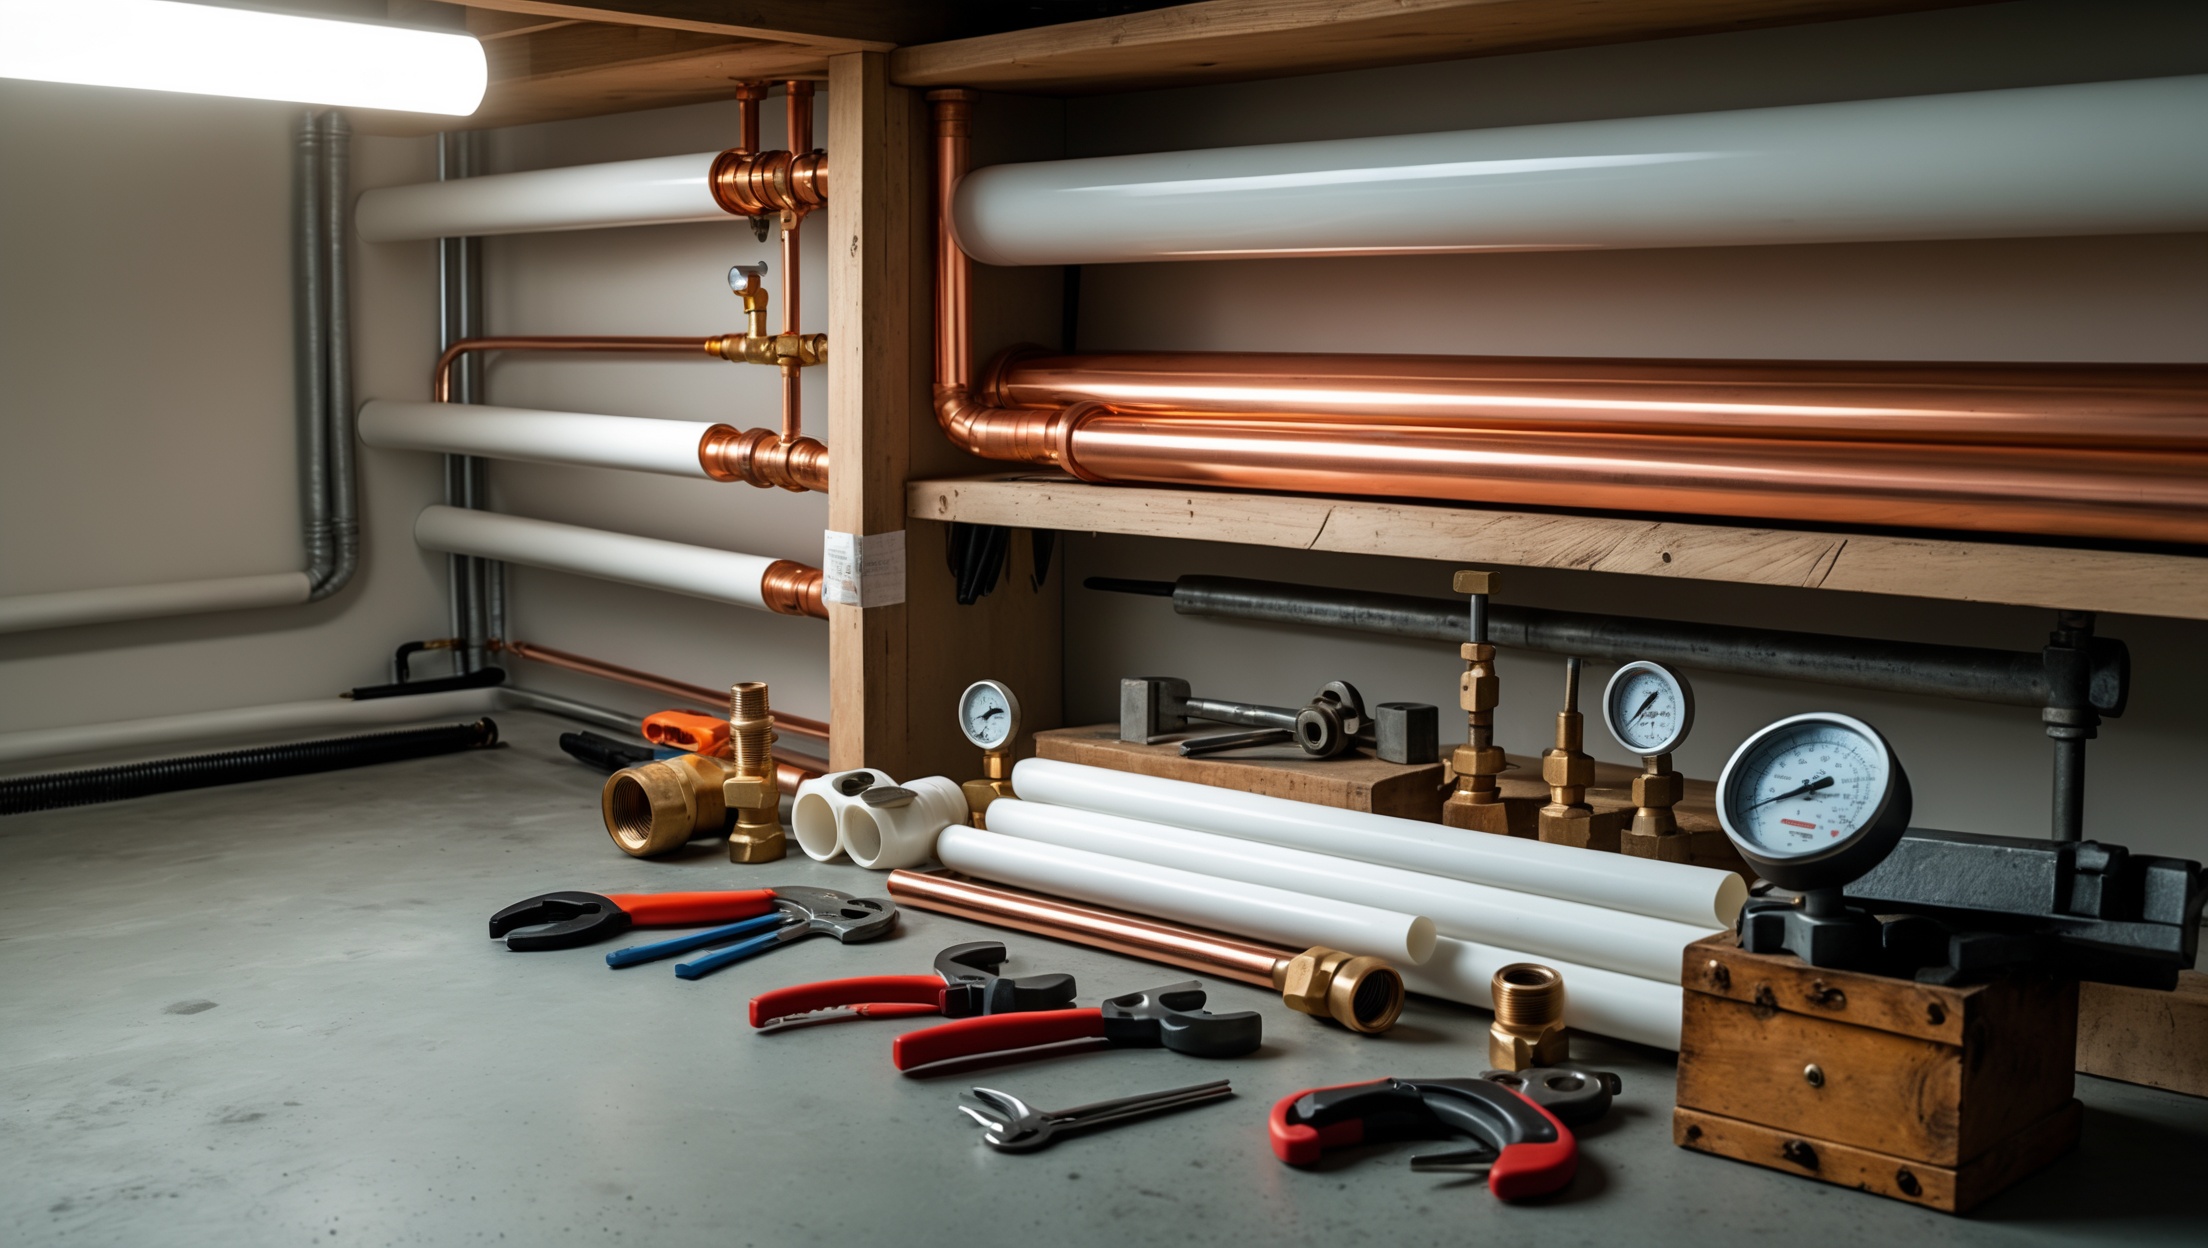
Insulate Exposed Pipes Before the First Freeze

Why Fall Pipe Insulation Is Critical

When water inside an uninsulated pipe freezes, it expands and creates intense pressure. This can crack or burst pipes, leading to expensive water damage and urgent repairs. Insulating pipes is a simple, cost-effective way to prevent this common cold-weather disaster—especially in vulnerable areas like basements, garages, crawl spaces, and unheated exterior walls.

How to Identify At-Risk Pipes

  • Check all visible pipes in unheated spaces: basements, attics, crawl spaces, garages, and exterior walls.
  • Pay close attention to pipes running along exterior walls, behind kitchen/bath cabinets, and near drafty windows.
  • Look for condensation, signs of previous freezing, or old, crumbling insulation.

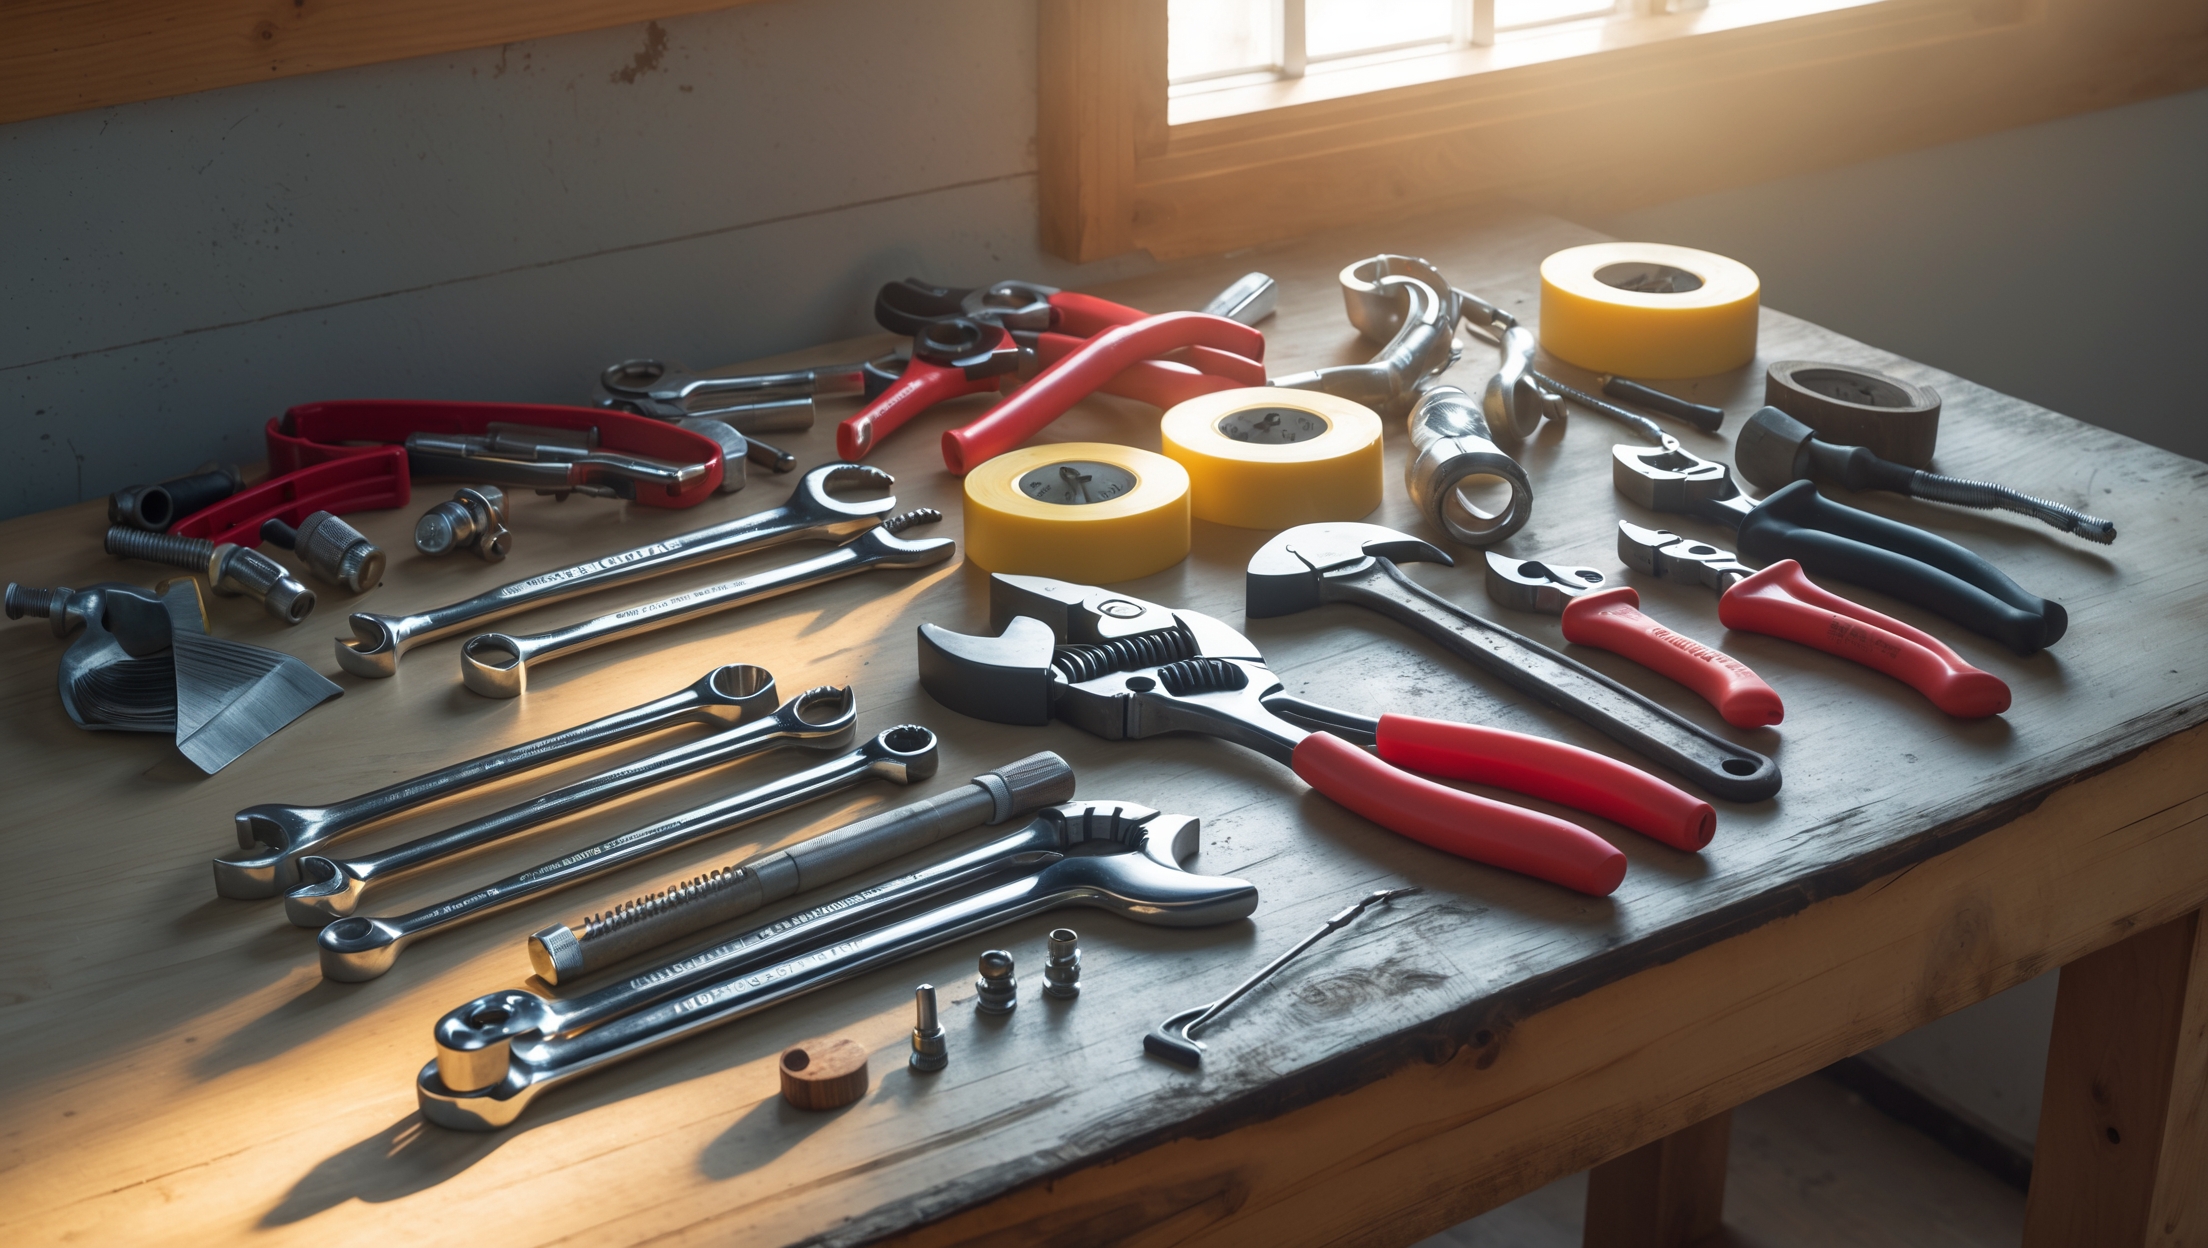
Step-by-Step Pipe Insulation

  • Measure the length and diameter of exposed pipes.
  • Purchase foam pipe insulation sleeves or fiberglass wrap designed for your pipe size.
  • Cut insulation to length with a utility knife.
  • Fit the insulation snugly around the pipe, sealing seams with weatherproof tape.
  • Secure at joints and elbows with extra tape or zip ties.
  • For outdoor faucets, use insulated covers after disconnecting hoses (more on this below).

Pro tip: Don’t forget to insulate hot water pipes, too. This not only protects them from freezing but also saves energy.

Disconnect Hoses and Prep Outdoor Faucets

The Problem with Forgotten Hoses

Leaving hoses attached traps water in the faucet and hose bibb, which can freeze and cause cracks or leaks inside your home’s wall. Each fall, disconnect, drain, and store all garden hoses.

Winterizing Outdoor Faucets (Sillcocks)

  • Turn off the water supply to exterior faucets from the indoor shutoff valve (usually in the basement or utility room).
  • Open the outdoor faucet to drain remaining water.
  • Install an insulated faucet cover to keep cold air out.
  • Inspect for leaks—replace worn washers or repair minor drips before freezing weather arrives.

If you have frost-free sillcocks, maintenance is still important: confirm they’re draining fully and replace damaged vacuum breakers or washers.

Clear Gutters and Downspouts to Prevent Water Damage

Why Gutter Maintenance Impacts Plumbing

Clogged gutters and downspouts allow water to overflow and pool near your foundation, increasing the risk of basement leaks or sump pump overload. Keeping them clear protects your home’s drainage system—and your plumbing.

How to Clean Gutters Safely

  • Use a sturdy ladder and wear gloves.
  • Scoop out leaves, twigs, and debris by hand or with a specialized gutter scoop.
  • Flush gutters and downspouts with a hose to check for proper flow.
  • Install gutter guards if you have heavy leaf fall for easier maintenance.
  • Check that downspouts direct water at least 3–4 feet away from the house.

Address any gutter leaks or sagging sections before winter snow and ice make repairs more difficult.

Test and Maintain Your Sump Pump

Why Sump Pumps Fail in Fall and Winter

Heavy autumn rains and rapid snowmelt can overwhelm a neglected sump pump. If your pump isn’t working, your basement is at risk for flooding and water damage.

How to Test Your Sump Pump

  • Locate your sump pit and remove the cover.
  • Slowly pour a bucket of water into the pit until the float rises and triggers the pump.
  • Watch for quick, smooth operation and confirm water is discharged outside your foundation.
  • If the pump doesn’t start, runs slowly, or makes strange noises, schedule a professional inspection or replacement.

Additional Sump Pump Upkeep

  • Clean any debris from the pit and pump inlet screen.
  • Check the backup power source (battery or generator) if you have one.
  • Inspect the discharge line for clogs or freezing risk—install a freeze protection device if needed.

Inspect and Service Your Water Heater

Why Water Heaters Need Fall Attention

Colder temperatures mean your water heater works harder, and sediment can accumulate faster. An annual checkup ensures efficient performance, saves energy, and reduces the risk of leaks or breakdowns during peak use.

Key Water Heater Maintenance Steps

  • Lower the thermostat to 120°F (49°C) to prevent scalding and save energy.
  • Drain 1–2 gallons of water from the tank to flush out sediment (consult your manual for instructions).
  • Inspect for rust, leaks, or corrosion around the base and fittings.
  • Test the temperature and pressure relief (TPR) valve by lifting the lever—replace if it doesn’t release water or resets slowly.
  • For tankless heaters, clean the inlet screen and check for error codes.

Consider scheduling a professional tune-up every couple of years to maximize efficiency and lifespan.

Check Indoor Fixtures and Drains for Early Warning Signs

Spotting Small Issues Before Winter

Minor leaks, slow drains, or dripping faucets often get worse as temperatures drop. Fall is the perfect time to catch and fix these issues, saving money and hassle later.

What to Inspect

  • Look for puddles or water stains under sinks, around toilets, and near the water heater.
  • Check for slow-draining sinks, tubs, or showers—clear minor clogs with a drain snake or safe enzyme cleaner.
  • Test toilet flushes for leaks by adding food coloring to the tank. If color appears in the bowl without flushing, replace the flapper.
  • Listen for running or hissing noises from pipes, which can indicate hidden leaks or pressure issues.
  • Check caulking and grout around tubs and showers to prevent water seepage.

Seal Foundation and Basement Gaps

Why This Matters for Plumbing

Cracks or gaps in your home’s foundation and basement walls allow cold air in, which can freeze nearby pipes and increase heating costs. Sealing these areas also helps keep out pests and moisture.

How to Seal Effectively

  • Walk around your home’s exterior and interior basement walls, noting any cracks or gaps near pipe penetrations.
  • Seal small cracks with silicone or polyurethane caulk.
  • Use expanding spray foam for larger openings around pipes or vents.
  • Check and repair weatherstripping on basement doors and windows.

Service Your Main Water Shutoff Valve and Emergency Access

Why Fall Is the Best Time

If a pipe bursts or a major leak occurs, you need to quickly shut off your home’s main water supply. Many homeowners discover too late that their main valve is stuck or hard to access.

Checklist for Main Shutoff Valve

  • Locate your main shutoff valve (usually near where the water line enters your home).
  • Turn the valve off and back on to ensure smooth operation—if it’s stuck, apply penetrating oil or call a plumber for replacement.
  • Clear away boxes, debris, or storage that could block fast access during an emergency.
  • Label the valve clearly and make sure all family members know its location and how to use it.

Inspect Lawn Irrigation and Sprinkler Systems

Avoiding Frozen Damage to Outdoor Plumbing

Automatic sprinkler and irrigation lines are especially vulnerable. Leaving them filled with water over winter can lead to cracked pipes, broken valves, and costly repairs in spring.

How to Winterize Your System

  • Shut off the water supply to the irrigation system.
  • Use manual or automatic drain valves to remove water from pipes, or hire a professional to blow out lines with compressed air.
  • Insulate above-ground backflow preventers and valves with foam covers.
  • Store removable sprinkler heads indoors if possible.

Check your system’s manual for specific winterization instructions, or schedule professional service for peace of mind.

Bonus: Fall Plumbing Prep Quick Reference Checklist

  • Insulate exposed pipes in unheated areas
  • Disconnect and store all garden hoses
  • Shut off and drain outdoor faucets; install covers
  • Clear gutters and downspouts
  • Test and clean sump pump and pit
  • Flush and inspect water heater
  • Check all indoor fixtures for leaks and slow drains
  • Seal foundation and basement gaps
  • Service main water shutoff valve
  • Winterize lawn irrigation system

Conclusion: Stay Ahead of Plumbing Problems This Fall

Taking a weekend or two each fall to properly prepare your plumbing system is one of the smartest investments you can make in your home’s comfort and safety. The checklist above isn’t just a series of chores—it’s a proven strategy to prevent frozen pipes, water damage, emergency repairs, and unnecessary stress during the coldest months of the year. By identifying at-risk pipes, disconnecting hoses, cleaning gutters, testing sump pumps, and winterizing outdoor systems, you’ll catch small issues before they spiral into costly disasters. You’ll also protect your home’s foundation, save on energy bills, and ensure your plumbing fixtures and appliances last longer and operate more efficiently. If you’re unsure about any step or spot worrisome signs—such as persistent leaks, corroded pipes, or a failing sump pump—don’t hesitate to call a licensed plumber for expert help. Prevention is always more affordable than a mid-winter emergency call. With these targeted fall plumbing tips, you’ll enjoy peace of mind and a trouble-free season, knowing your home is ready for whatever the weather brings. Stay proactive, stay warm, and keep your plumbing in top shape all autumn and beyond.

50 comments
Robert Thomas

If I missed insulating some exterior wall pipes before the first big freeze, is there any way to prevent them from bursting at the last minute, or is it already too late?

    Mario The Plumber

    If you’ve missed insulating some exterior wall pipes, there are still ways to help prevent them from bursting. Open cabinets under sinks to allow warm air to circulate around the pipes, and let faucets drip slightly to keep water moving. You can also use space heaters in problem areas, but be sure to watch them closely for safety. Insulate the pipes as soon as temperatures allow.

John Rodriguez

If I’ve already noticed condensation on some pipes in my unheated basement, is that a sign of a more serious issue, or just a normal cue to add insulation as explained in your checklist?

    Mario The Plumber

    Noticing condensation on pipes in an unheated basement is fairly common, especially as temperatures change. It usually means warm, moist air is contacting the cooler pipe surface. While it’s not necessarily a sign of a serious problem, it’s a good cue to insulate those pipes, as suggested in the checklist. This helps prevent moisture buildup, which can lead to mold or, in colder months, frozen pipes.

Michael Anderson

I noticed you mentioned insulating pipes in crawl spaces and attics before the first freeze. How can I tell if the insulation I installed last year is still effective, or if it needs to be replaced for this fall?

    Mario The Plumber

    To check if your pipe insulation is still effective, inspect it for any signs of moisture, mold, cracking, or gaps. If the insulation feels brittle, is wet, or has come loose, it should be replaced. Also, check that it still fits snugly around the pipes and covers all exposed areas. Replacing damaged sections helps ensure your pipes are protected this fall.

Robert Lopez

After insulating exposed pipes, is there a recommended way to test if I did it correctly or if I missed any problem spots, especially in a big house with a finished basement?

    Mario The Plumber

    To check your insulation work, first run warm water through the pipes for a few minutes, then carefully feel along the insulation for cold spots. If you find any, those areas might be missed or not fully covered. In a large house, check corners, crawl spaces, and behind obstacles in the finished basement, since these spots are easy to overlook. Consider using an infrared thermometer to detect temperature differences for a more thorough check.

Robert Perez

How early in the fall should I start this checklist to make sure my plumbing is protected before the temperatures really drop? Is there a recommended timeframe for getting everything done?

    Mario The Plumber

    It’s best to start your fall plumbing checklist as soon as temperatures begin to cool, usually in late September or early October. This gives you plenty of time to address any issues before the first frost hits. Aim to have all maintenance tasks completed at least a few weeks before any expected freezing weather to ensure your plumbing is fully protected.

Emily Clark

I live in an area with mild winters but occasional cold snaps. Is it still worth going through the whole checklist in your article, or can I focus just on the most critical steps like pipe insulation?

    Mario The Plumber

    If your winters are usually mild with only occasional cold spells, you can prioritize the more critical steps, such as insulating exposed pipes, disconnecting hoses, and checking outdoor faucets for leaks. These measures address the main risks from sudden freezes. However, it’s still a good idea to review the full checklist to see if any other quick tasks are relevant for your home’s specific needs.

Julie Lopez

What should I do if I notice signs that a pipe has already frozen at some point, like those mentioned in the article, but it hasn’t burst yet? Is this something I can handle on my own or does it always require a plumber?

    Mario The Plumber

    If you suspect a pipe has frozen but hasn’t burst, you can try gently thawing it yourself using a hair dryer or towels soaked in hot water—never use open flames. Open the affected faucet so water can flow as the ice melts. However, if you’re unsure of the pipe’s condition or can’t locate the frozen area, it’s safer to call a plumber to prevent any possible damage.

Linda Garcia

About outdoor faucets mentioned in the article—after shutting them off for the season, is there anything else I should do to prevent freezing, like draining the lines or adding any kind of cover?

    Mario The Plumber

    Yes, after shutting off your outdoor faucets for the season, you should also drain any remaining water from the lines by opening the faucet until it runs dry. This helps prevent water from freezing and causing pipes to burst. Adding an insulated cover over the faucet provides extra protection against cold temperatures. Both steps are simple and very effective for winterizing your outdoor plumbing.

Helen Miller

If I already have some pipe insulation from last winter, how can I tell if it’s still effective, or if it needs to be replaced before the temperatures drop again?

    Mario The Plumber

    To check if your pipe insulation is still effective, look for signs of wear such as cracks, brittleness, moisture damage, or areas where it has come loose. Squeeze the insulation—if it feels soft and springy, it’s likely still good. Replace any sections that are damaged, compressed, or no longer fit snugly around the pipes to ensure proper protection before it gets cold.

Brian Lopez

You mention insulating pipes in areas like basements, garages, and crawl spaces before the first freeze. Is there a preferred material between foam sleeves and fiberglass wrap for extreme cold, or does it depend on the specific location in the house?

    Mario The Plumber

    The choice between foam sleeves and fiberglass wrap does depend on the location and level of cold exposure. Foam sleeves are easy to install and work well for most indoor spaces. However, for areas subject to extreme cold—like unheated garages or crawl spaces—fiberglass wrap, especially with a vapor barrier, offers better insulation. For maximum protection, you can even combine both materials in especially vulnerable spots.

James Wilson

You suggest using foam pipe sleeves or fiberglass wrap for insulation. Is one better for really cold climates, or does it mostly come down to personal preference and cost?

    Mario The Plumber

    For really cold climates, fiberglass wrap generally provides better insulation than foam pipe sleeves, as it’s more effective at retaining heat and can handle wider temperature ranges. However, foam sleeves are easier to install and work well in moderately cold areas. If you expect extremely low temperatures, fiberglass wrap is a safer choice, but for most homes, either option can work depending on your budget and comfort with installation.

Daniel Jackson

Are certain types of pipe insulation better for outdoor pipes versus those in my garage or crawl space, or is foam insulation usually sufficient for all exposed pipes?

    Mario The Plumber

    Foam insulation is generally suitable for most exposed pipes, including those in garages and crawl spaces. However, for outdoor pipes, it’s better to use insulation with a weather-resistant covering or specifically designed exterior pipe wraps. These provide extra protection against moisture and extreme cold, which foam alone might not handle as well outside. Indoors or in sheltered areas, standard foam insulation should be sufficient.

Kevin Lewis

You brought up checking pipes behind kitchen cabinets and near drafty windows. Any tips for how to insulate pipes in those tight spots where I can’t reach very well?

    Mario The Plumber

    For hard-to-reach pipes behind cabinets or near drafty windows, try using pipe insulation sleeves that can be slid over the exposed sections you can reach. For tighter spaces, self-sealing foam tape or insulating wrap can be wrapped around pipes by hand. A flexible reach tool or a long stick can help apply the insulation further back if needed. Even covering as much as possible makes a big difference.

Anthony Brown

If I find condensation on pipes in my basement while checking in the fall, does that always mean I need to insulate, or could it be a sign of another issue I need to address before adding insulation?

    Mario The Plumber

    Condensation on basement pipes is usually due to humid air contacting cold pipe surfaces, which insulation can help with. However, it’s also important to check for other issues like excess basement humidity, poor ventilation, or water leaks. Address any moisture sources or leaks first before insulating, to ensure you’re not just covering up a bigger underlying problem.

John Perez

For small business owners with limited time, which part of the fall plumbing checklist would be the most urgent to prioritize if we can’t get to everything before the first freeze?

    Mario The Plumber

    If time is limited, the most urgent task is to protect your pipes from freezing, especially any exposed outdoor or uninsulated indoor pipes. Draining and shutting off exterior faucets, and adding insulation to vulnerable pipes, can prevent costly burst pipes. Quick checks for leaks or drips are also important to avoid bigger issues during cold snaps.

Richard Garcia

In the checklist, you suggest checking for condensation and signs of previous freezing on pipes. If I find pipes with a little rust or some water stains, should I replace them immediately or just add insulation?

    Mario The Plumber

    If you notice rust or water stains on your pipes, it’s a good idea to inspect them closely. Light surface rust or minor stains often indicate past condensation and can usually be managed by cleaning the area and adding proper insulation. However, if the rust is deep, flaky, or the pipe feels weak, replacement is safer. When in doubt, consult a plumber to assess the condition before deciding.

Joseph Ramirez

I’m curious about how to tell if existing pipe insulation is still in good shape. Are there signs I should look for to know when it’s time to replace the old insulation, beyond just crumbling?

    Mario The Plumber

    Aside from crumbling, check if the pipe insulation feels hard, brittle, or has any moisture, mold, or mildew. Look for gaps, tears, or areas where insulation has pulled away from the pipe. Discoloration or a musty odor are also signs it may need replacing. Proper insulation should fit snugly and be dry, flexible, and intact.

Patricia White

For homeowners on a tight budget, what are the most critical plumbing prep tasks to prioritize in the fall, and which ones could reasonably wait until winter if needed?

    Mario The Plumber

    For homeowners on a tight budget, focus first on draining and insulating outdoor faucets and hoses, checking for leaks on visible pipes, and clearing gutters to prevent water backup. These steps help avoid major freeze-related damage. Tasks like flushing the water heater or updating old fixtures can usually wait until winter if needed, as they are less urgent for immediate fall prep.

Christopher Miller

If I already have older insulation on basement pipes but it looks worn, is it better to remove and replace it, or can I just add a new layer on top for fall prep?

    Mario The Plumber

    If your existing pipe insulation looks worn or damaged, it’s best to remove it before adding new insulation. Old insulation may trap moisture or hide corrosion, which could lead to bigger problems. Replacing it ensures you catch any underlying issues and that the new insulation fits snugly for maximum protection during the colder months.

Robert Sanchez

Could you clarify whether pipe insulation is a DIY-friendly project or if there are situations where it’s better to call a plumber? If so, what are the red flags that the job is too big for a homeowner?

    Mario The Plumber

    Pipe insulation is typically a DIY-friendly project, especially for accessible pipes in basements, crawl spaces, or attics. You just need the right materials and a bit of patience. However, if pipes are hard to reach, show signs of past leaks, or you notice corrosion, it’s best to call a plumber. Red flags include pipes hidden behind walls, complex plumbing layouts, or dealing with lead or galvanized pipes.

David Jones

The article mentions spotting signs like condensation and old insulation—what should I do if I notice a small amount of condensation but no other damage on my pipes?

    Mario The Plumber

    If you notice just a small amount of condensation on your pipes and there’s no visible damage, try wiping the pipes dry and monitor them for any recurring moisture. Improving ventilation in that area or insulating the pipes can help prevent condensation from returning. If the issue persists or you notice mold or water pooling, consider consulting a plumber for further assessment.

Michelle Sanchez

When insulating exposed pipes, how do you decide between foam sleeves and fiberglass wrap? Are there advantages to using one material over the other depending on location or climate?

    Mario The Plumber

    Foam sleeves are generally easier to install and work well for most indoor pipes, especially in milder climates. They provide good insulation and moisture resistance. Fiberglass wrap is better for pipes exposed to very cold temperatures or those in unheated areas, like basements or garages. Fiberglass handles extreme cold and heat better, but needs to be covered with a vapor barrier to prevent moisture buildup. So, choose foam for convenience and moderate conditions, fiberglass for harsher environments.

James Anderson

The checklist talks about using foam sleeves or fiberglass wrap for insulating pipes. Is one option better than the other for someone on a tighter budget, or are there certain situations where one type works better than the other?

    Mario The Plumber

    Foam sleeves are generally more budget-friendly and easier to install, making them a good choice if you’re watching costs. They’re ideal for most indoor pipes. Fiberglass wrap offers better insulation for extremely cold areas or outdoor pipes but can be more expensive and trickier to handle. For most homeowners, foam sleeves are sufficient unless your pipes are in very exposed or unheated spaces.

Michelle Robinson

I noticed you recommend insulating pipes in attics and crawl spaces. Is there a specific type of insulation that works better for those really hard-to-reach spots, or does the standard foam sleeve work just as well?

    Mario The Plumber

    For hard-to-reach areas like attics and crawl spaces, pre-slit foam pipe sleeves are often easiest to install and work well for most situations. However, for very tight spaces or awkward bends, you might find that using fiberglass pipe wrap or self-sealing foam tape is more flexible and easier to fit snugly. Be sure to cover all exposed pipe areas and seal any gaps to maximize protection.

Daniel Moore

Are there significant cost differences between foam pipe insulation sleeves and fiberglass wraps, and is one type more effective for garage pipes specifically?

    Mario The Plumber

    Foam pipe insulation sleeves are usually less expensive and easier to install compared to fiberglass wraps. For garage pipes, foam sleeves are often more effective because they provide better protection against freezing and are easier to fit around straight runs of pipe. Fiberglass wraps can offer higher heat resistance but may require more effort to install and secure in place. For most garage applications, foam sleeves strike a good balance of cost and effectiveness.